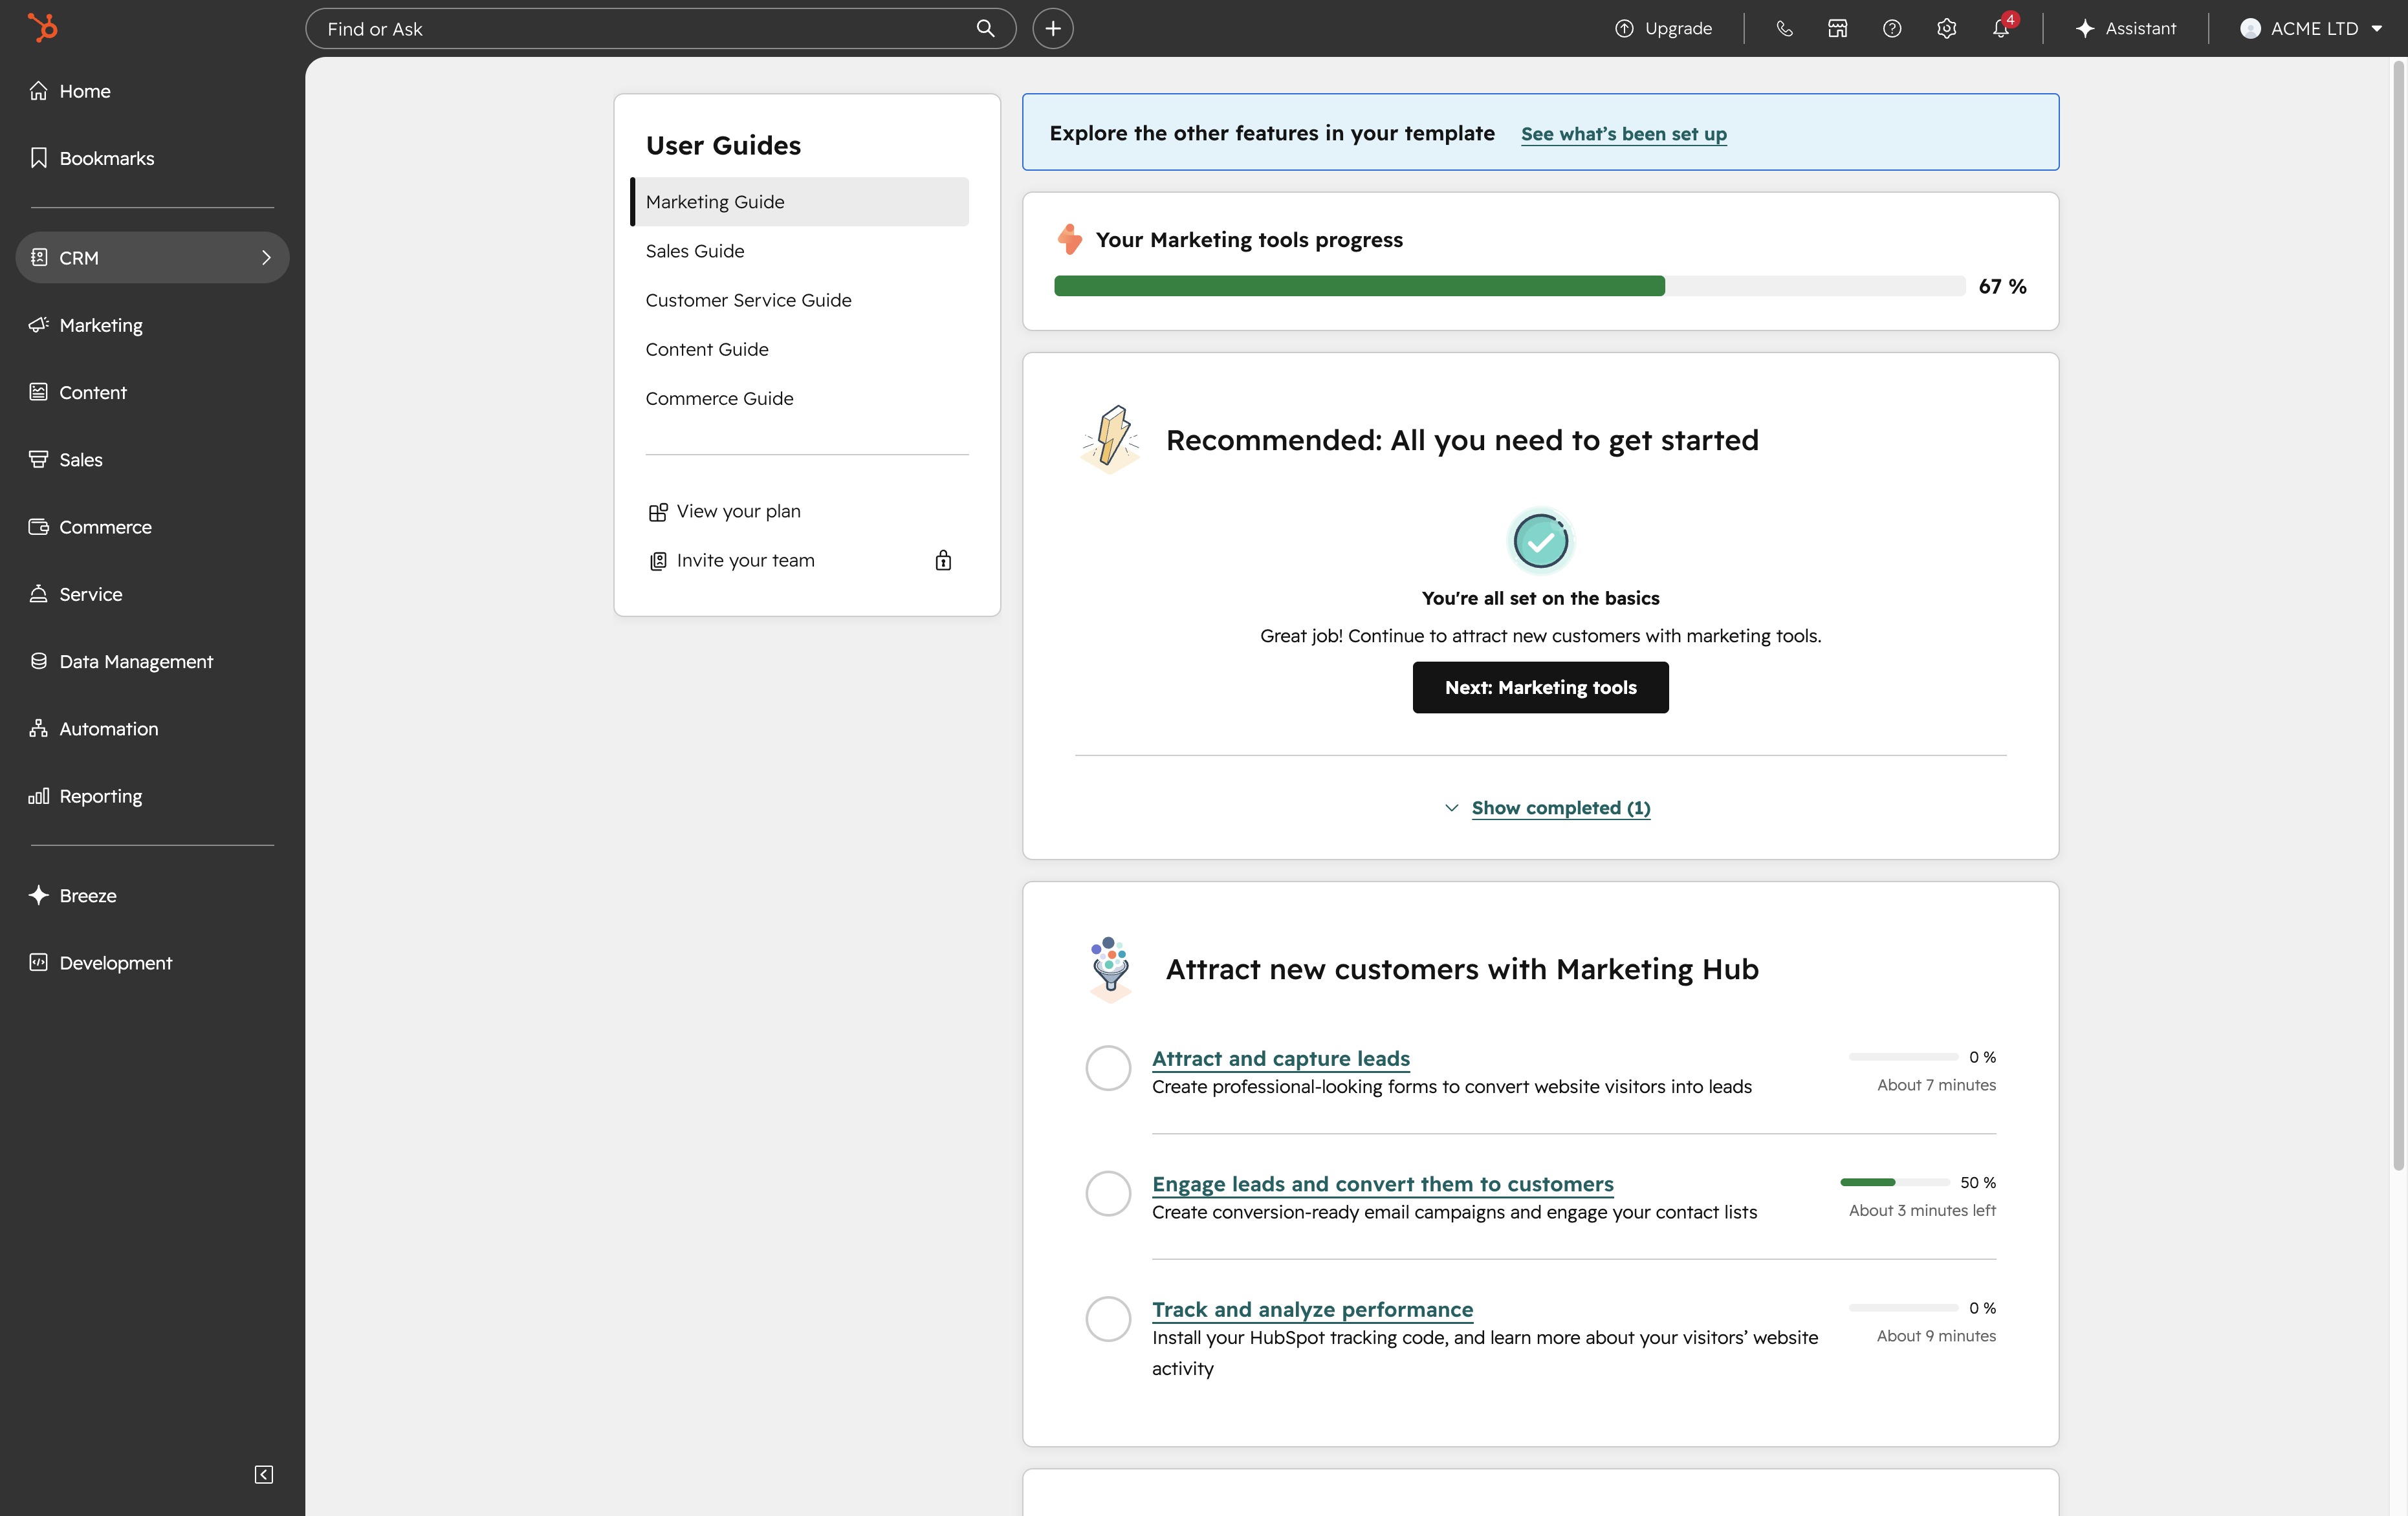
Click the CRM link
Clicking the 'CRM' link will take you to the Customer Relationship Management section where you can manage customer interactions and data.
Loading screenshot…
100%
In this step-by-step video guide, you'll learn how to effectively utilize the CRM features in HubSpot by managing and creating new contacts.
 brian.annan
In this step-by-step video guide, you'll learn how to effectively utilize the CRM features in HubSpot by managing and creating new contacts. Follow along as we demonstrate navigating the interface, entering essential contact information, and understanding the implications of associating contacts with legitimate interests.
Clicking the 'CRM' link will take you to the Customer Relationship Management section where you can manage customer interactions and data.
This will open your contacts list, allowing you to view and manage your contacts effectively.

This action opens a form where you can enter details for a new contact. Fill in the required information to save the contact in your list.
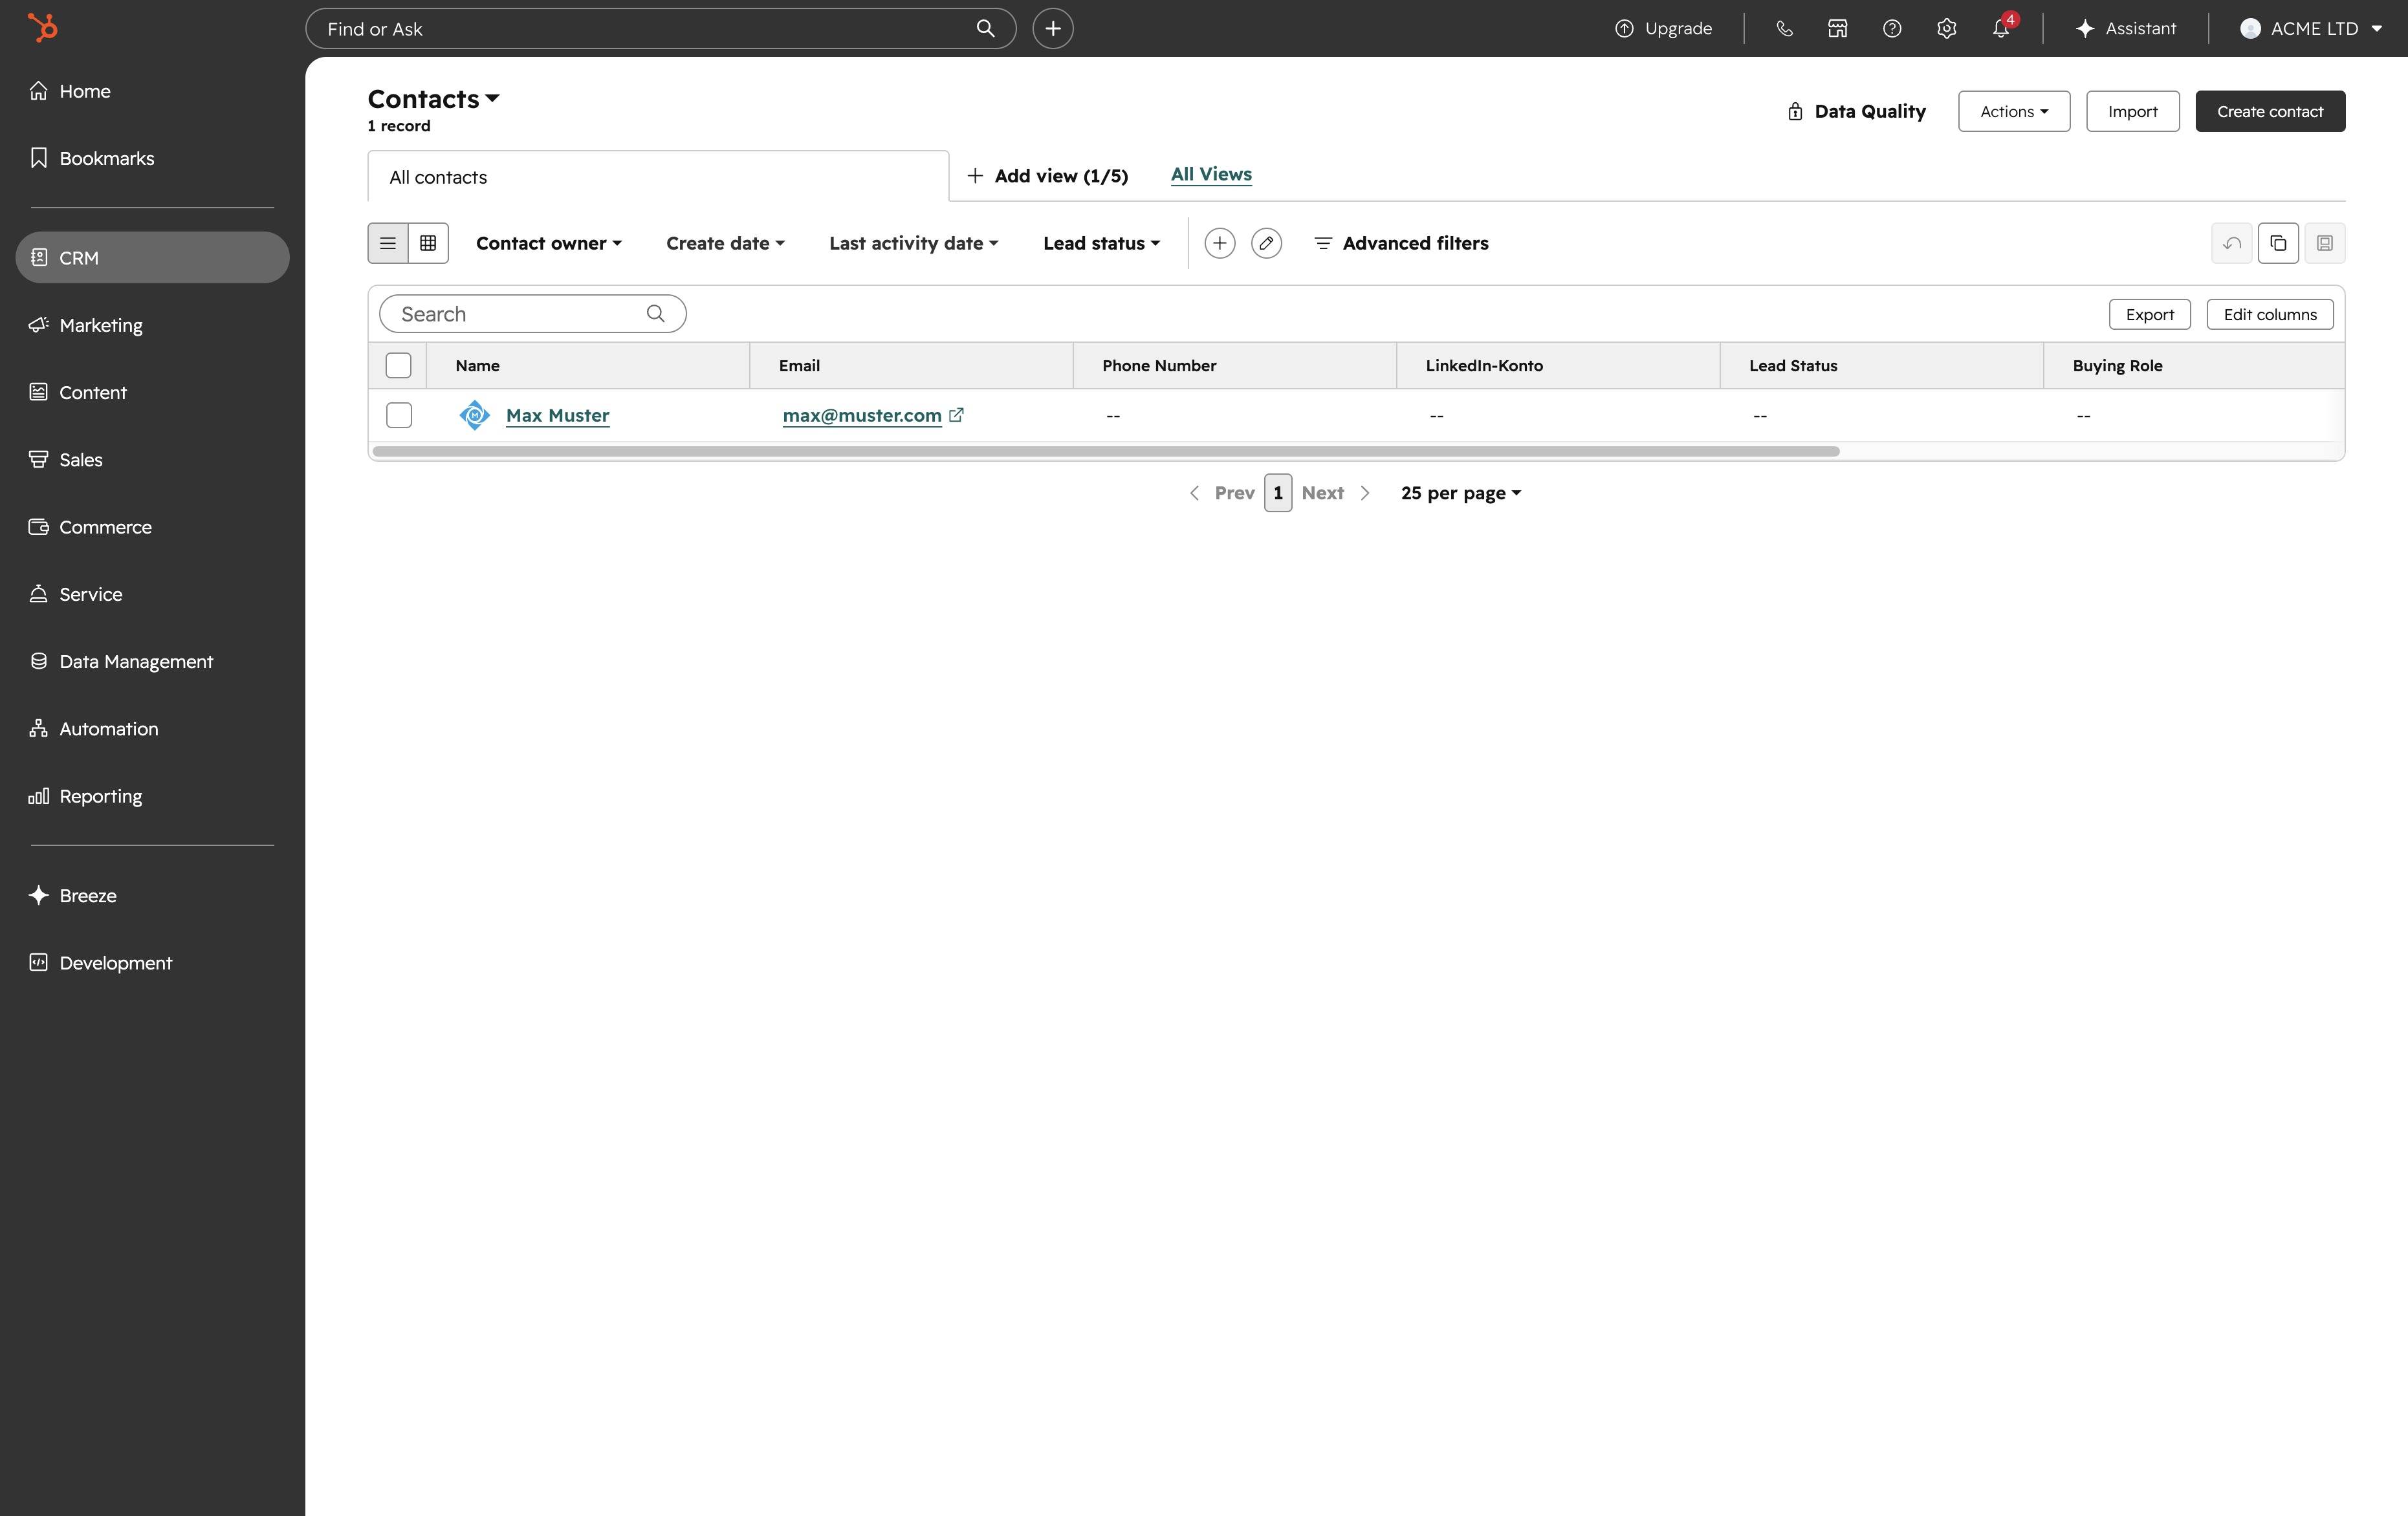
This will initiate the process to create a new contact, allowing you to input essential information such as name and email.
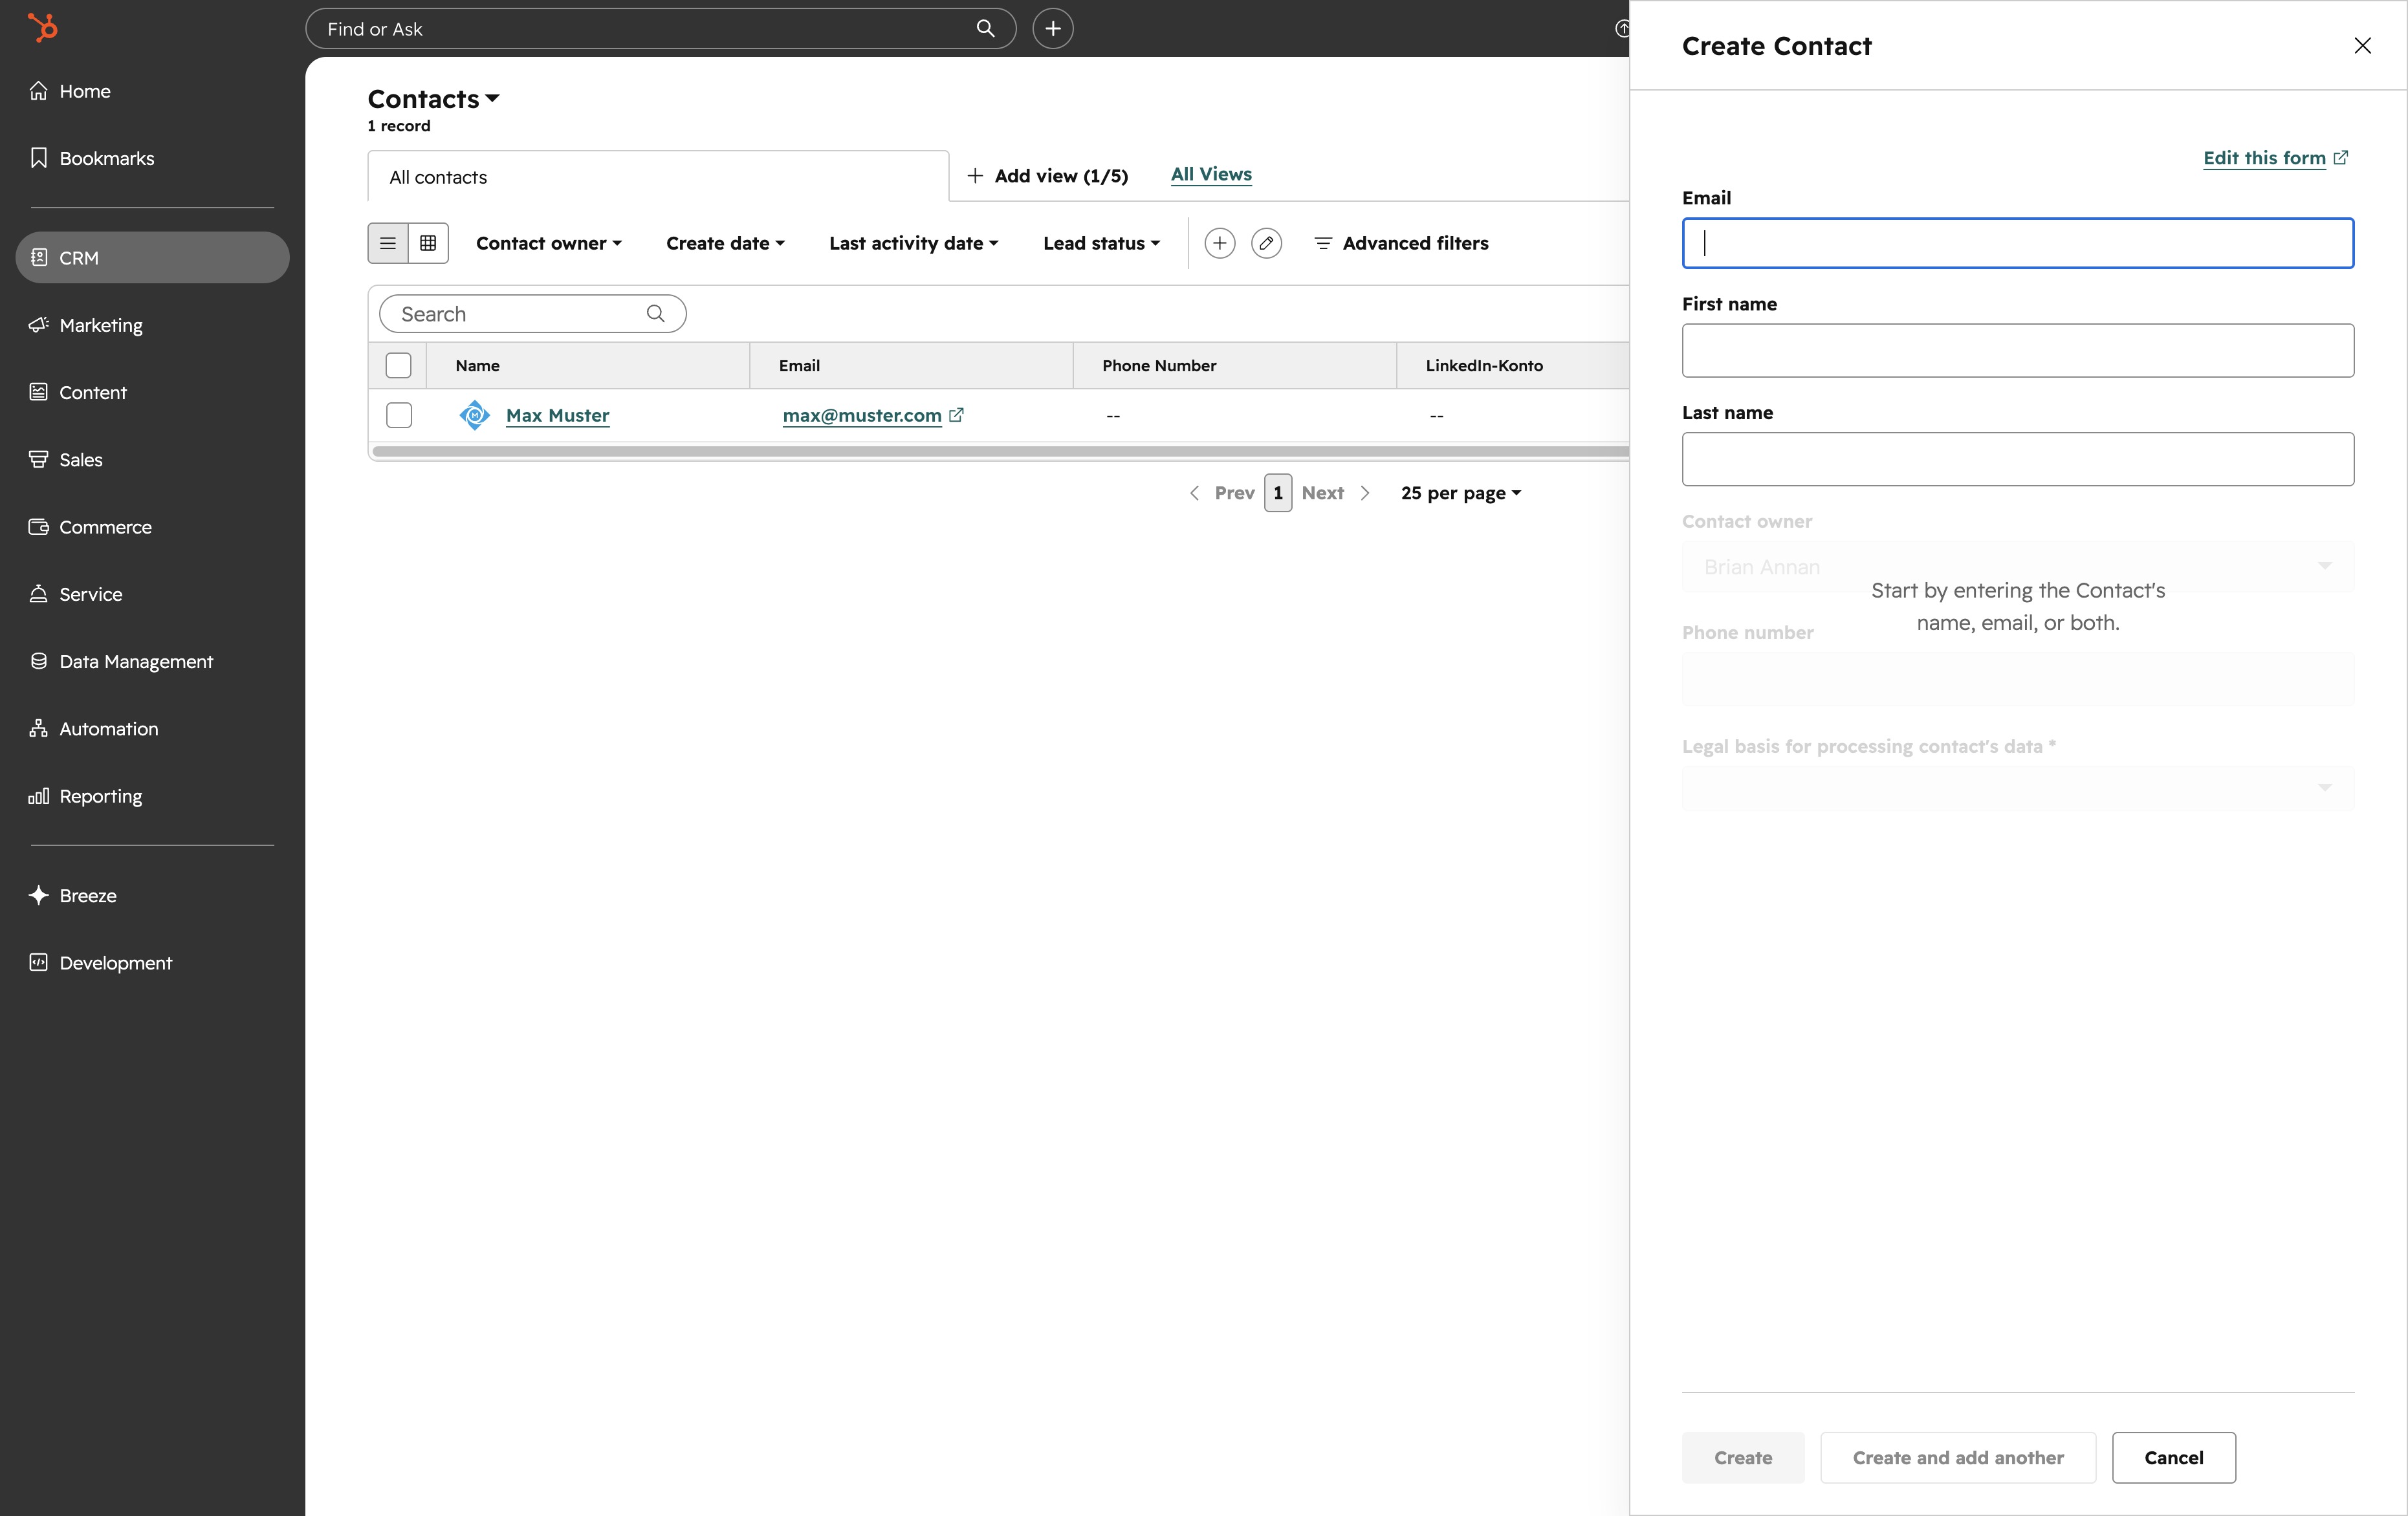
Enter 'max@muster.de' in the Email field to provide your contact's email address. This information will be saved as part of the contact details.
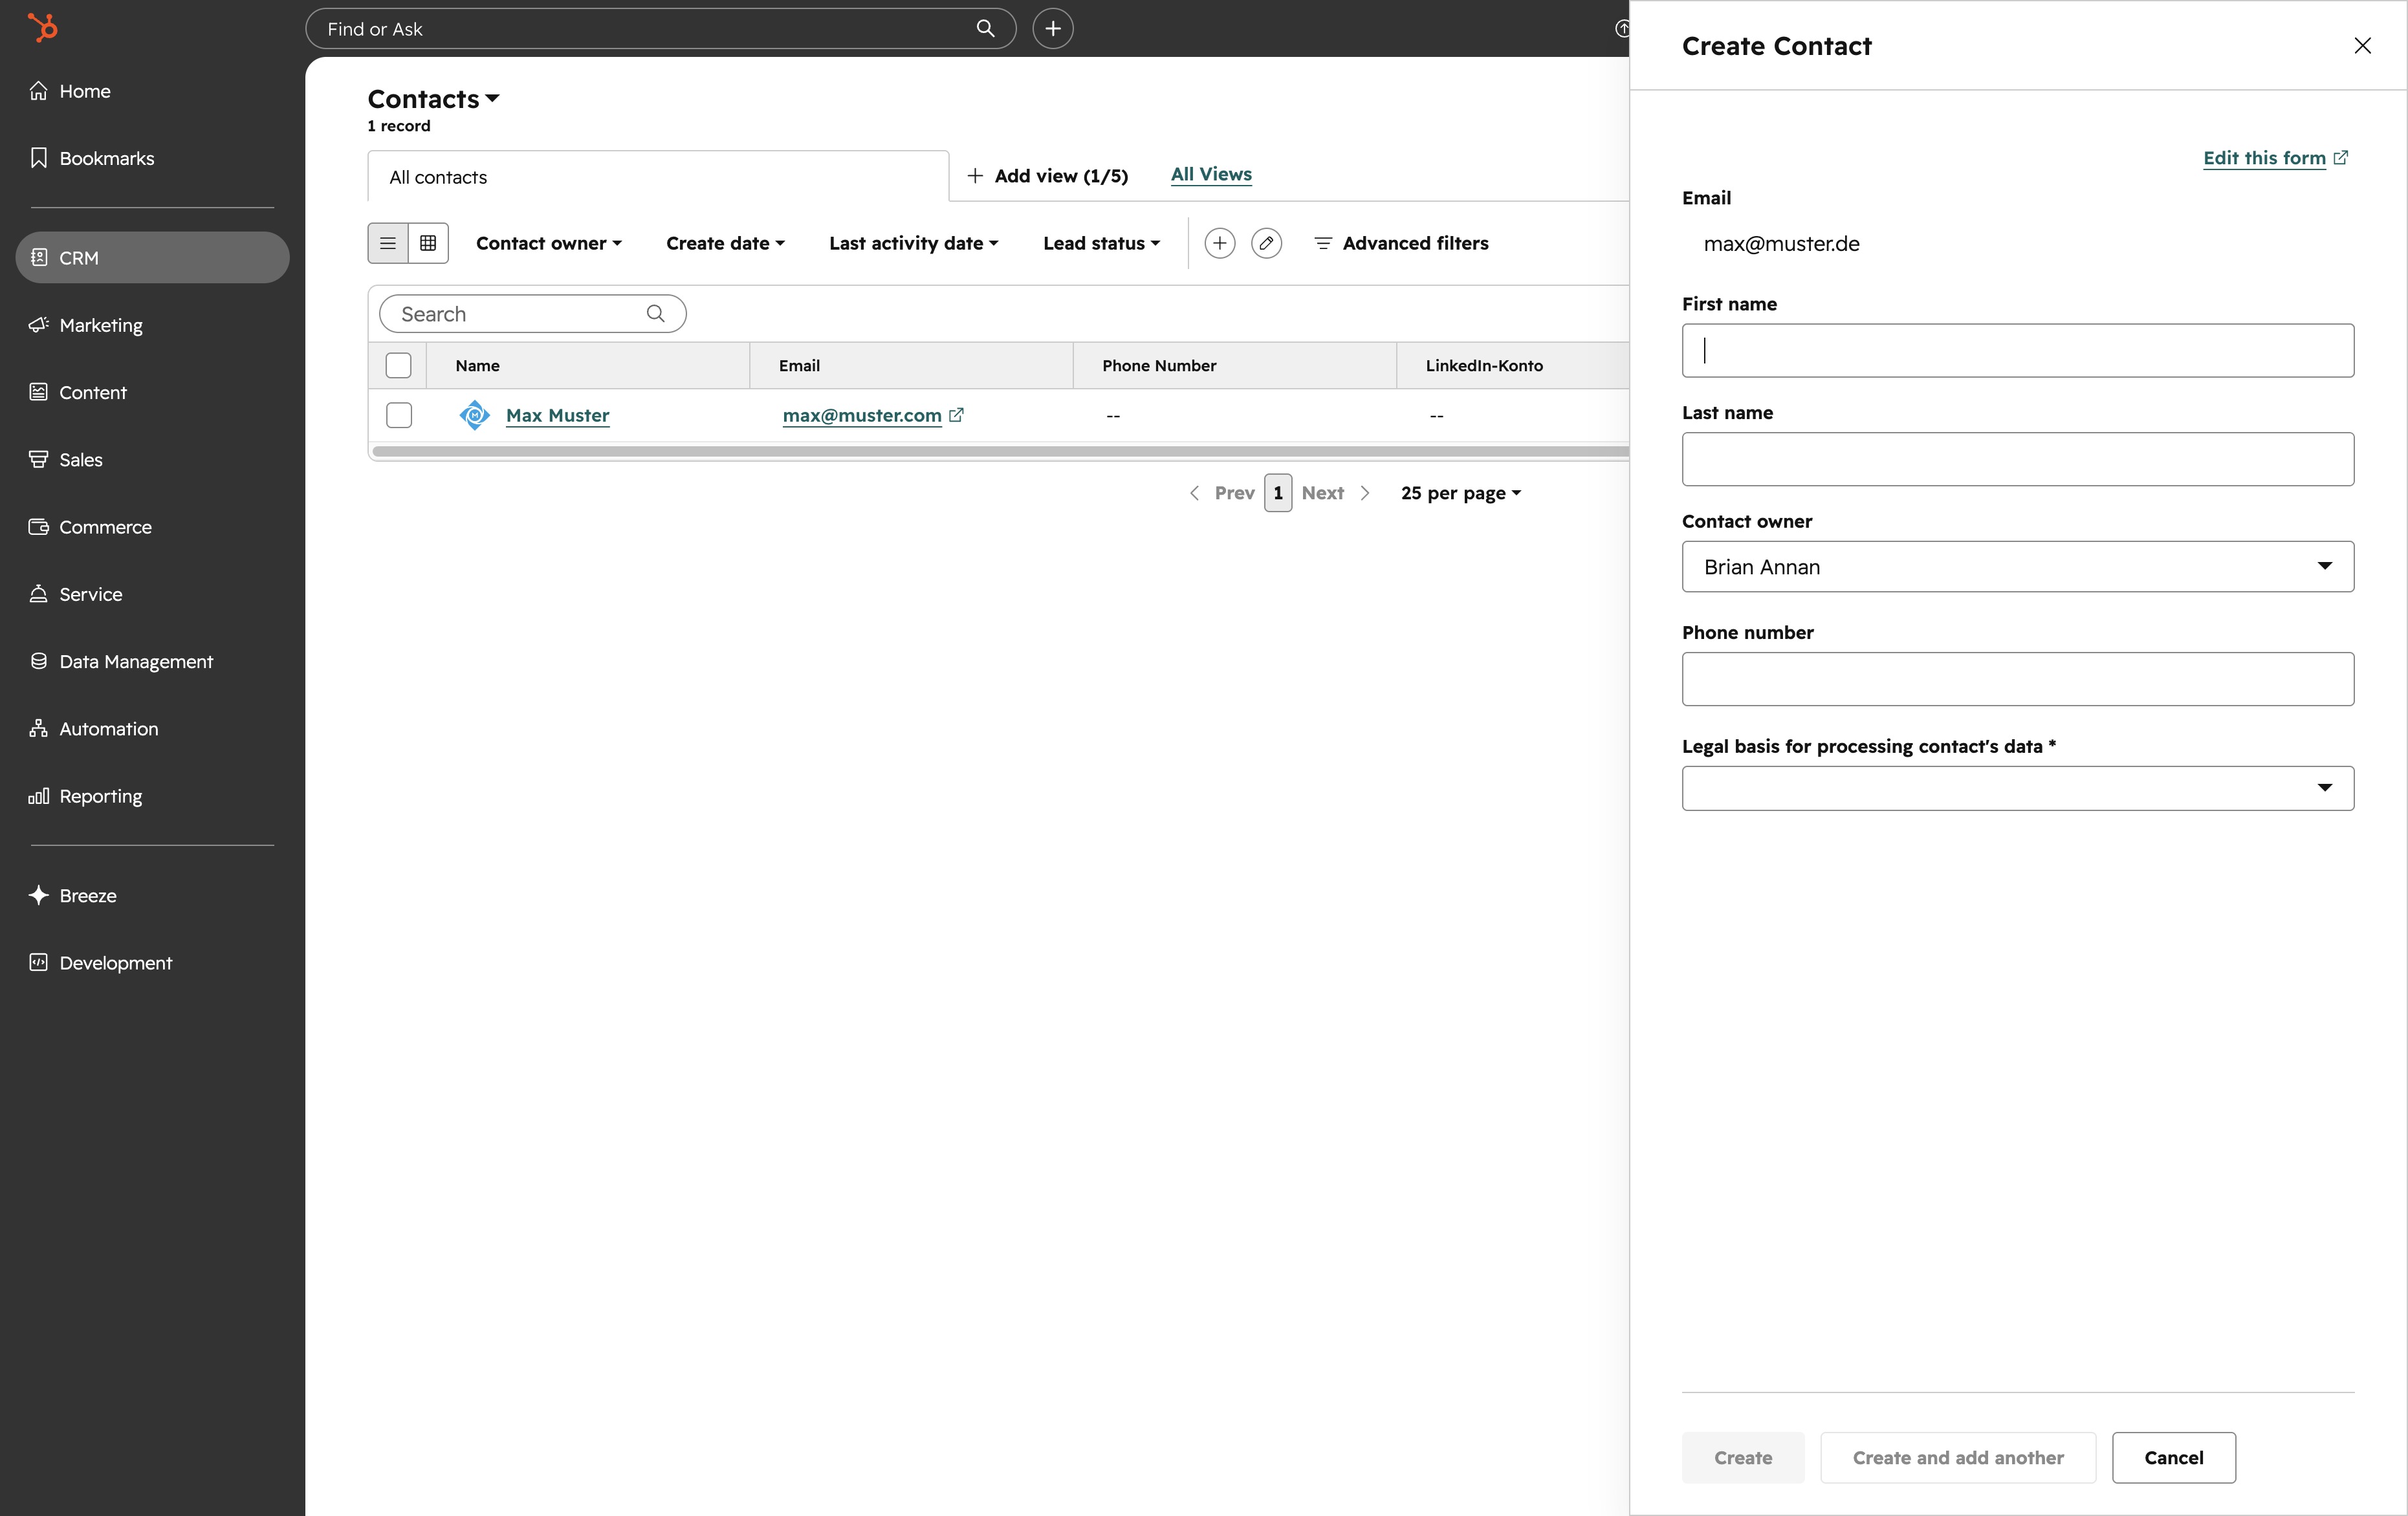
This textarea allows you to input additional information about the contact. After clicking, you can type in relevant details and proceed to save the contact.
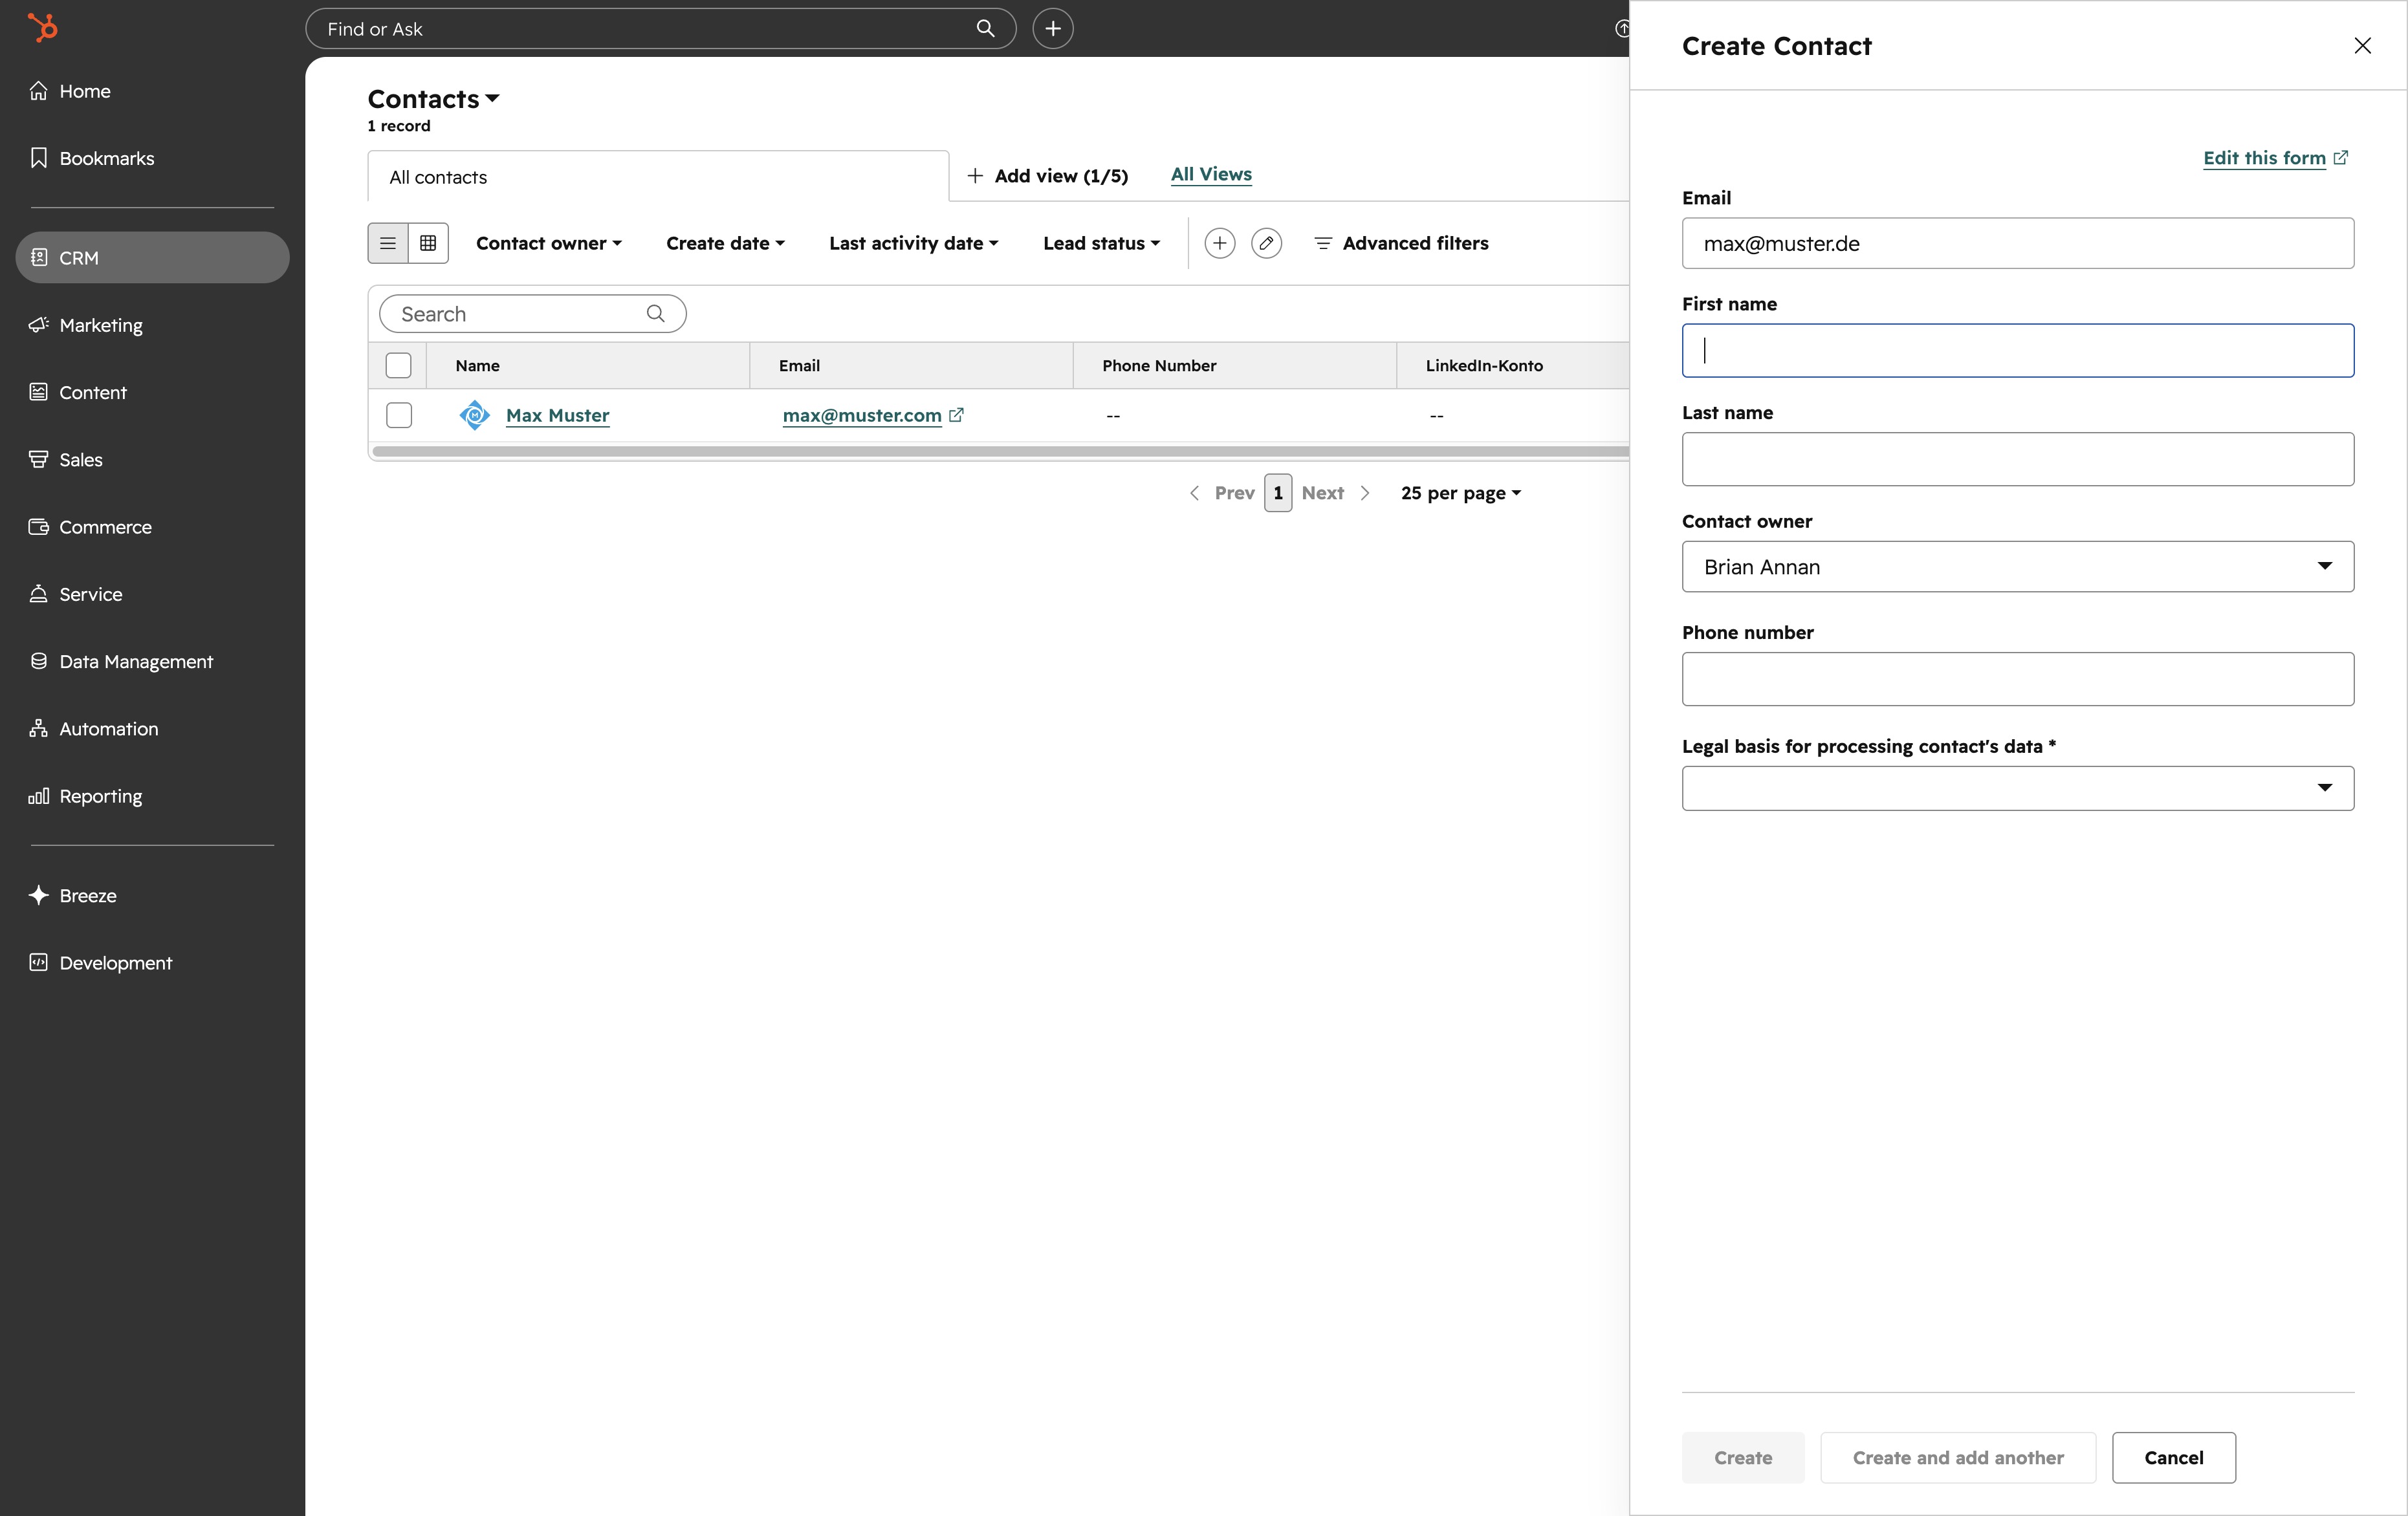
Enter 'max' in the First Name field to specify the contact's first name. This will be saved as part of the new contact information.

This action will allow you to input the email address for the new contact you are creating.
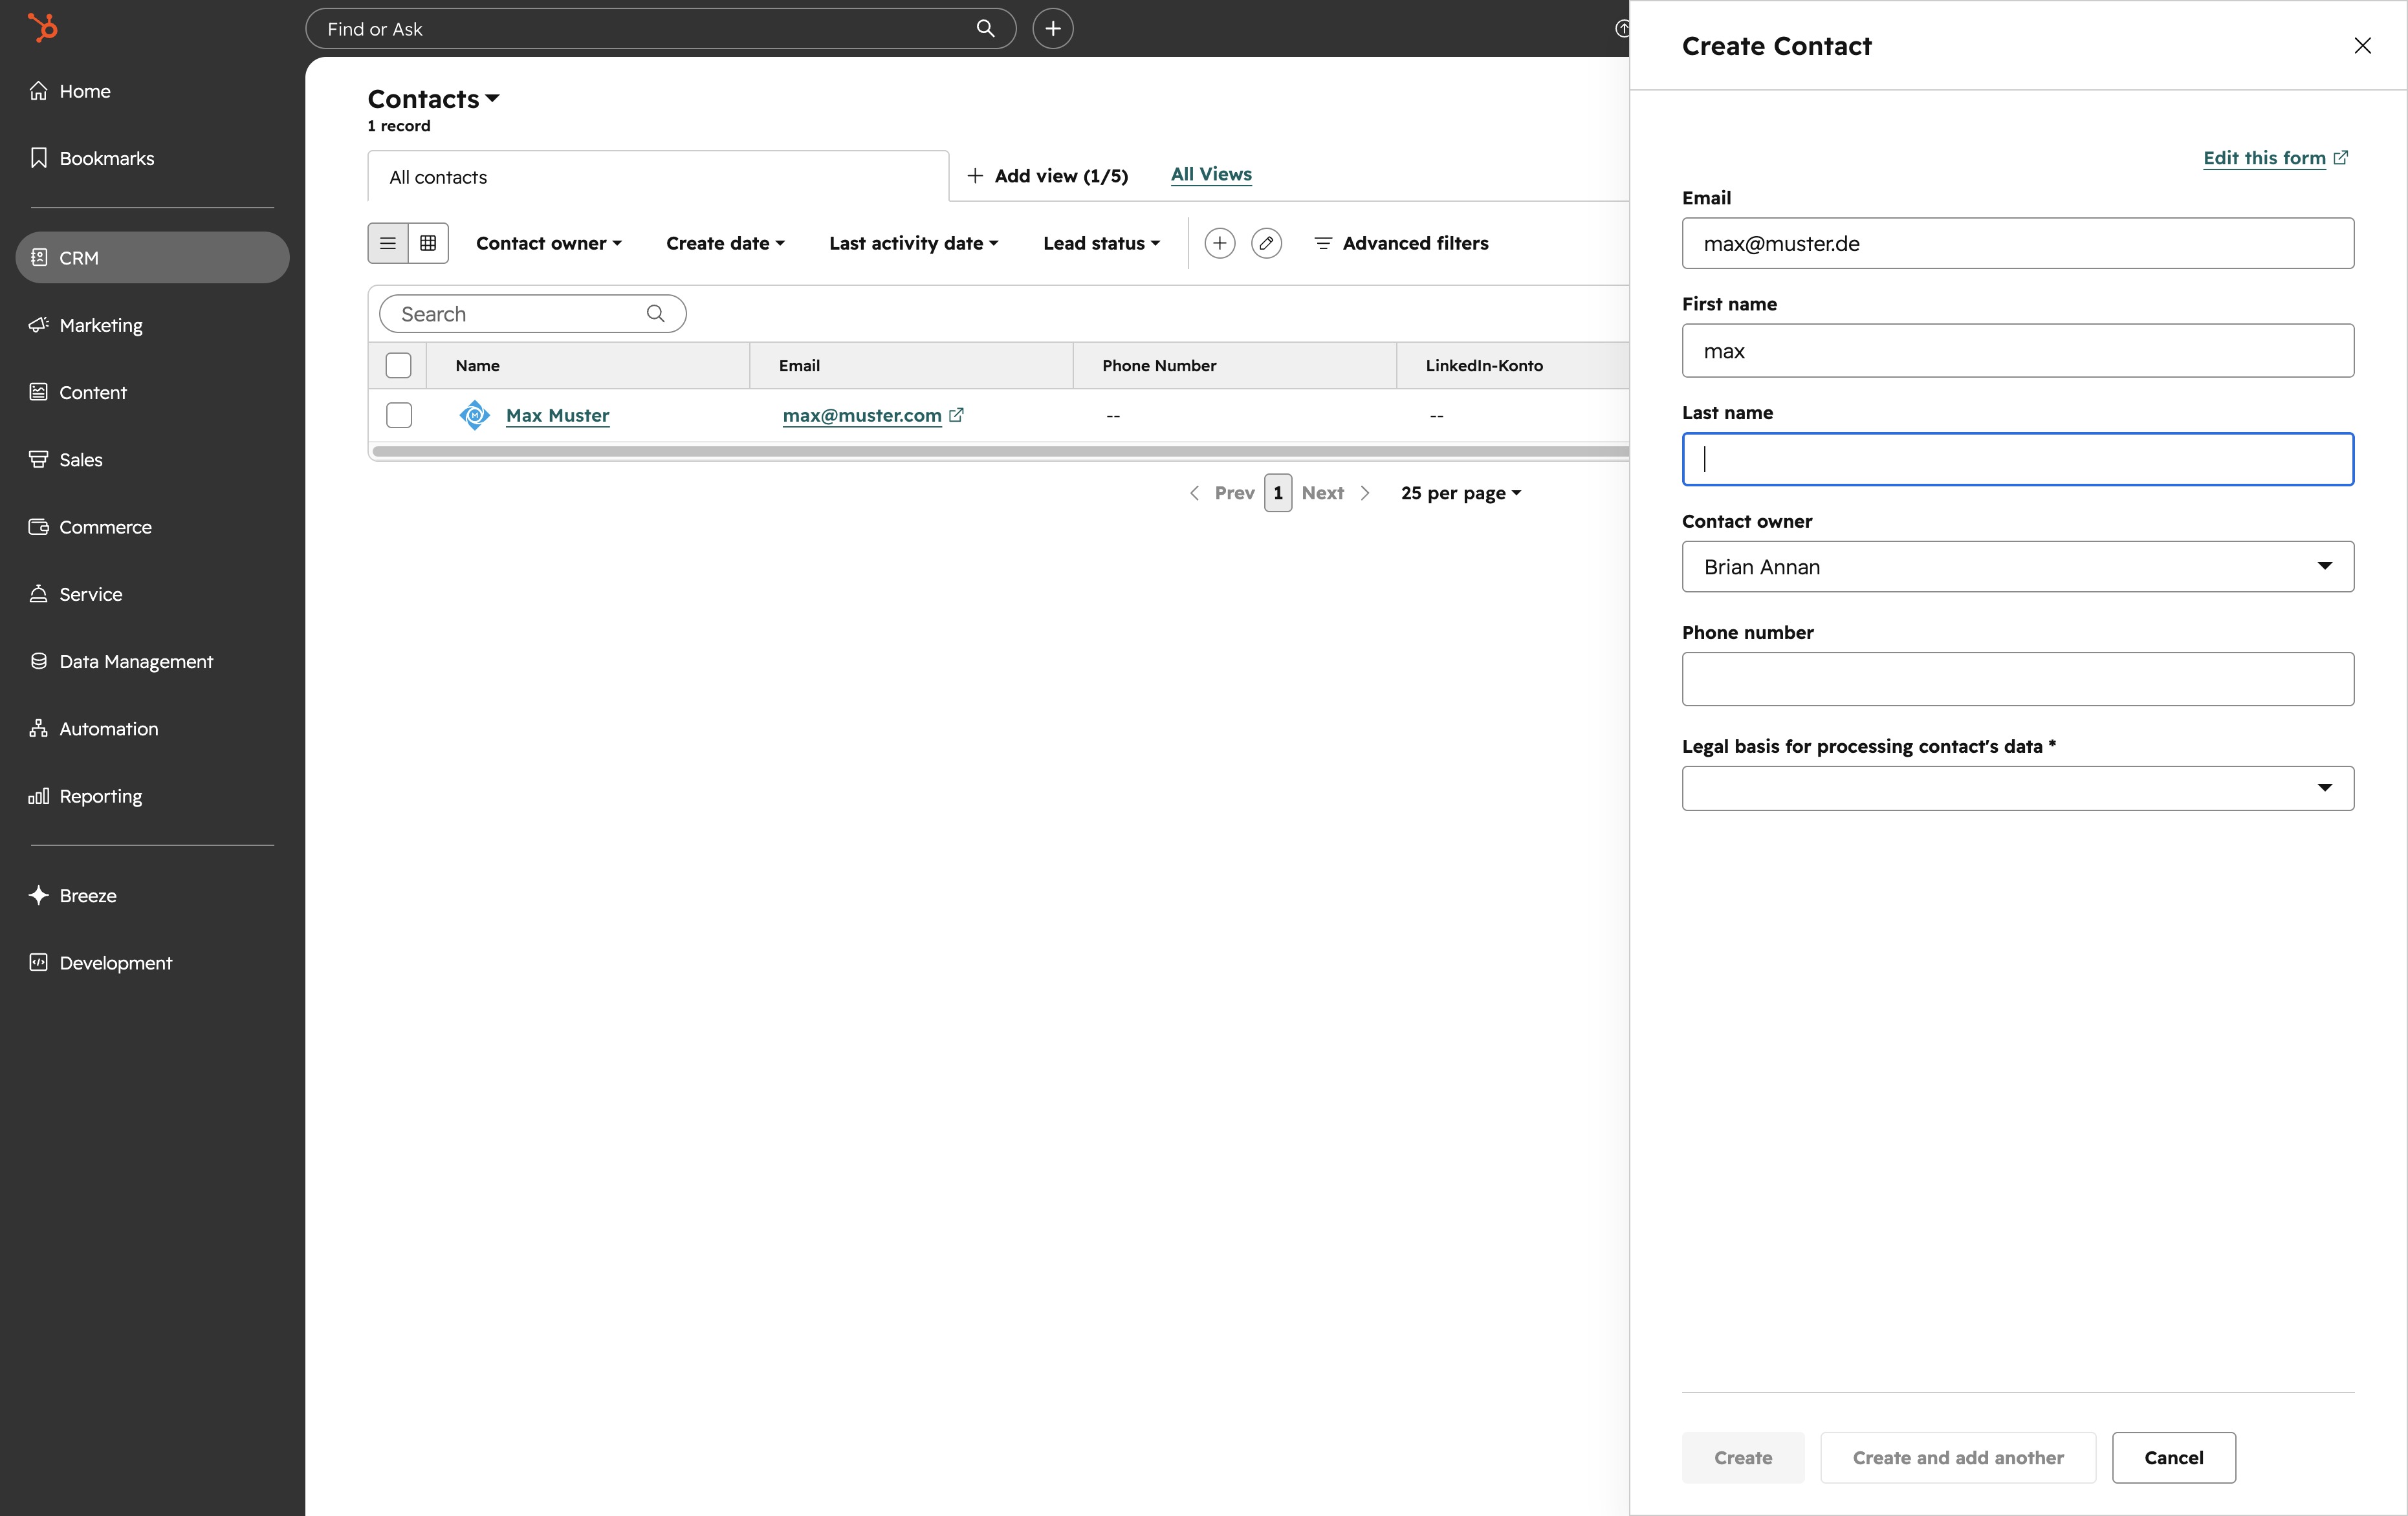
Enter 'muster' into the Last name text area to specify the contact's last name. This information will be saved alongside other details for the new contact.

Clicking this link will allow you to continue creating a new contact in the system.

This action initiates the process to create a new contact. Once clicked, the necessary fields for entering contact information will become available.
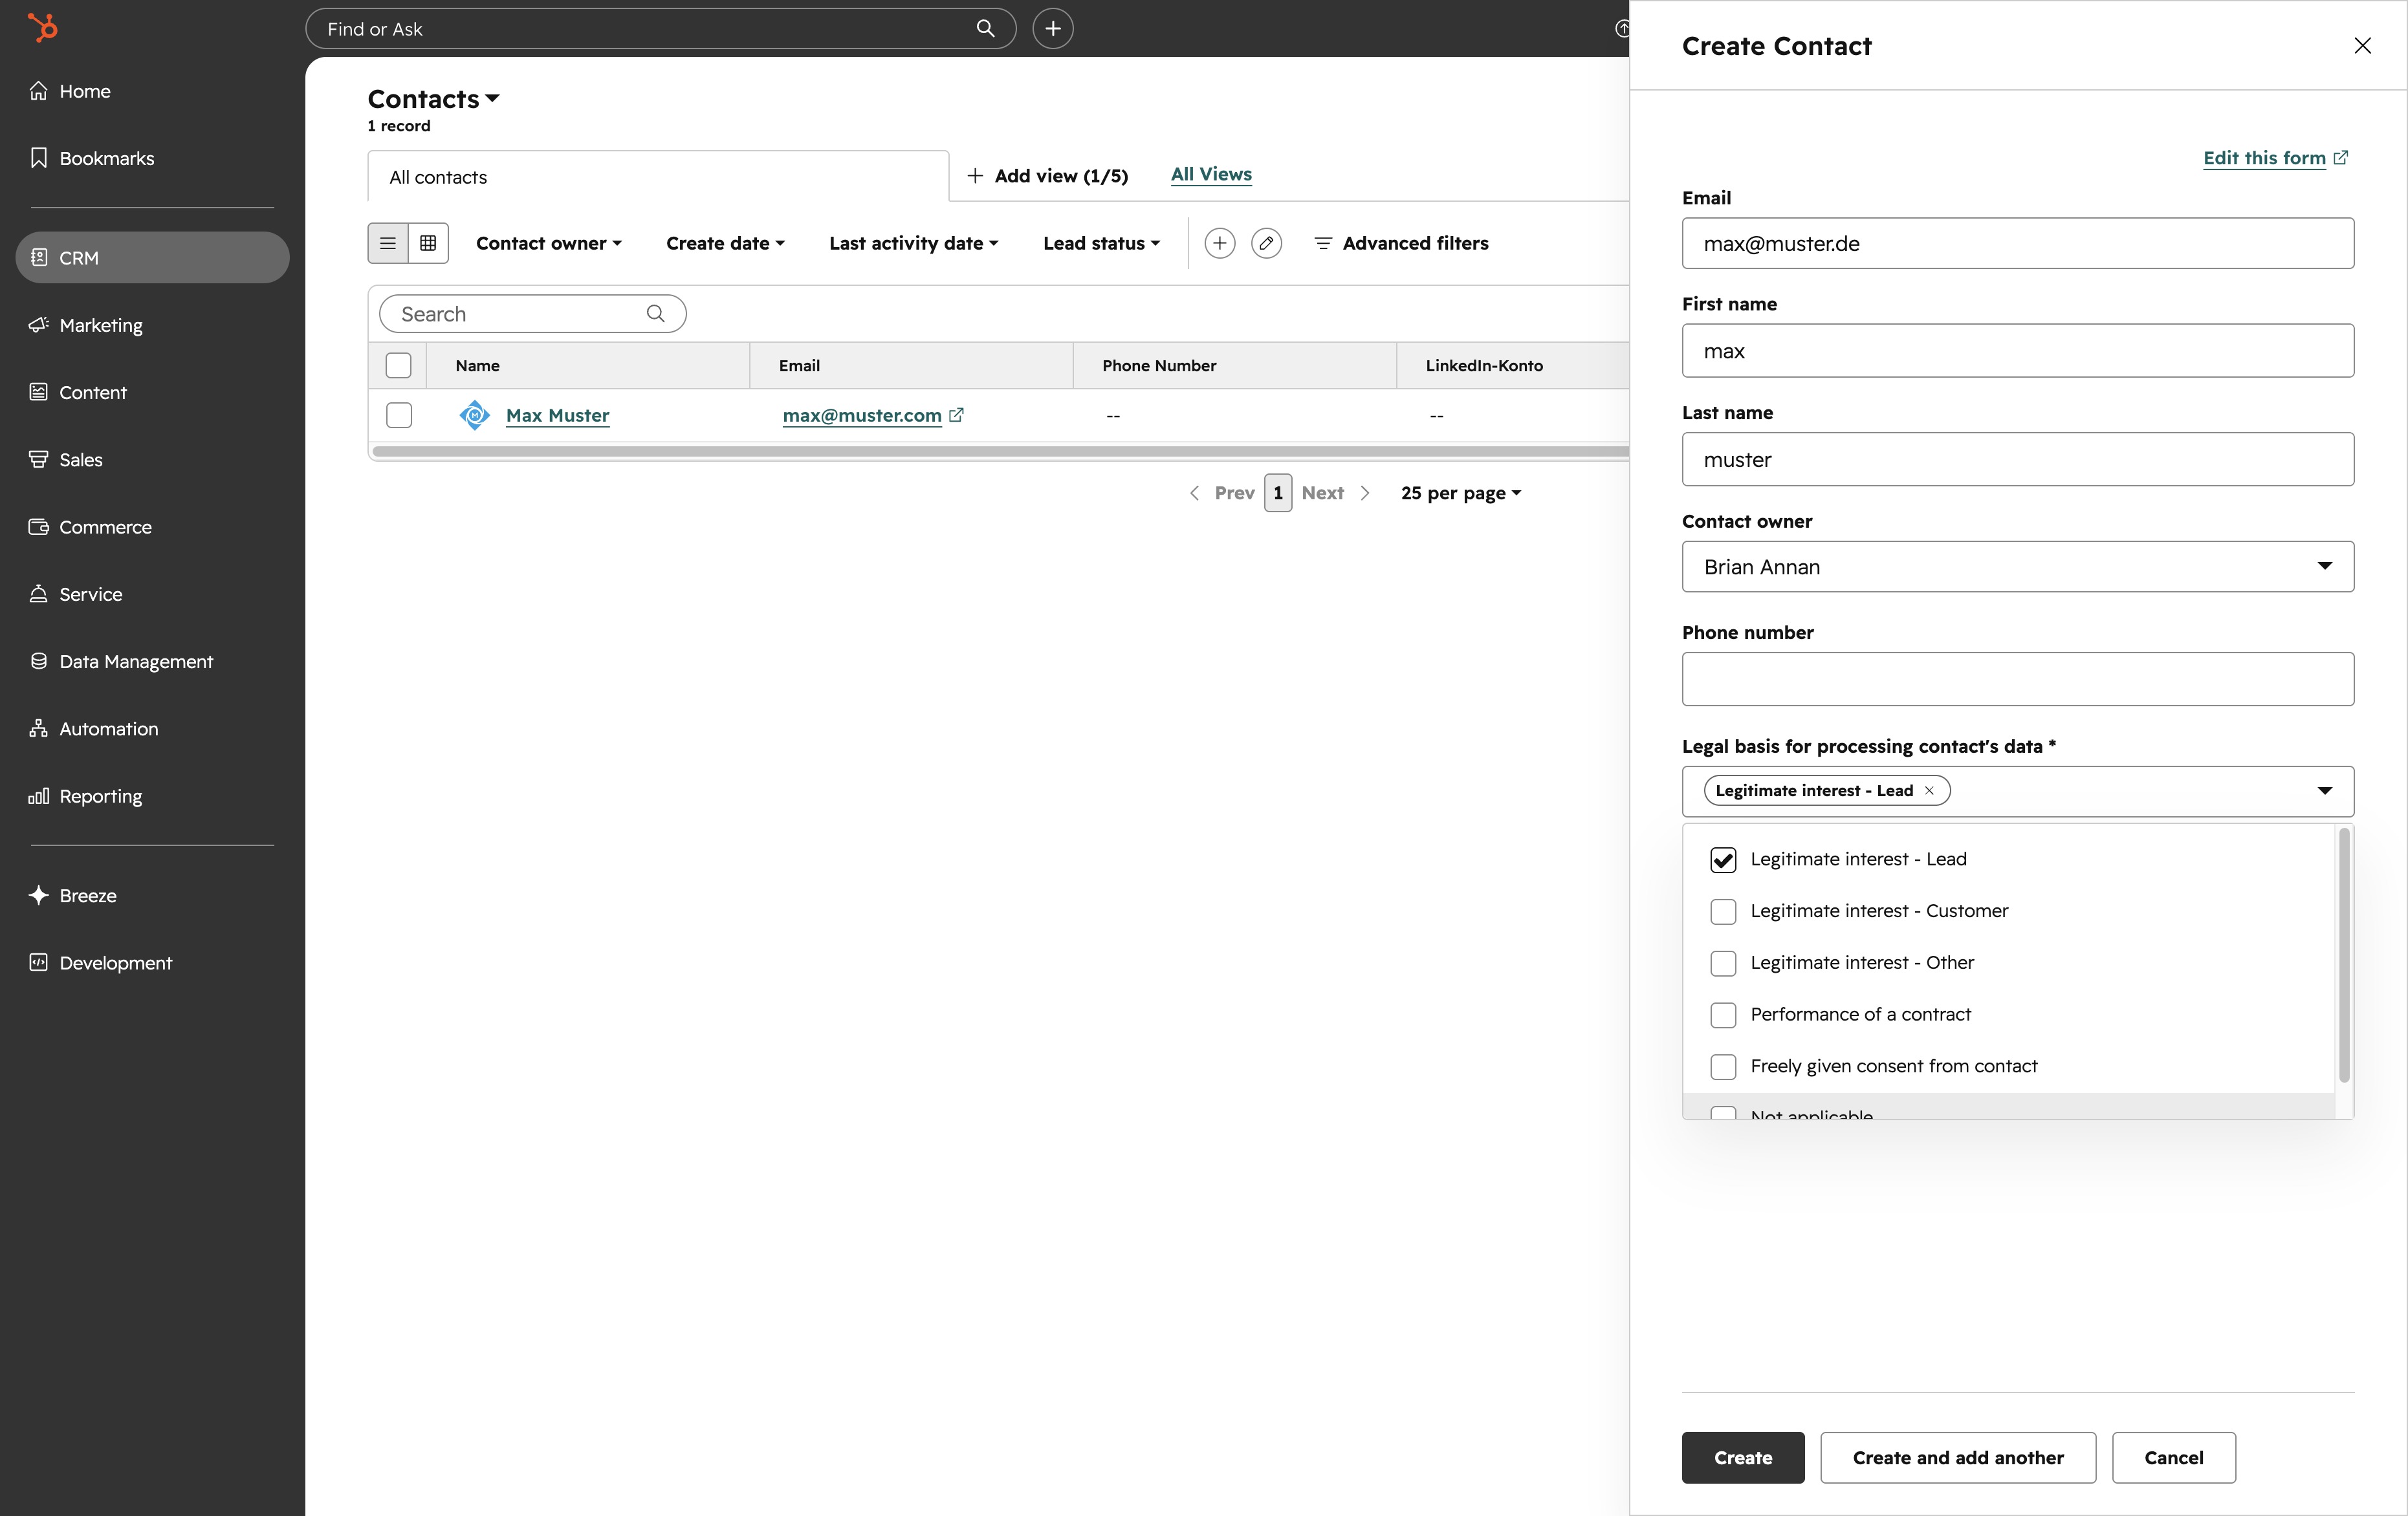
Selecting this option will associate the contact with legitimate interest for processing their data. Ensure that you understand the implications of this choice.
