Click the Contacts link
Selecting this link will navigate you to the Contacts section, where you can manage and access your saved contacts within the CRM.

Loading screenshot…
100%
Link a contact to a company in your CRM by navigating to the Contacts section, selecting Jane Doe, and associating her with an existing company through the provided search…
 viktoria
Link a contact to a company in your CRM by navigating to the Contacts section, selecting Jane Doe, and associating her with an existing company through the provided search functionality.
Selecting this link will navigate you to the Contacts section, where you can manage and access your saved contacts within the CRM.
This action will display all the available contacts in your list, allowing you to view and manage them as needed. If there are no matching records, a message will indicate that no contacts meet the current filters.

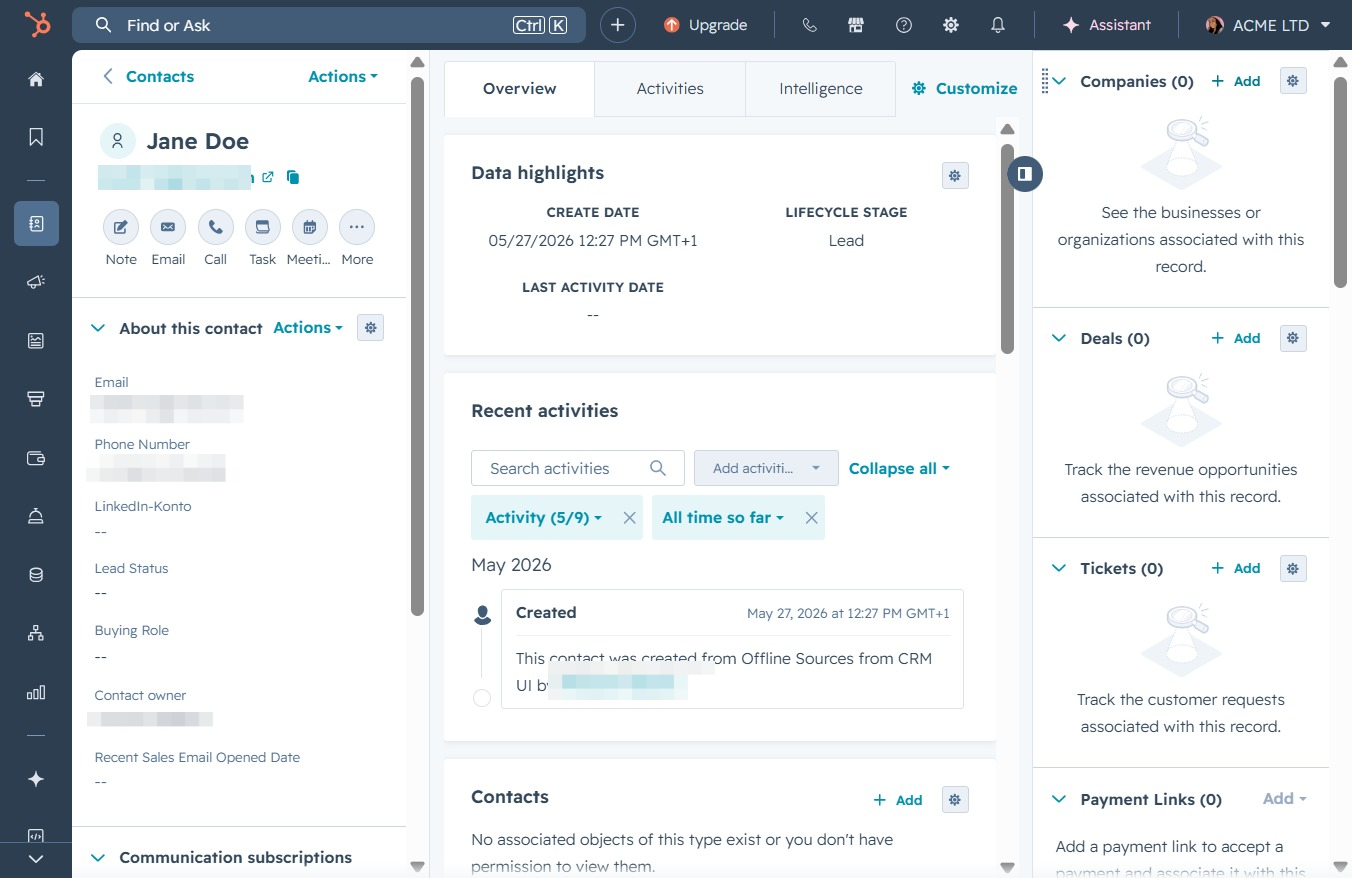
This action will open the contact details for Jane Doe, allowing you to view or edit her information in the Contacts section.

Clicking the 'Add' button allows you to create new entries for Companies, Deals, Tickets, or Payment Links associated with this contact.
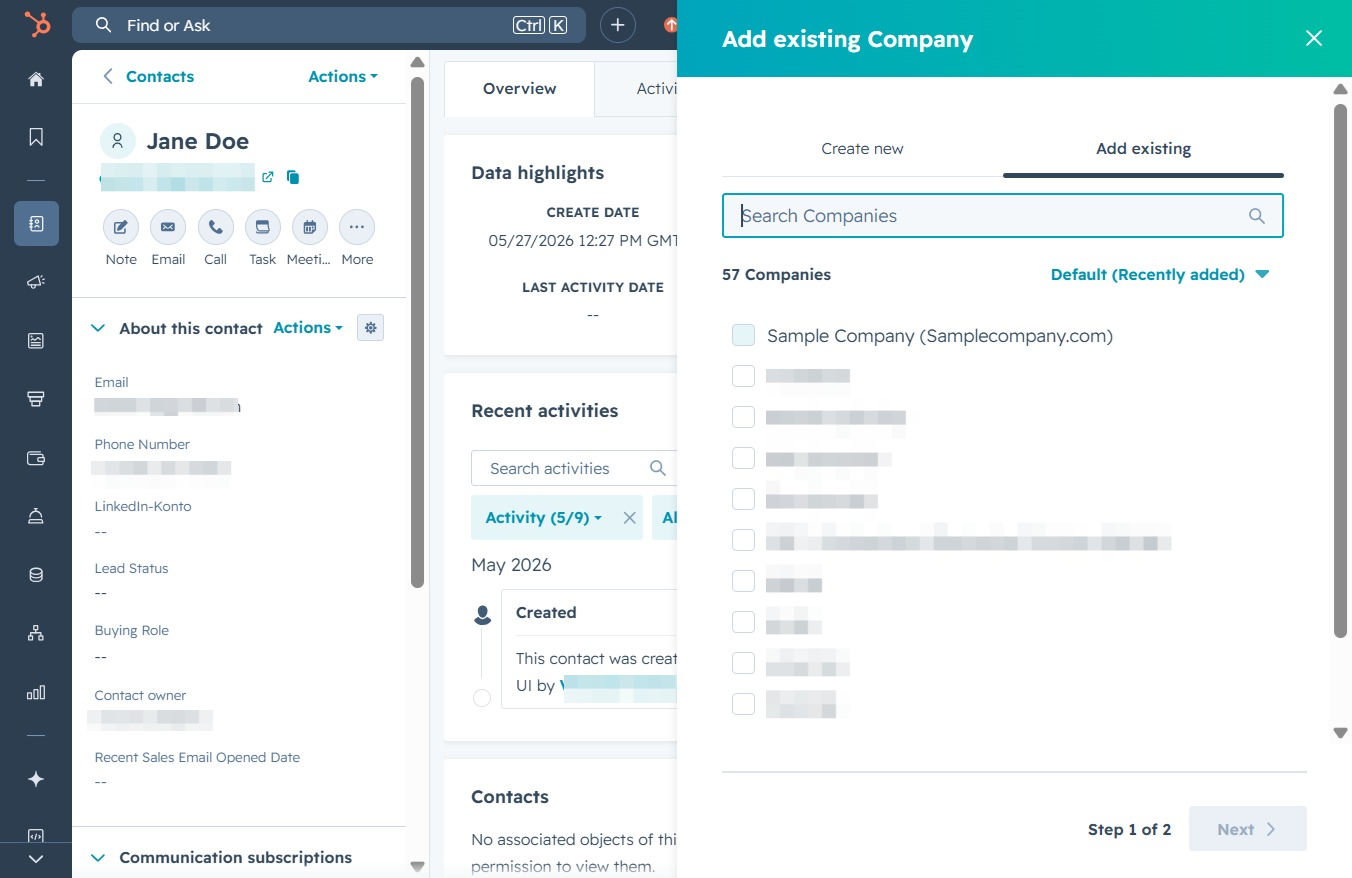
This action opens a search function allowing you to find and add an existing company to the contact. You can browse through recently added companies or enter a name to find a specific organization.
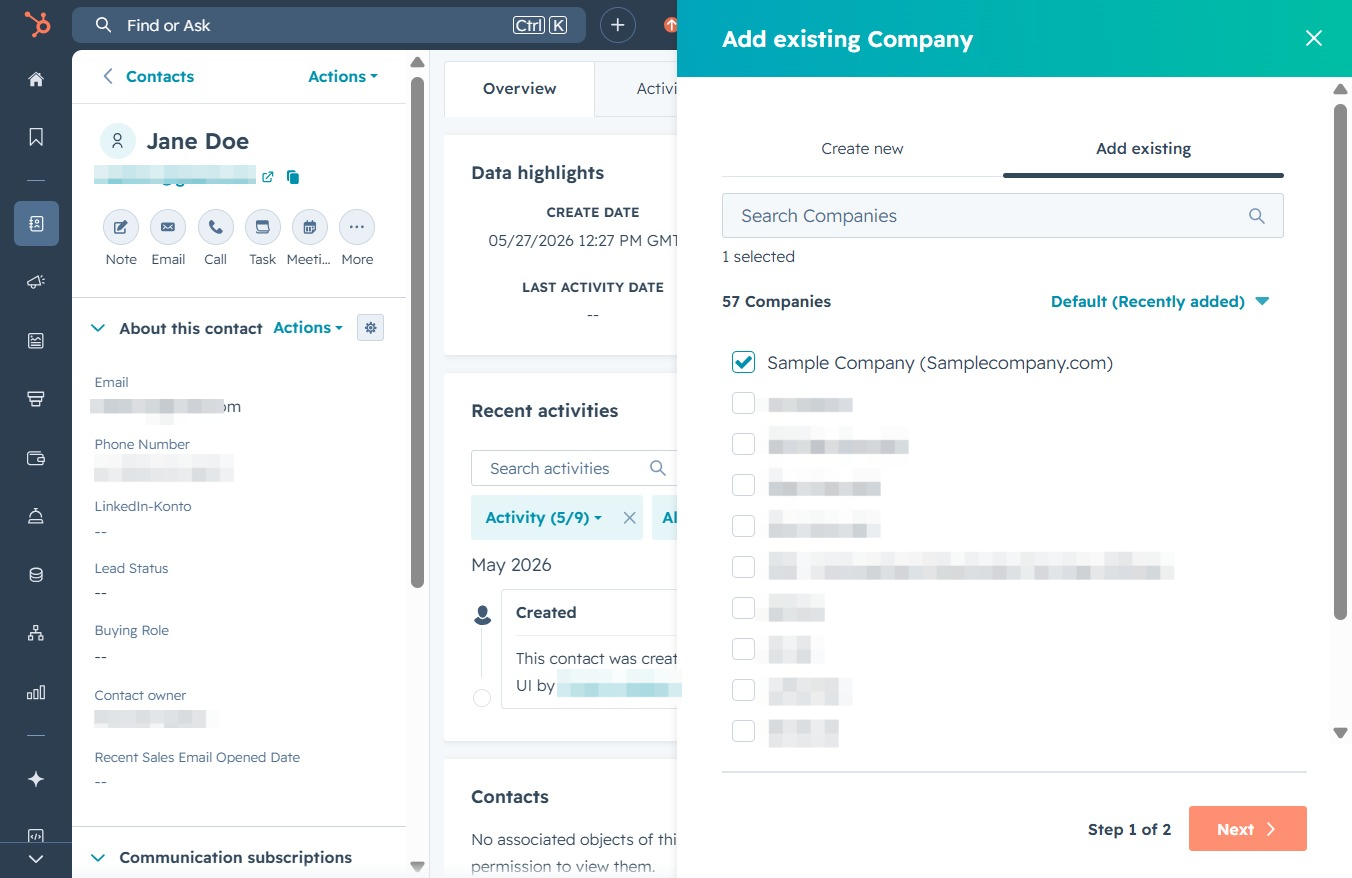
Clicking the Next button allows you to proceed to the second step of adding an existing company to the contact. This action may trigger the application to save your current selections and display the relevant information for the next stage.
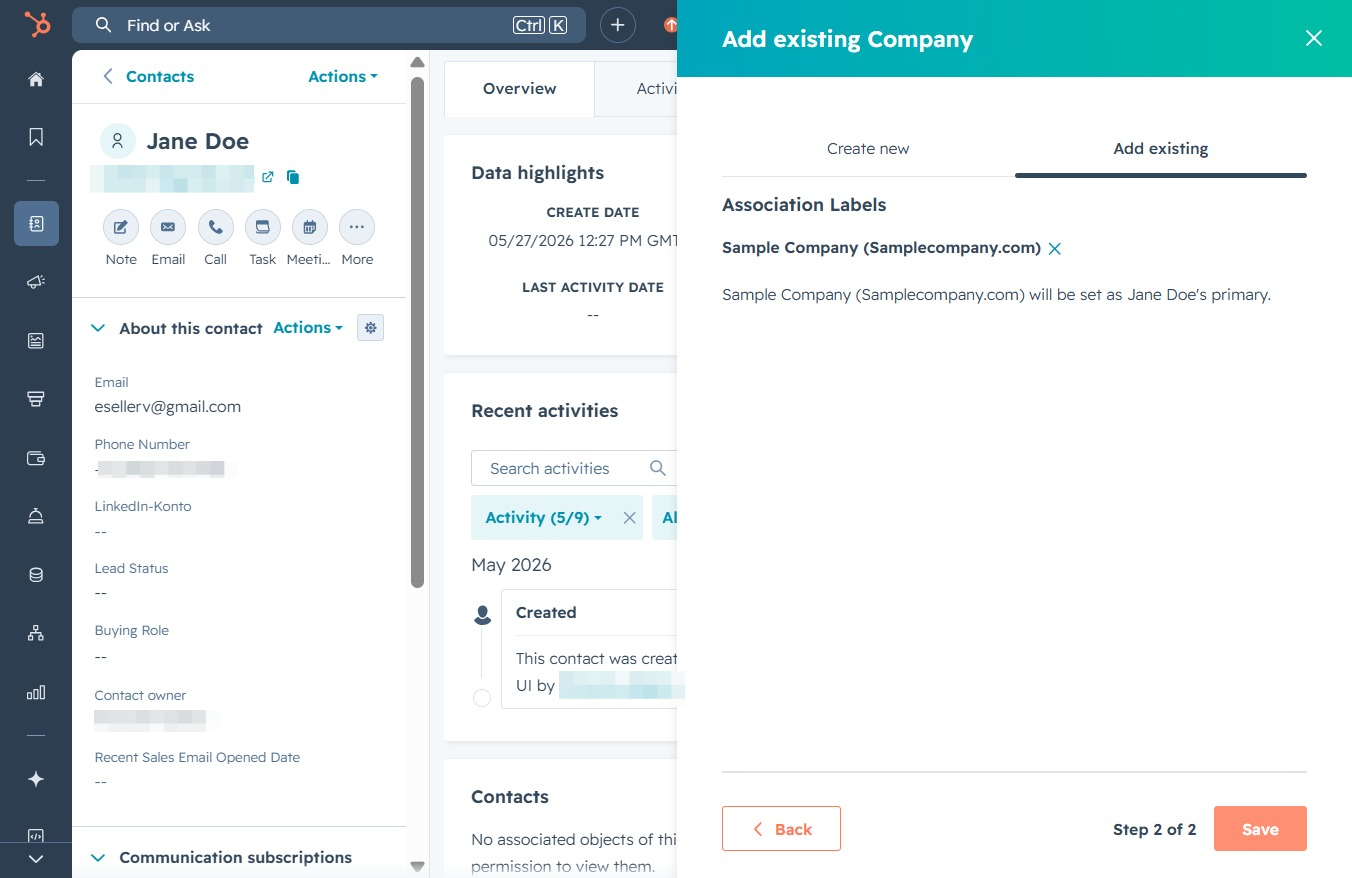
After clicking the Save button, any changes made to the association of the existing company with Jane Doe will be confirmed and stored in the system.