Learn how to edit a document in DocuFast by updating text, making changes to your content, and saving your edits.
viktoria
·20 steps·11 views·Published
Learn how to edit a document in DocuFast by updating text, making changes to your content, and saving your edits.
Step-by-step Guide20 steps
1
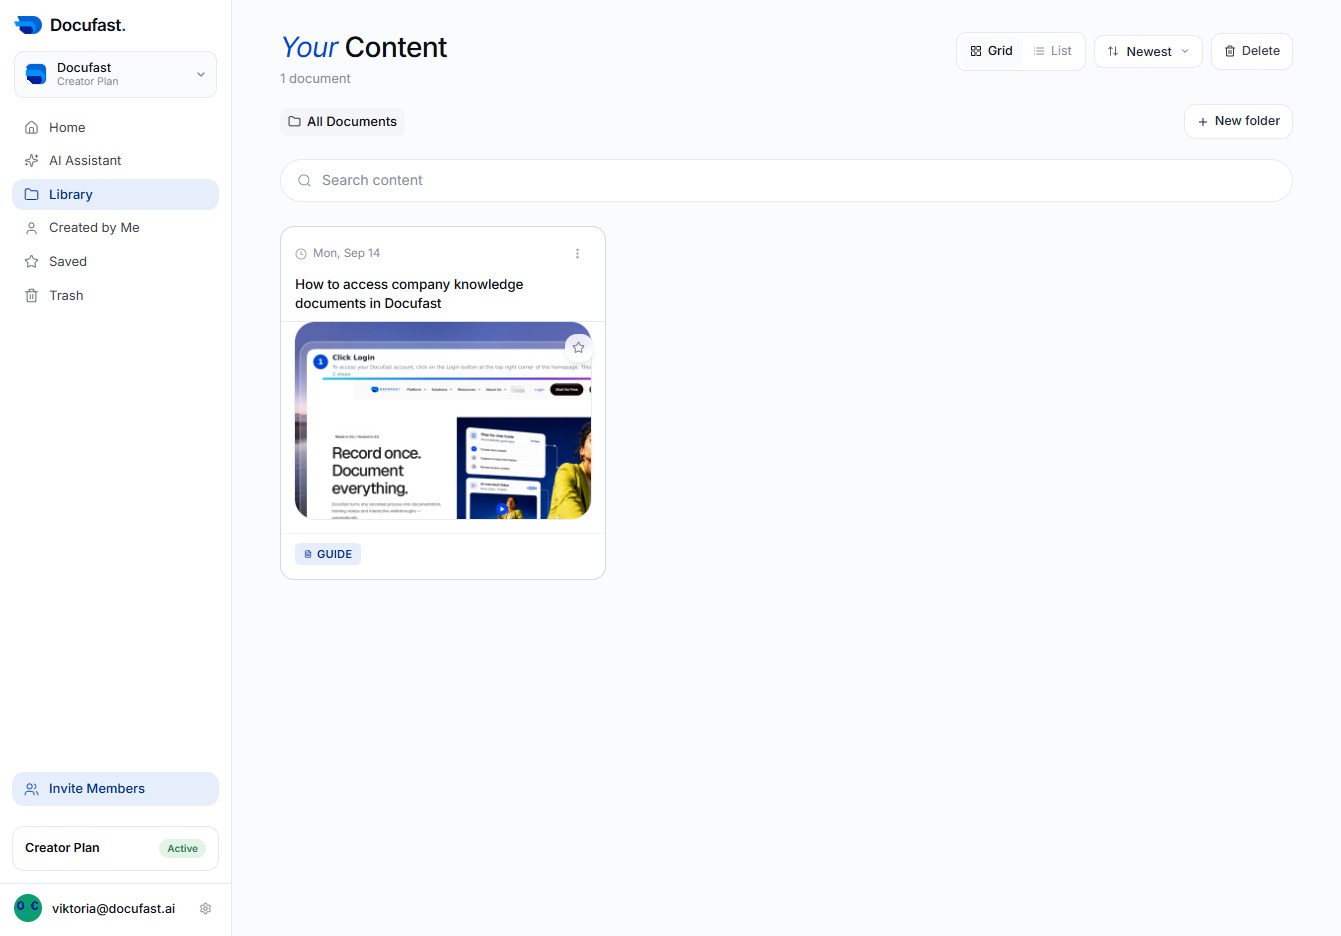
Click How to access company knowledge documents
In the Docufast library, you'll find the guide on how to access company knowledge documents. Click here to open it and begin exploring the necessary resources available for your work.
Loading screenshot…
100%
2
Click Edit
To modify the content, you'll click the Edit button. This allows you to make changes to the documents you are accessing in Docufast.
Loading screenshot…
100%
3
Click Document Title
In this step, you'll select the Document title field to enter or edit the title of your document in Docufast, ensuring it accurately represents the content you're working with.
Loading screenshot…
100%
4
Click to Add a Video Description
In this step, you’ll add a brief description for your video. This helps viewers understand the content better and gives context to the material you’re sharing.
Loading screenshot…
100%
5
Click Step Title
In this step, you'll click on the 'Step title' input field to provide a title for your submission. This helps in organizing and identifying your documentation more effectively.
Loading screenshot…
100%
6
Click to Describe the Action
Now, you'll provide a description of what happens in this step. This helps clarify the process for anyone viewing the workflow, ensuring they understand the details relevant to this interaction.
Loading screenshot…
100%
7
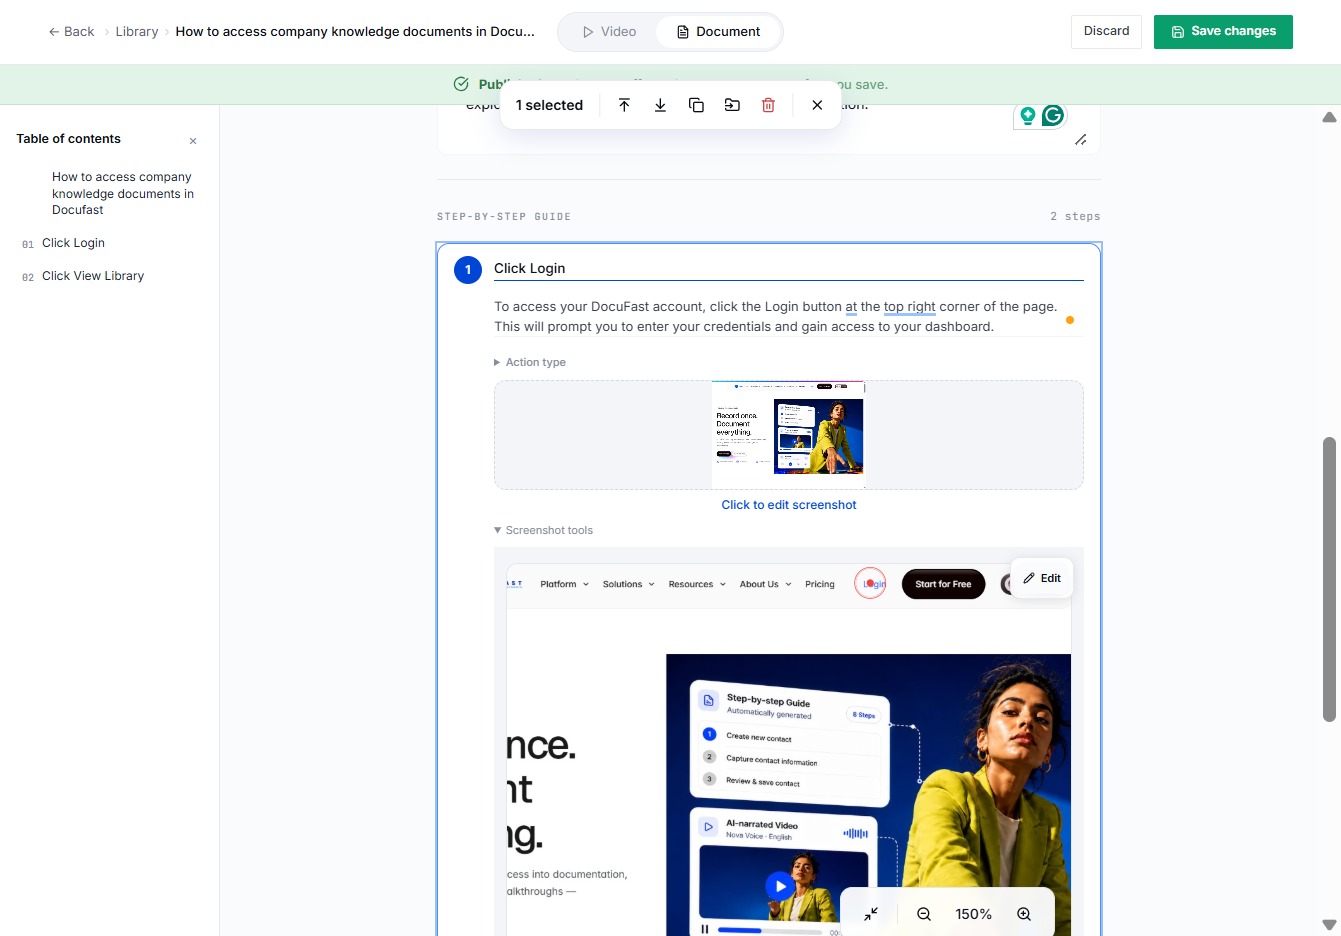
Click Screenshot Tools
To capture parts of your screen, click the Screenshot tools option. This feature allows you to easily take screenshots of your documents or various sections within your interface.
Loading screenshot…
100%
8
Click Edit
To modify your document, click the Edit button located at the top of the screen. This will allow you to make changes to the content and settings as needed.
Loading screenshot…
100%
9
Click Replace Image
To update the visual content, simply select the 'Replace Image' option from the context menu. This enables you to choose a new image for your document, ensuring it stays fresh and relevant.
Loading screenshot…
100%
10
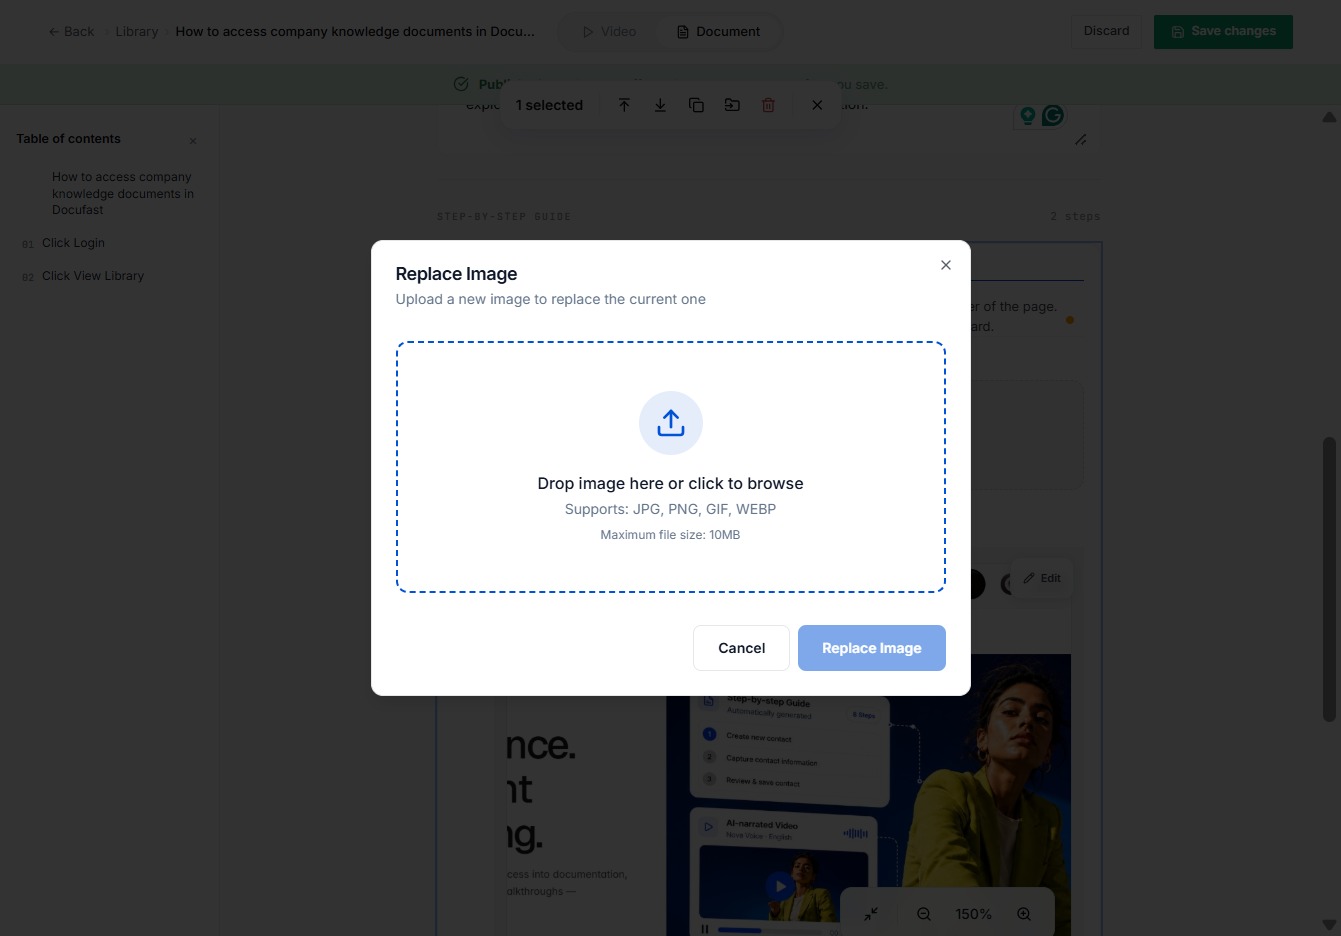
Click Here to Upload Image
You'll want to click here to open the upload option for replacing the current image. This allows you to easily browse and select a new image file from your device.
Loading screenshot…
100%
11
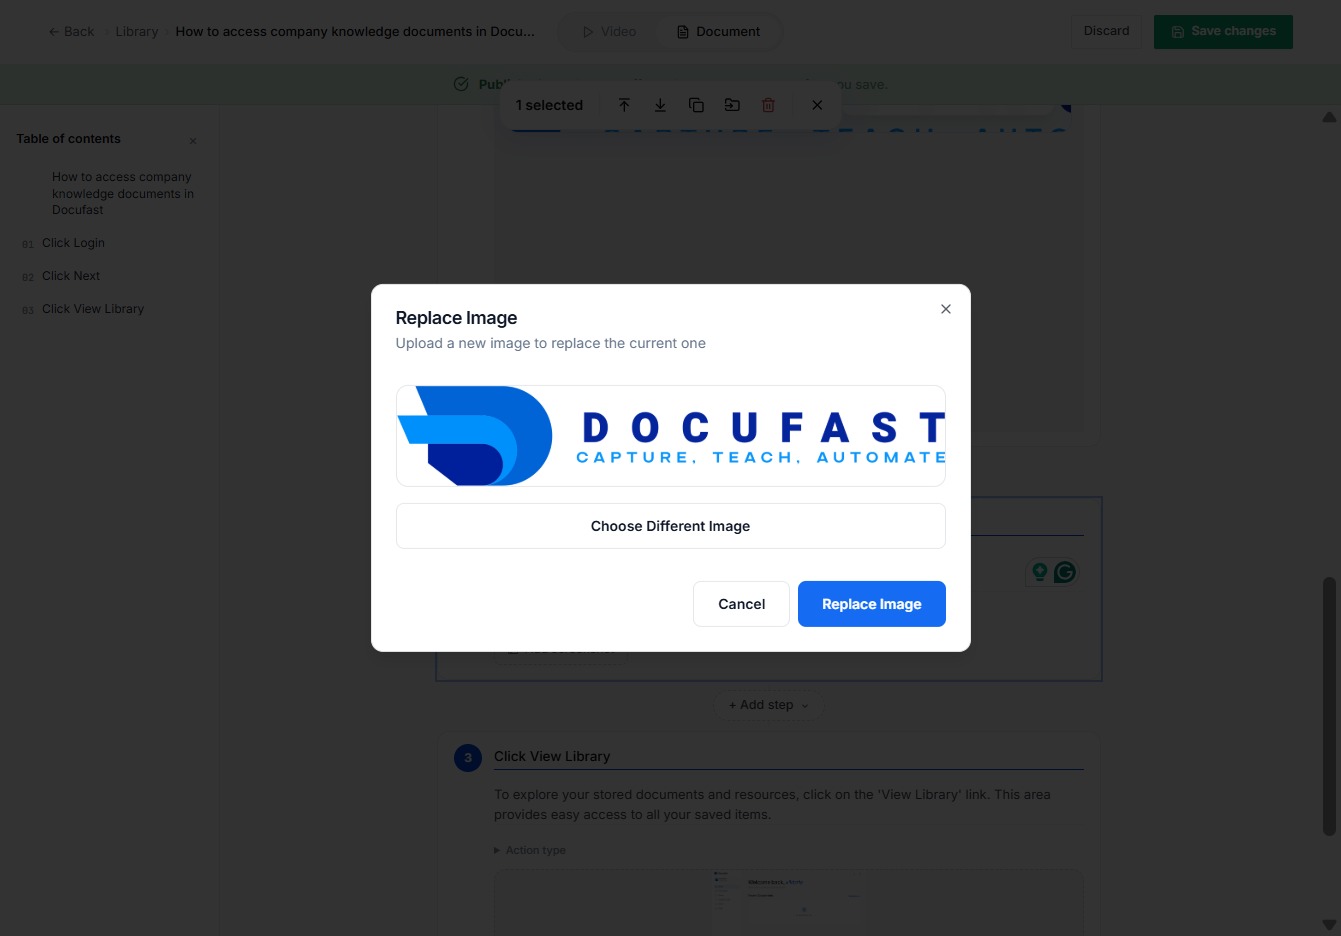
Click Replace Image
In this step, you’ll replace the current image by selecting the 'Replace Image' button. This action allows you to upload a new image that will update the existing one.
Loading screenshot…
100%
12
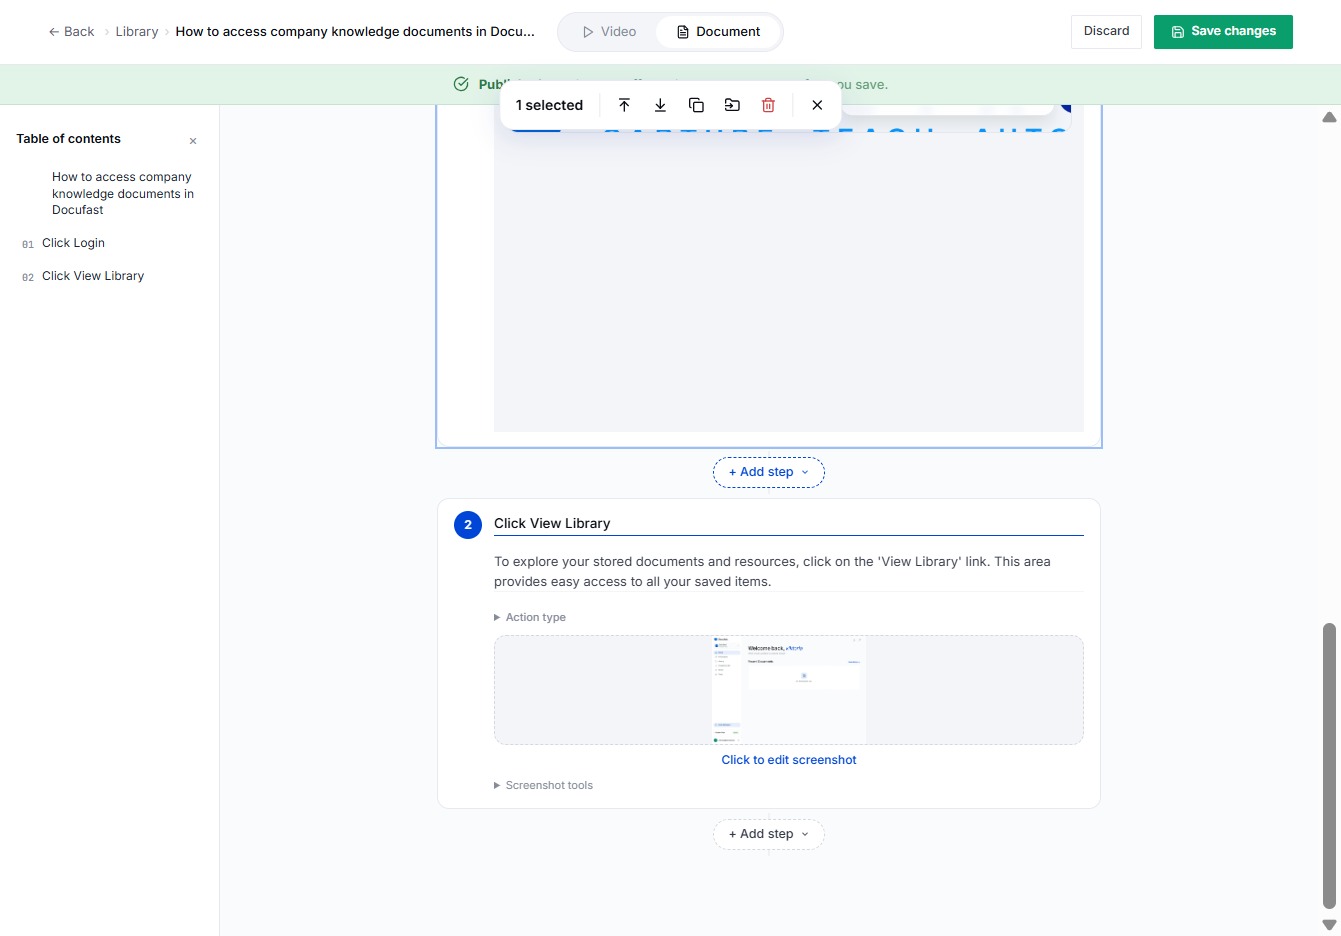
Click + Add Step
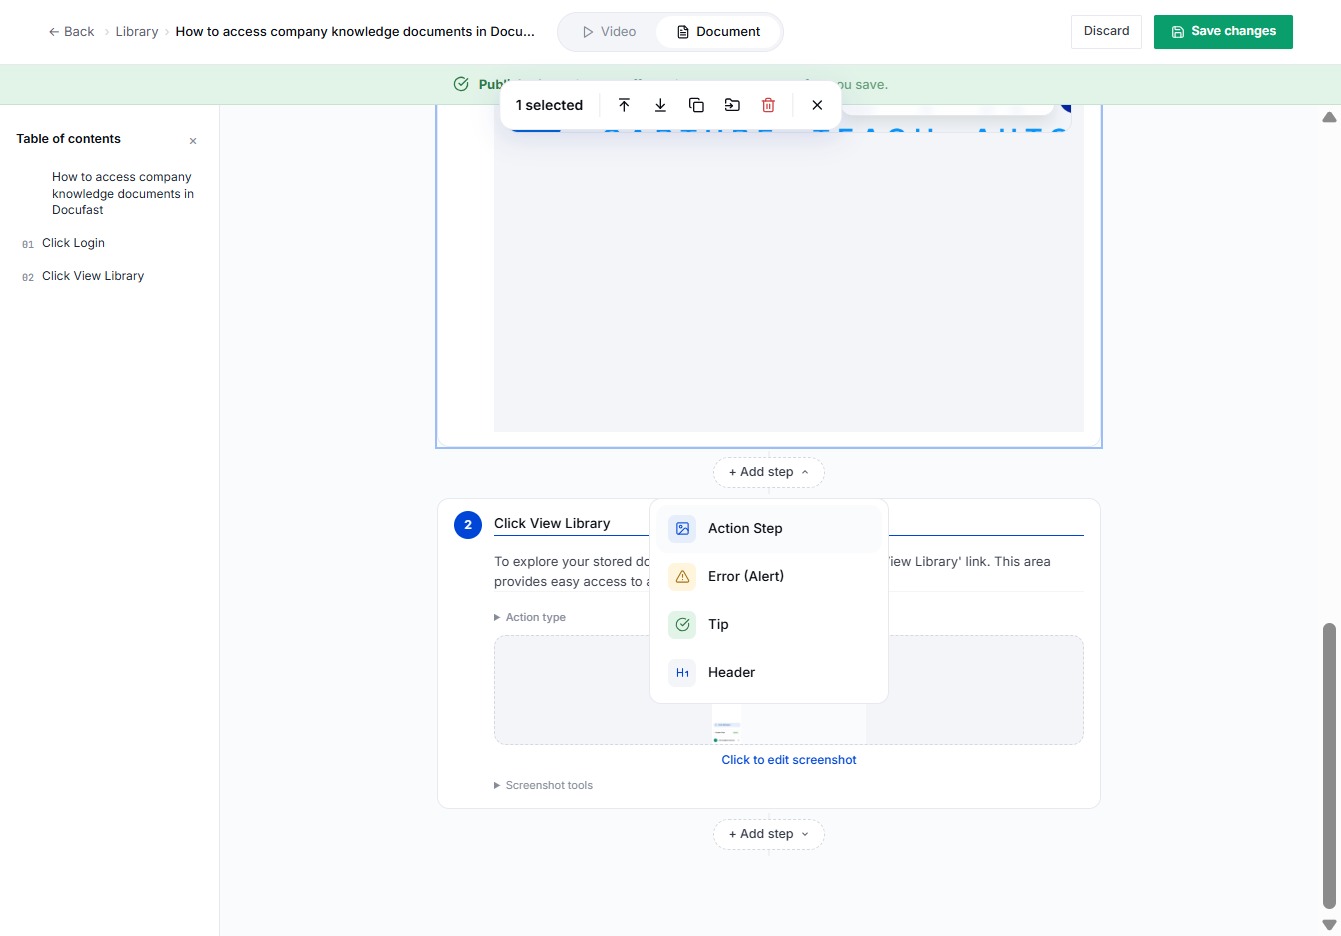
To enhance your workflow in this document, simply click the '+ Add step' button. This allows you to introduce additional actions or notes as needed throughout your process.
Loading screenshot…
100%
13
Click Action Step
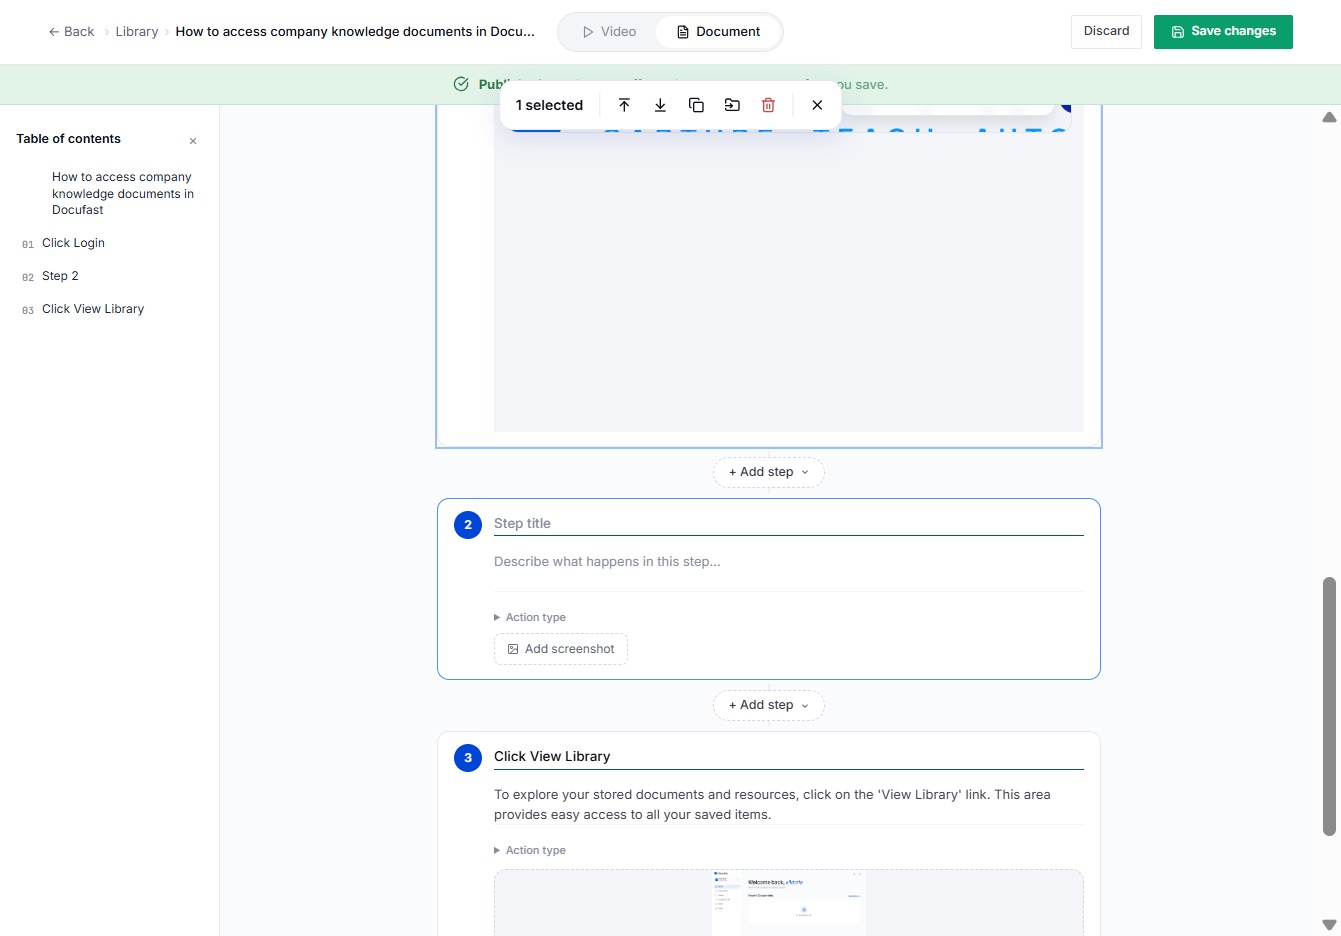
In this step, you'll select the 'Action Step' option from the dropdown menu. This allows you to define specific actions within your workflow, enhancing the document's functionality.
Loading screenshot…
100%
14
Click Step Title
To begin adding more detail to your workflow, you’ll select the Step title input field. This is where you can enter the description for the current step in your process.
Loading screenshot…
100%
15
Type 'Click Next' in Step Title
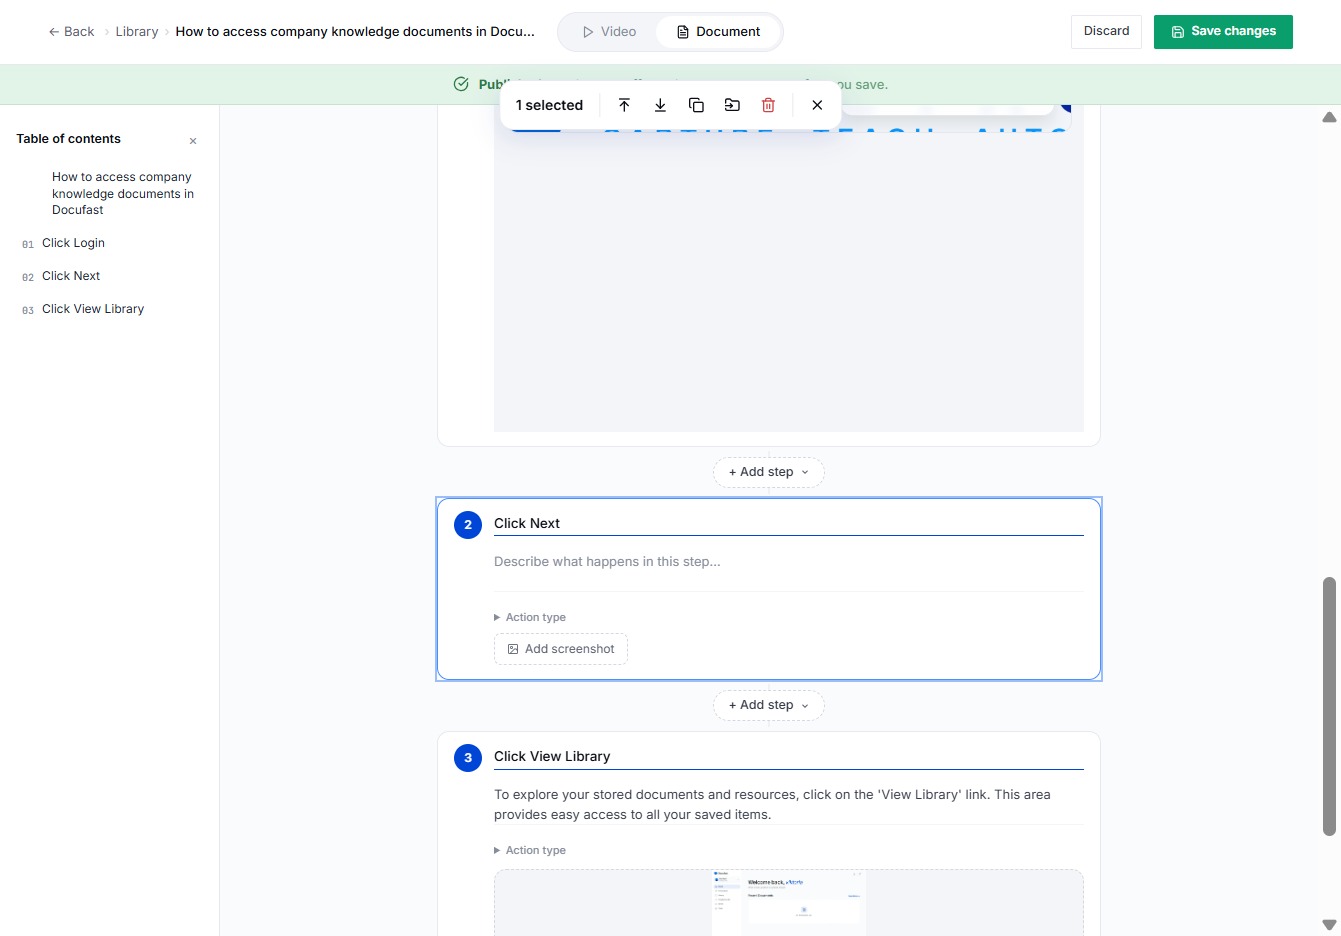
In the Step Title field, you will enter 'Click Next'. This step allows you to define the action that will be referenced later in your document, ensuring clarity for your audience.
Loading screenshot…
100%
16
Click to Describe the Step
In this section, you'll indicate what happens in this step by entering details in the provided text area. This helps clarify the process for future reference.
Loading screenshot…
100%
17
Click Add screenshot
To include a visual reference in your document, click the 'Add screenshot' button. This allows you to enhance your content by integrating relevant images easily.
Loading screenshot…
100%
18
Click to Replace Image
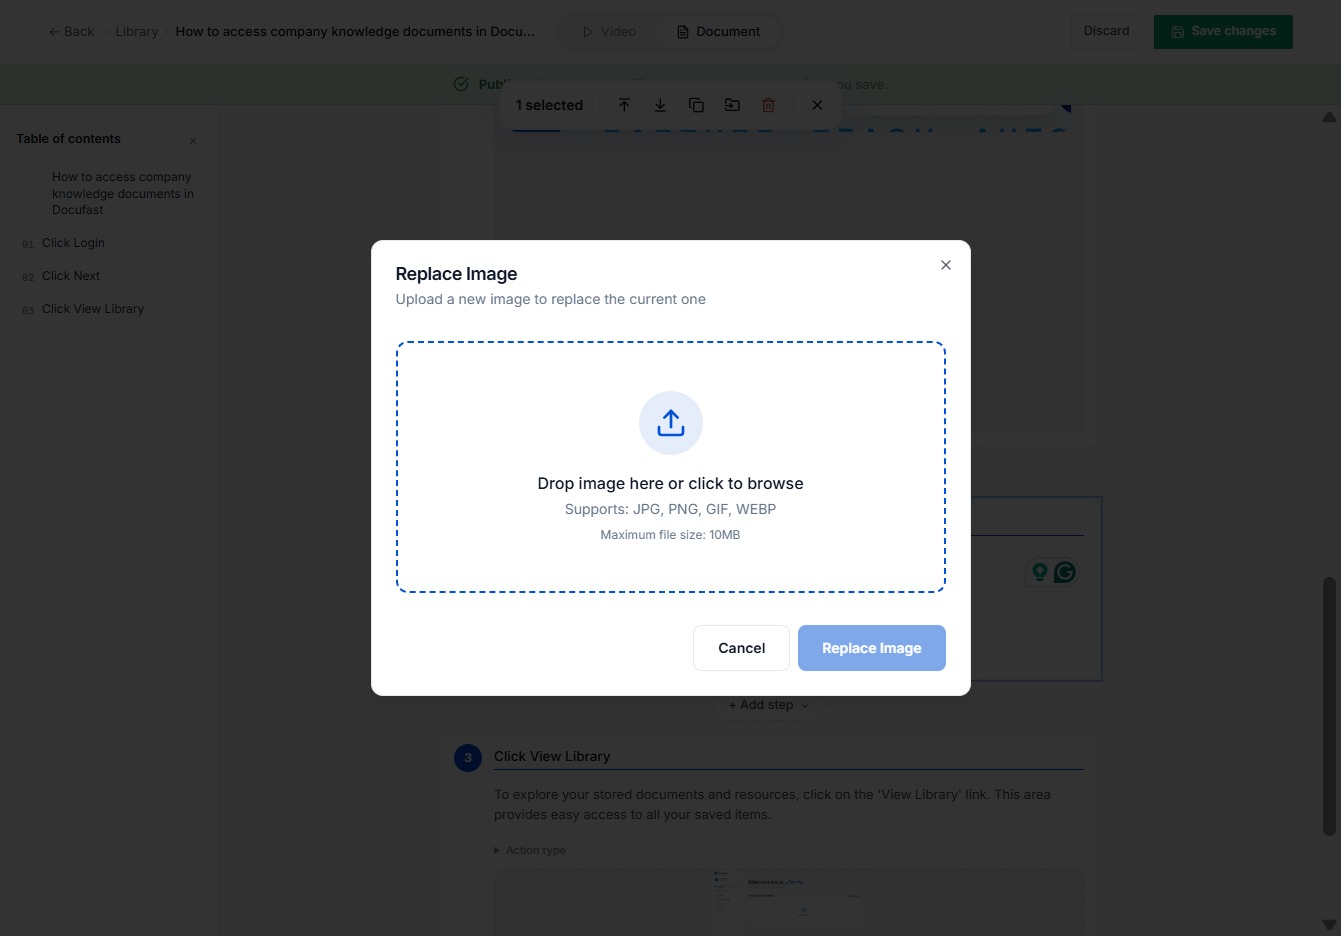
In this step, you'll replace the current image by clicking the 'Replace Image' button, allowing you to upload a new picture in its place. Make sure to select a supported file type.
Loading screenshot…
100%
19
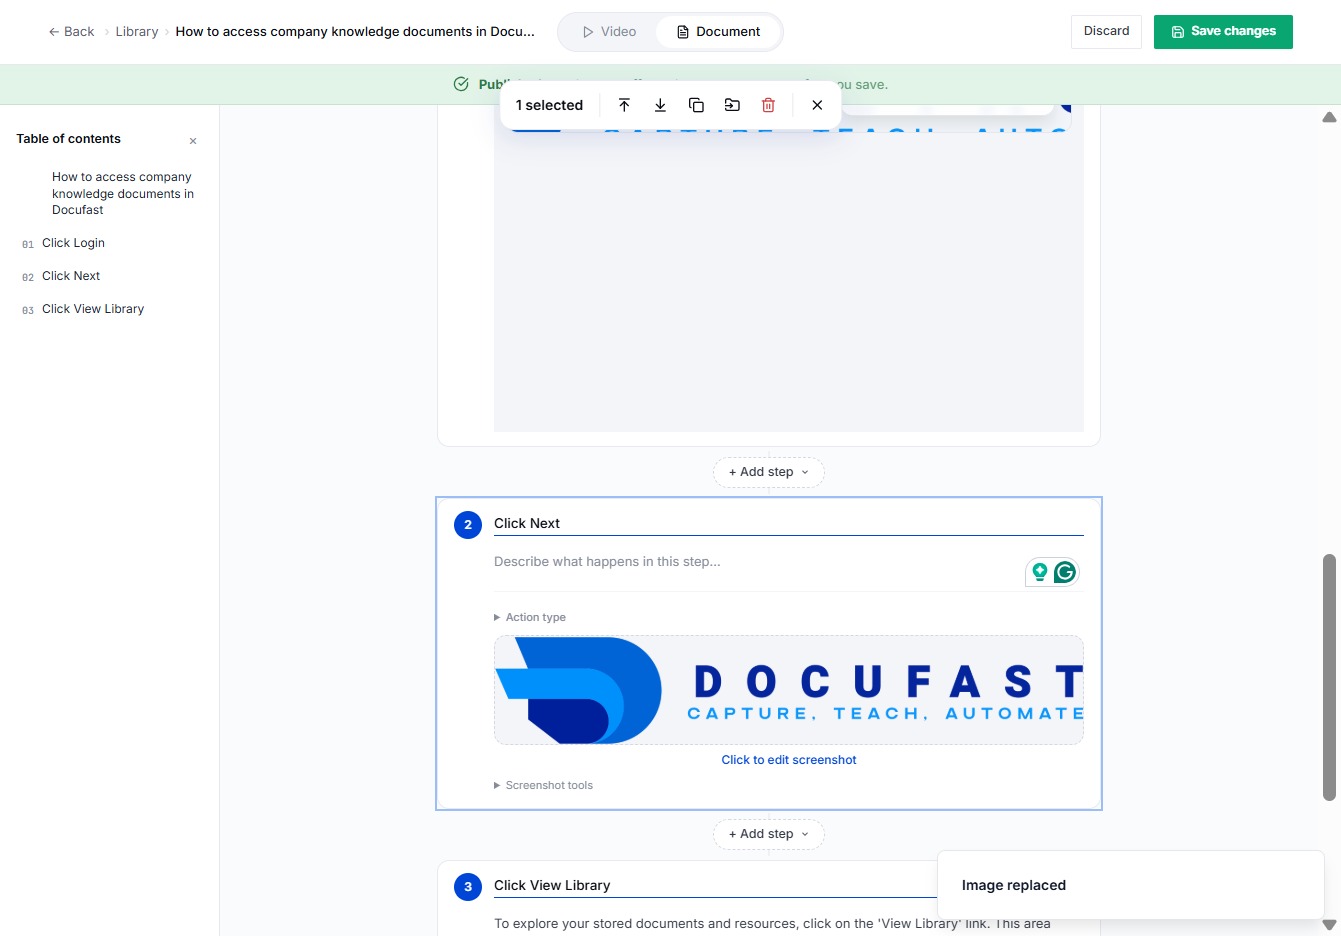
Click Replace Image
To update your current image, click on the 'Replace Image' button. This allows you to upload a new image easily, ensuring your content stays fresh and relevant.
Loading screenshot…
100%
20
Click Save Changes
To finalize your modifications, click the 'Save changes' button. This ensures your updates are stored, allowing your workflow to continue smoothly and efficiently.