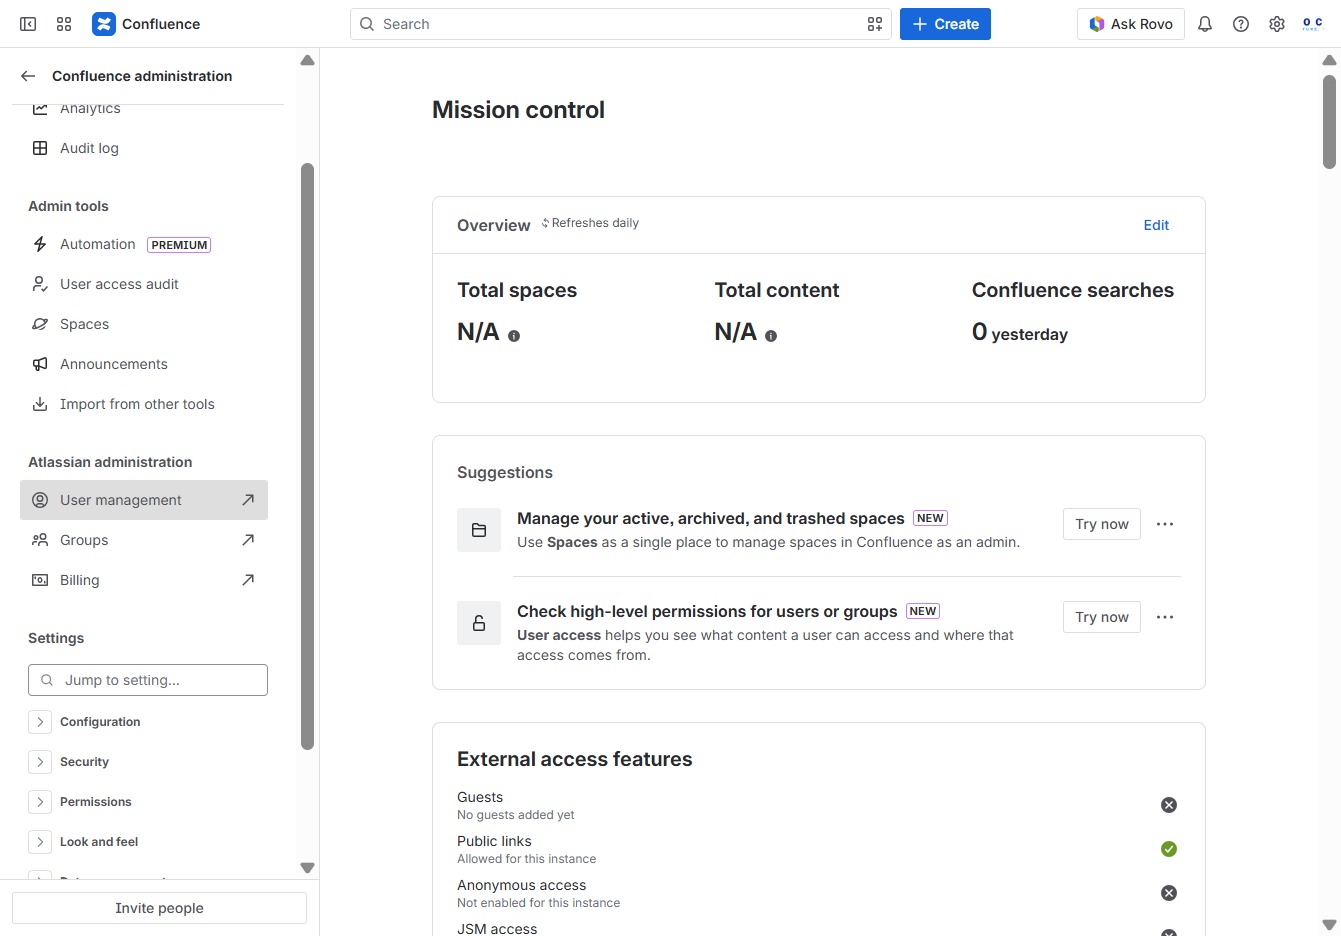
Click the Confluence administration link
This action will take you to the Confluence administration settings, where you can manage site configurations, user permissions, and other administrative features.

Loading screenshot…
100%
In this guide, you'll learn how to create user groups in Confluence by navigating through the administration settings, managing user access, and finalizing group configurations.
 viktoria
In this guide, you'll learn how to create user groups in Confluence by navigating through the administration settings, managing user access, and finalizing group configurations. Follow the steps to effectively organize your team and assign permissions for streamlined collaboration.
This action will take you to the Confluence administration settings, where you can manage site configurations, user permissions, and other administrative features.
This action opens the User Management section where you can manage user access, roles, and permissions within the Confluence administration interface.
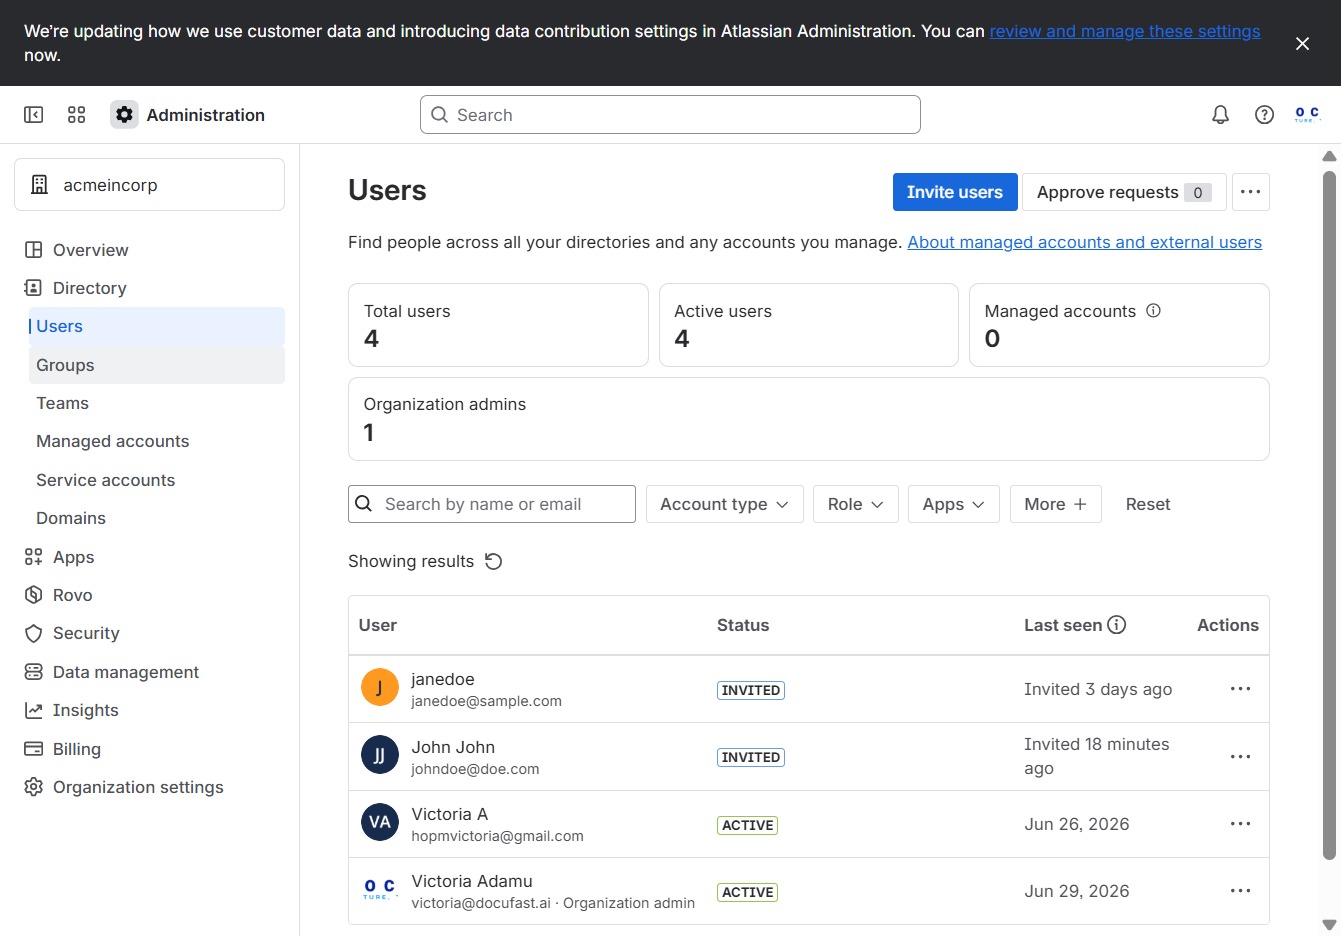
Selecting the 'Groups' option will allow you to manage user groups associated with the organization, providing access to group settings and configurations.
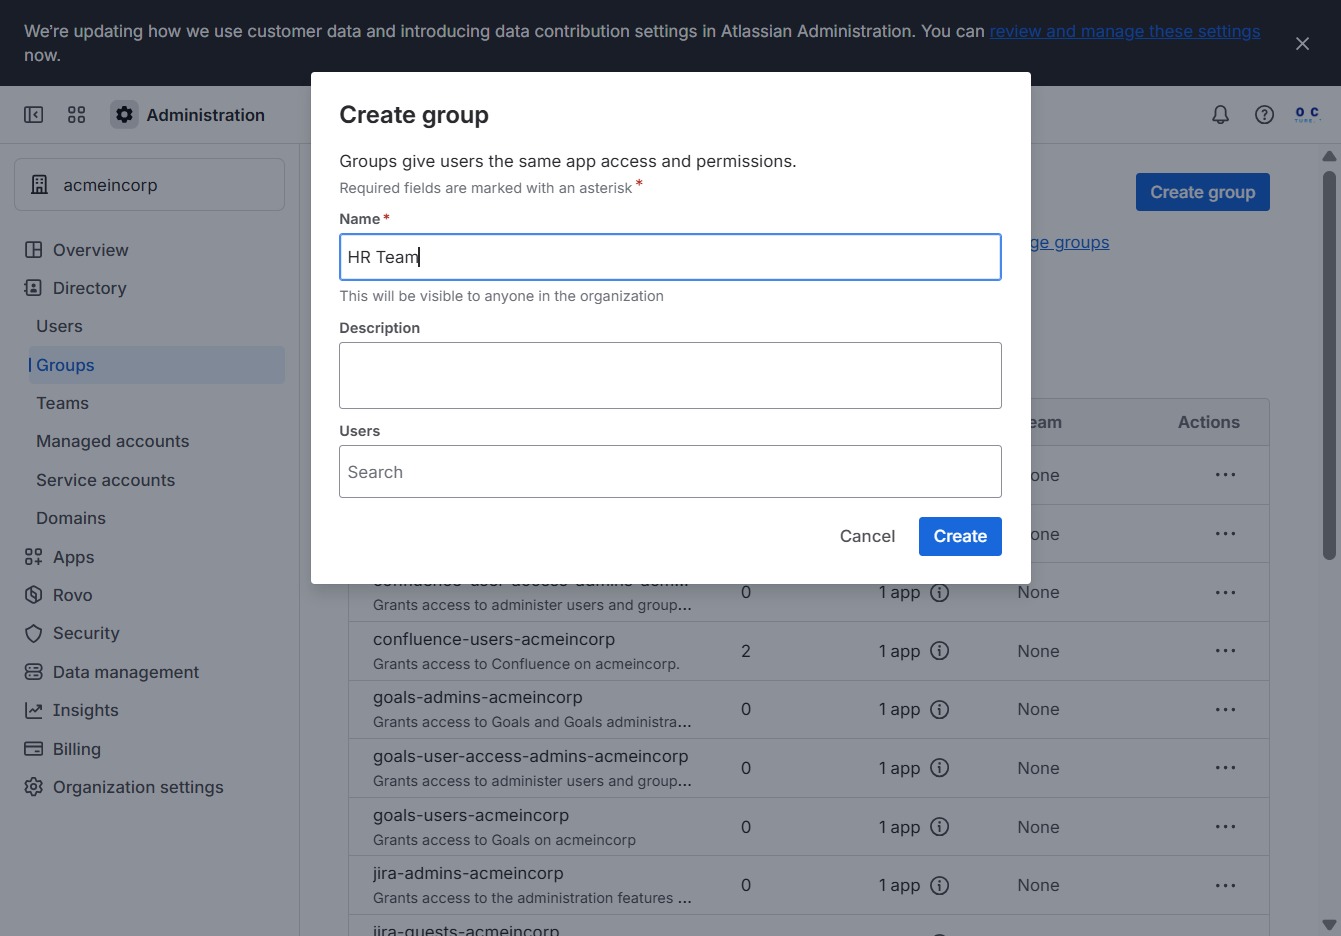
This will open a dialog where you can set up a new user group, allowing you to manage access and permissions for multiple users simultaneously.

Enter 'HR Team' in the Name field to identify the group you are creating. This name will be visible to all users in the organization.
This action allows you to select and add users to the 'HR Team' group, enabling them to access the same app permissions.

Selecting 'janedoe' adds this user to the group you are creating. This step is essential for granting access and permissions to the selected user.
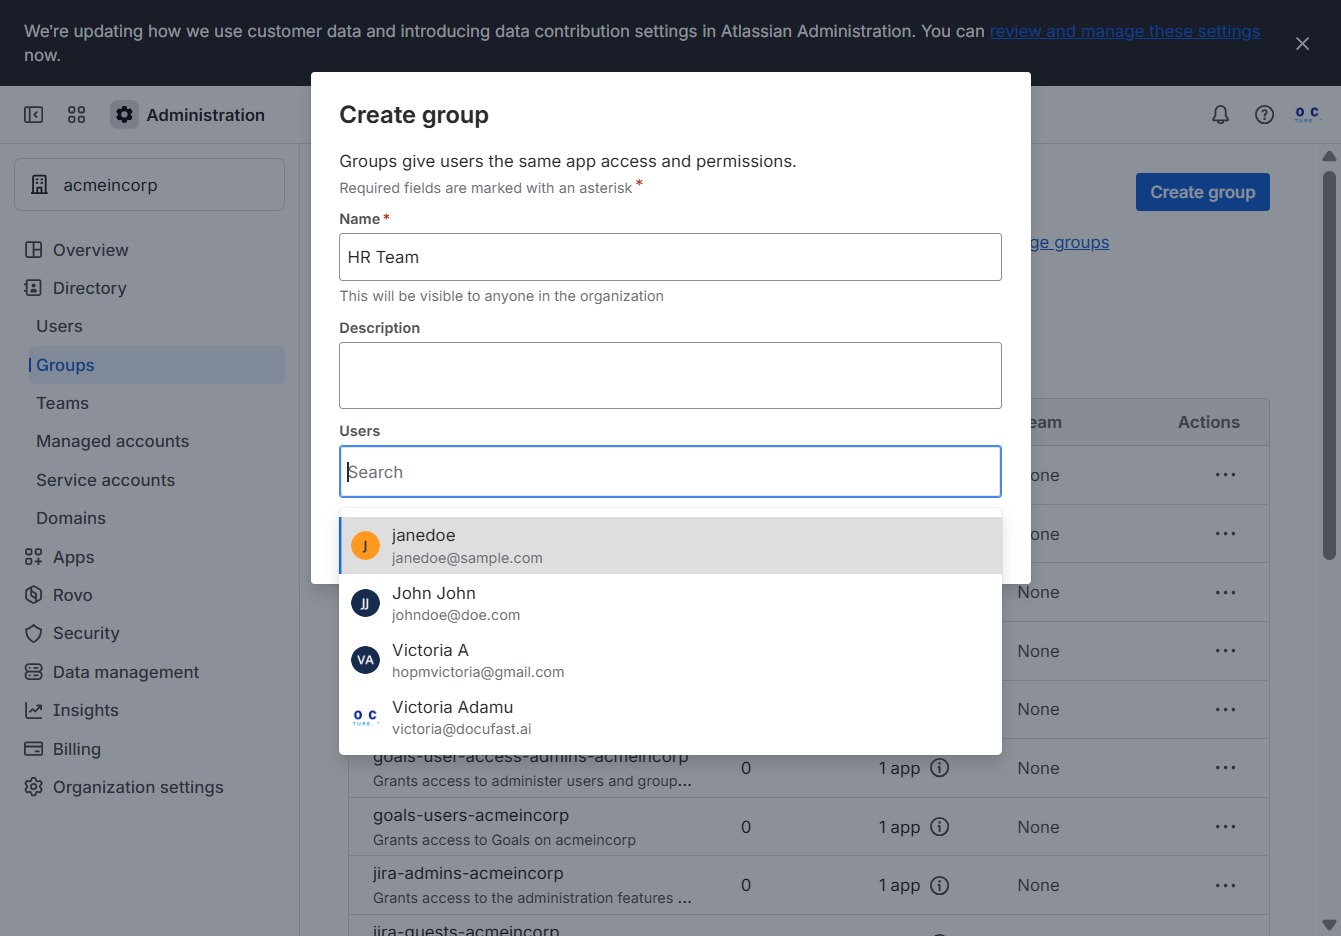
This action will finalize the creation of the user group with the specified name and associated users, allowing them access to the same app permissions.
