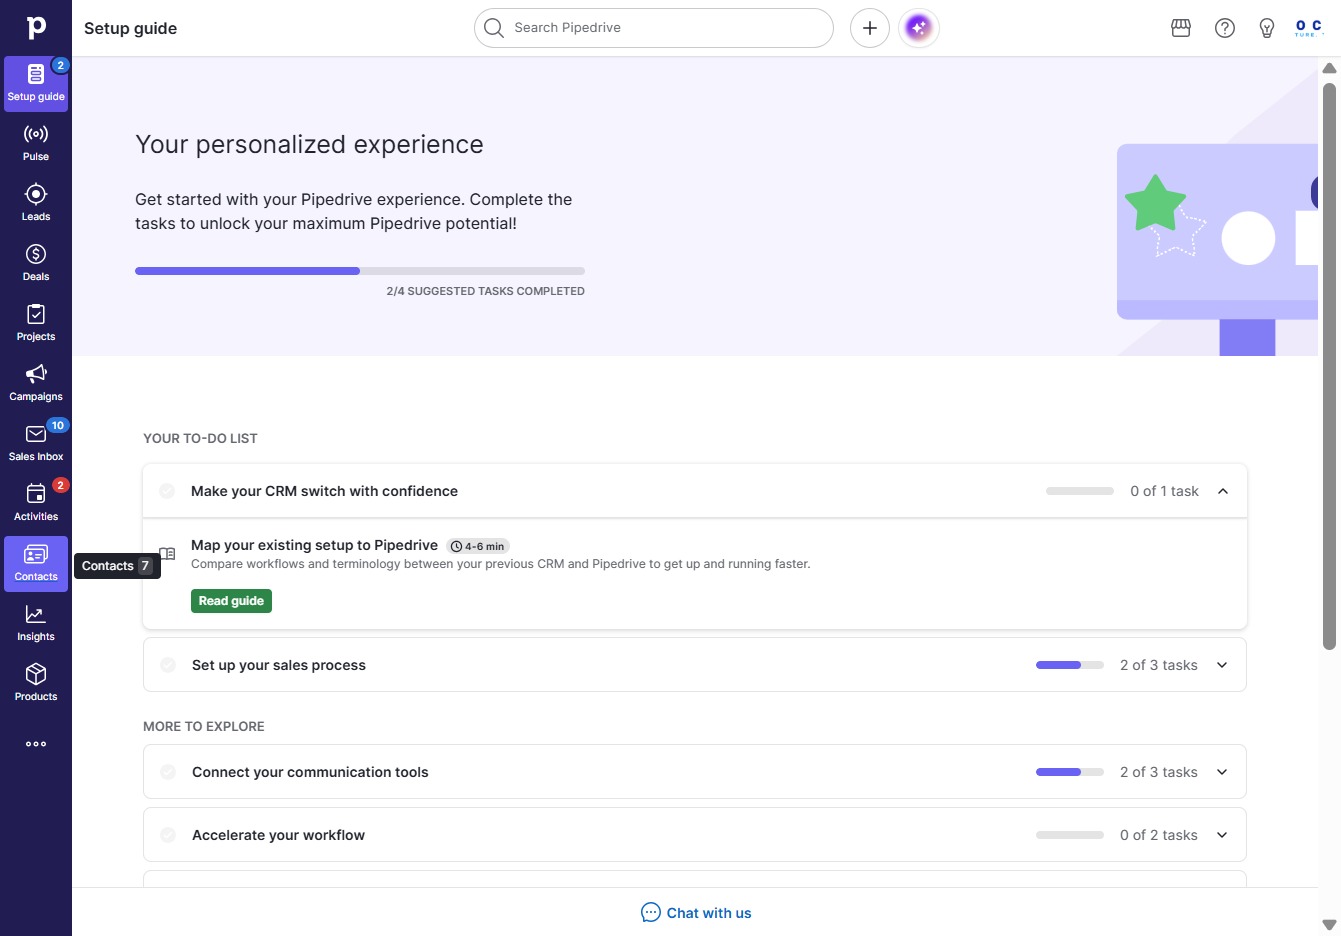
Click the Contacts icon
Clicking the Contacts icon will navigate you to the section where you can manage and view your saved contacts in Pipedrive.
Loading screenshot…
100%
In this guide, you'll learn how to efficiently bulk update your contacts in Pipedrive, from navigating the contact sections to editing details like labels and phone numbers.
 viktoria
In this guide, you'll learn how to efficiently bulk update your contacts in Pipedrive, from navigating the contact sections to editing details like labels and phone numbers. Follow our step-by-step instructions to streamline your contact management process effectively.
Clicking the Contacts icon will navigate you to the section where you can manage and view your saved contacts in Pipedrive.
Clicking this link opens a menu that allows you to add new contacts or perform additional actions related to managing your contacts.

Clicking here opens the bulk edit panel, allowing you to modify the selected contacts' details such as labels, phone numbers, and organizations.

Selecting this option will allow you to initiate the desired action related to bulk editing your contacts. Ensure the correct contacts are selected before proceeding with any changes.
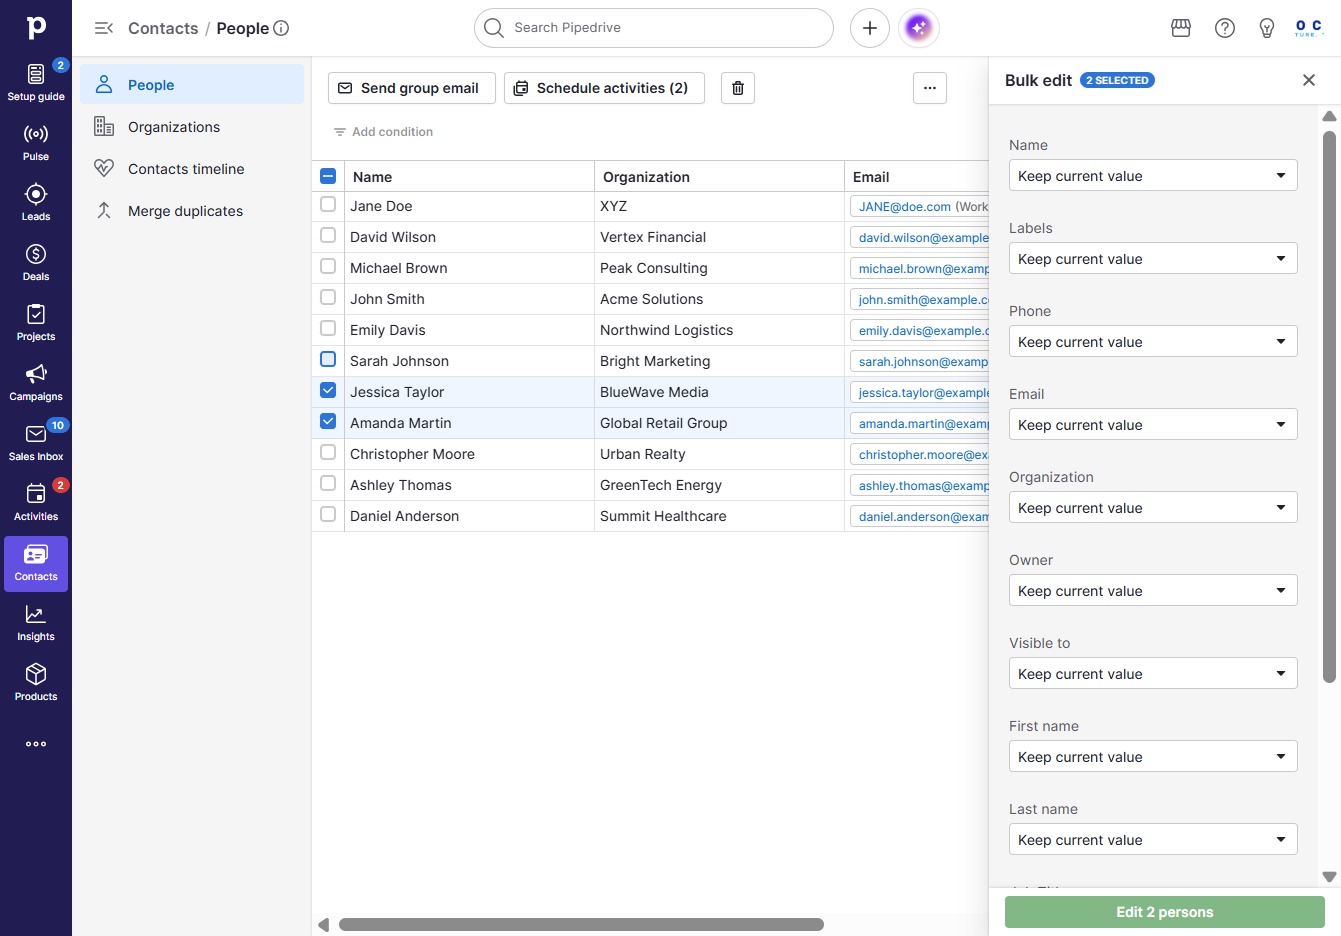
This action opens the bulk edit options for the selected contacts, allowing you to modify their details such as labels, phone numbers, and organization information.
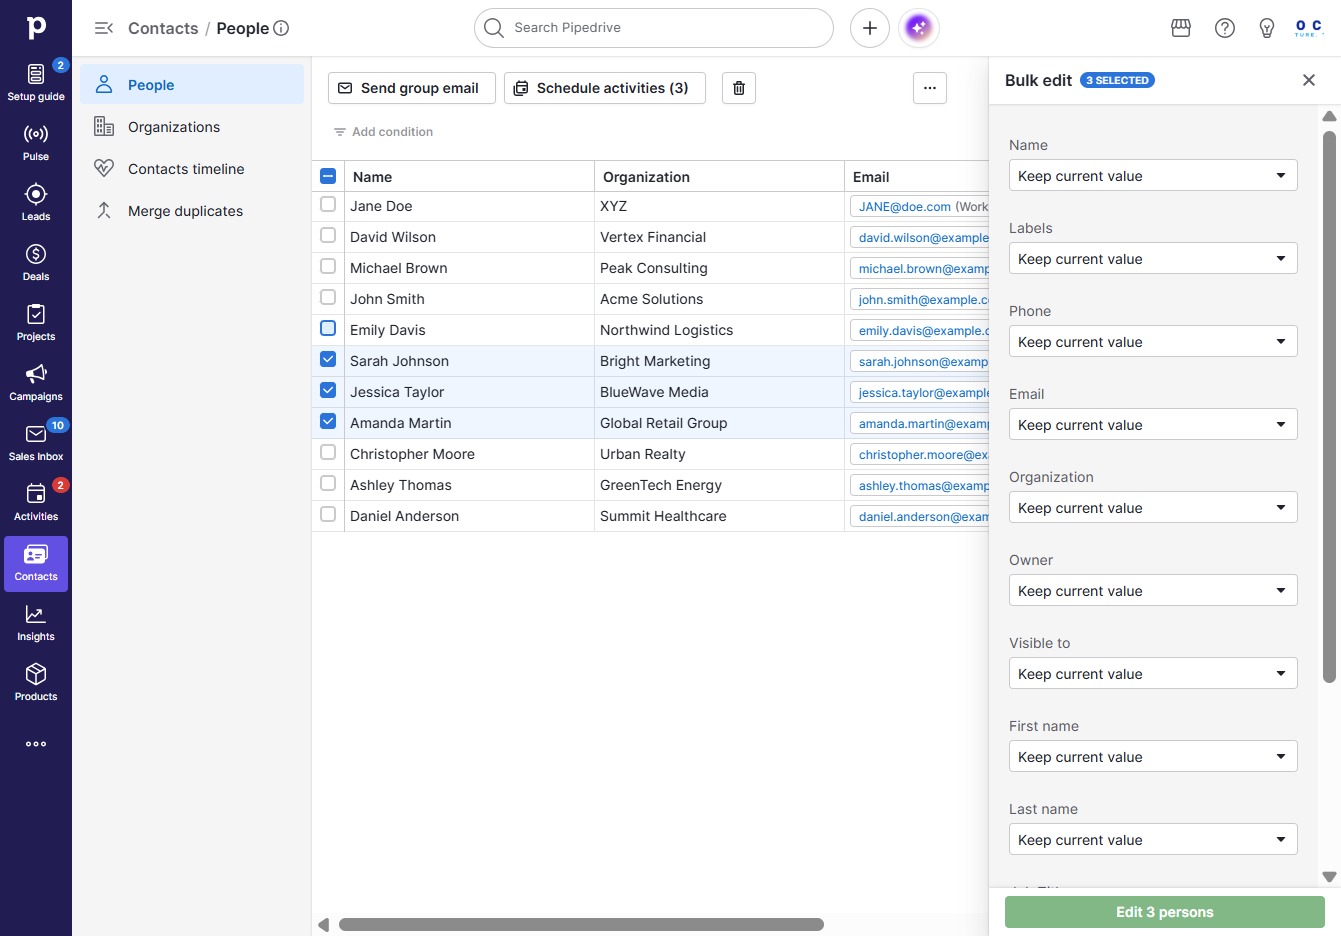
This action will retain the existing values for the selected contacts' fields during the bulk editing process.

Selecting the 'Add label' option allows you to categorize the selected contacts, which can help in organizing and managing your contacts effectively.

This action allows you to input new labels for the selected contacts, which can help organize and categorize them for better management.

Selecting the 'Warm lead' label allows you to categorize contacts based on their engagement level, streamlining your follow-up process.
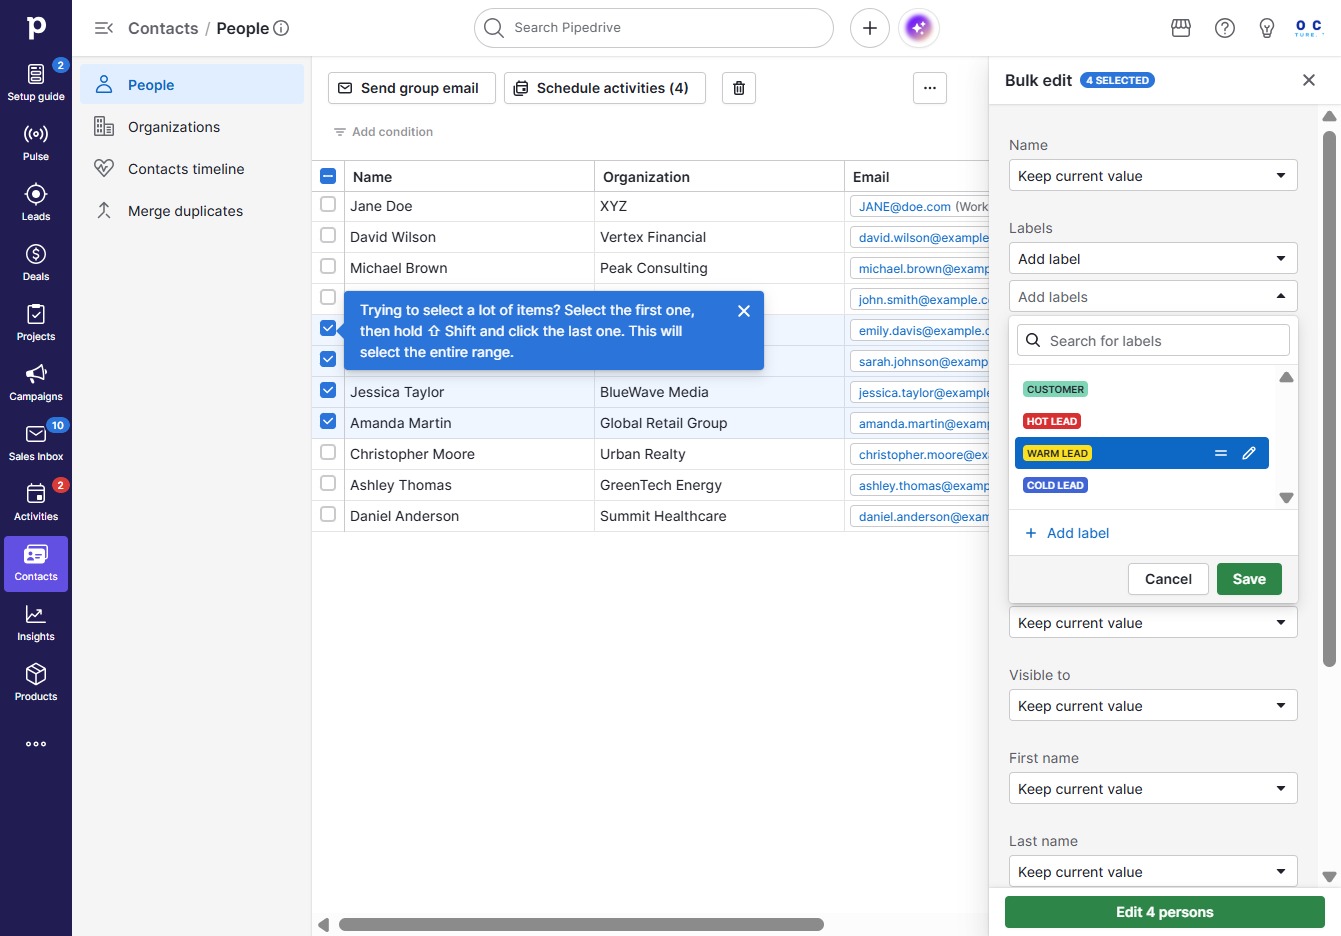
Clicking the Save button will finalize and store the changes made to your selected contacts in the bulk edit section.
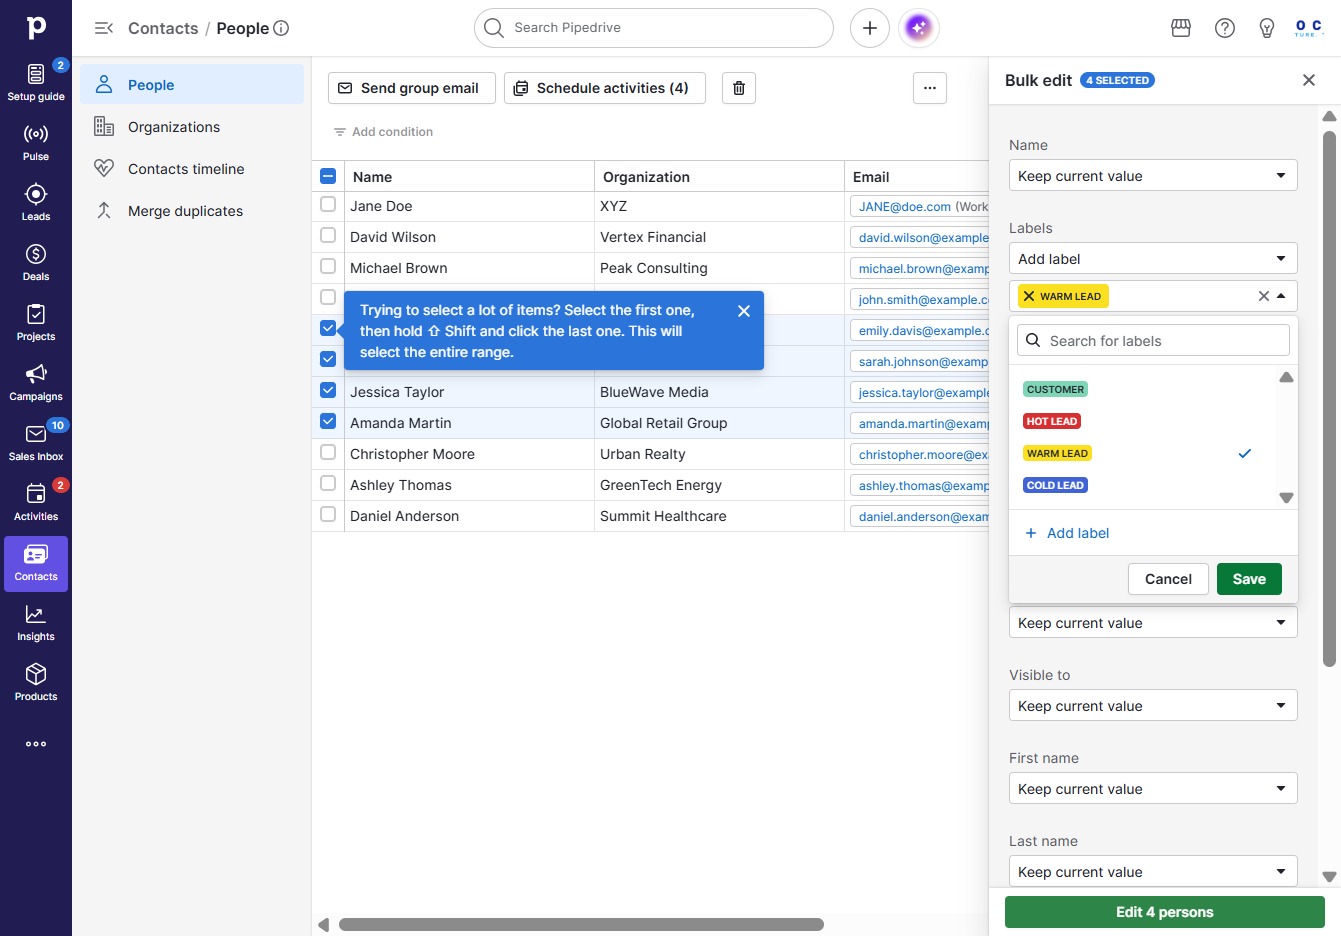
Selecting 'Keep current value' ensures that the current information for the chosen individuals remains unchanged during the bulk edit. This option is crucial when you want to preserve existing data for specific fields while editing others.

By clicking this option, you can modify the selected fields for the chosen contacts in the bulk edit menu. This allows you to update specific details such as 'Owner' and 'Job Title' efficiently.

This action reveals a dropdown menu with various options for managing contacts and activities. You can navigate through the menu to access features related to bulk edits or group emails.
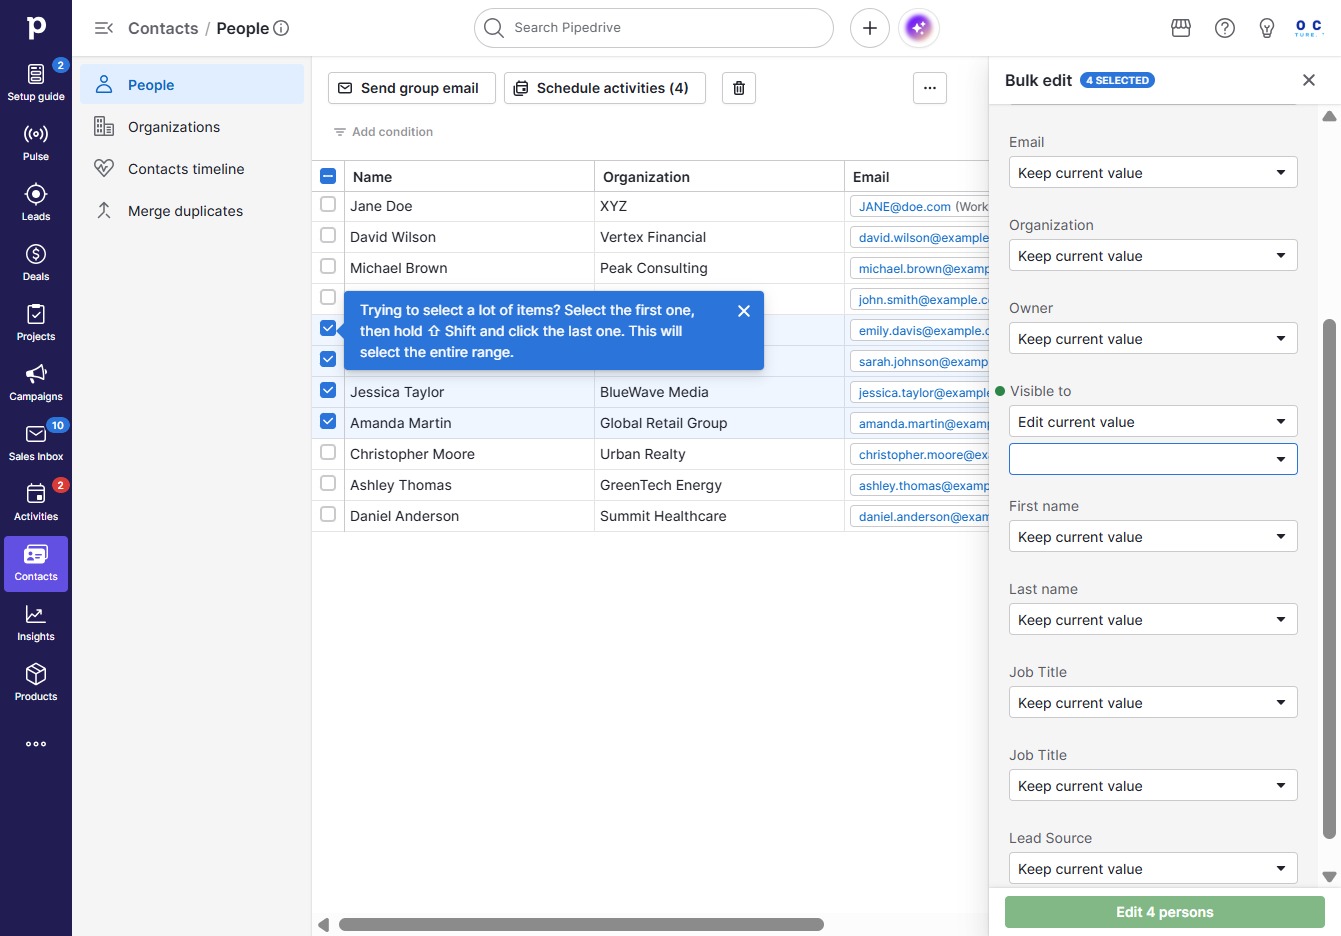
Select the desired visibility group and its sub-groups for the item. This setting determines who can view the item in your list.

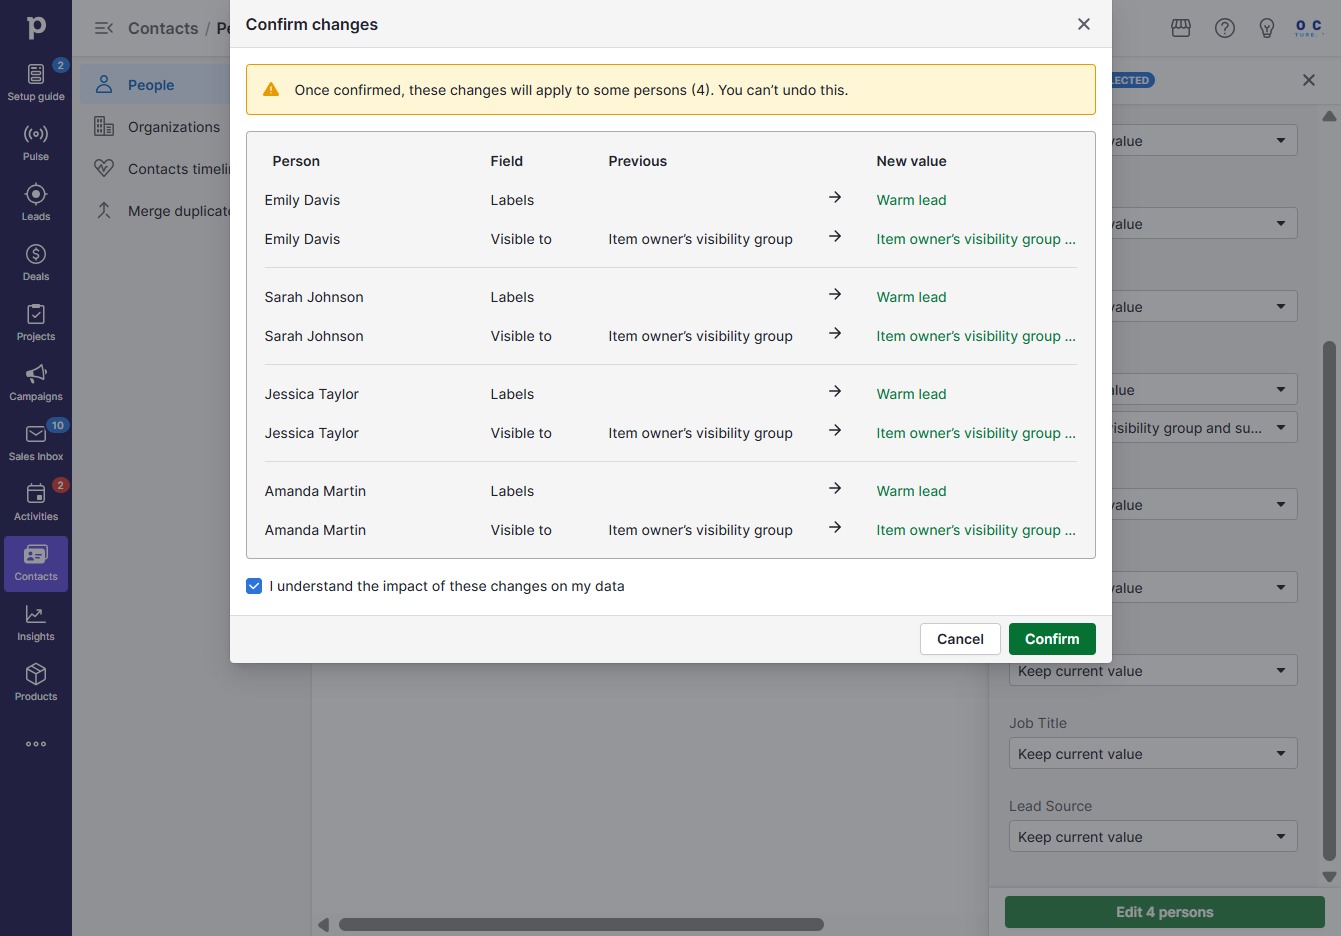
By clicking this option, you will initiate the bulk editing process for the selected four persons, allowing you to modify their information simultaneously in the corresponding edit fields.
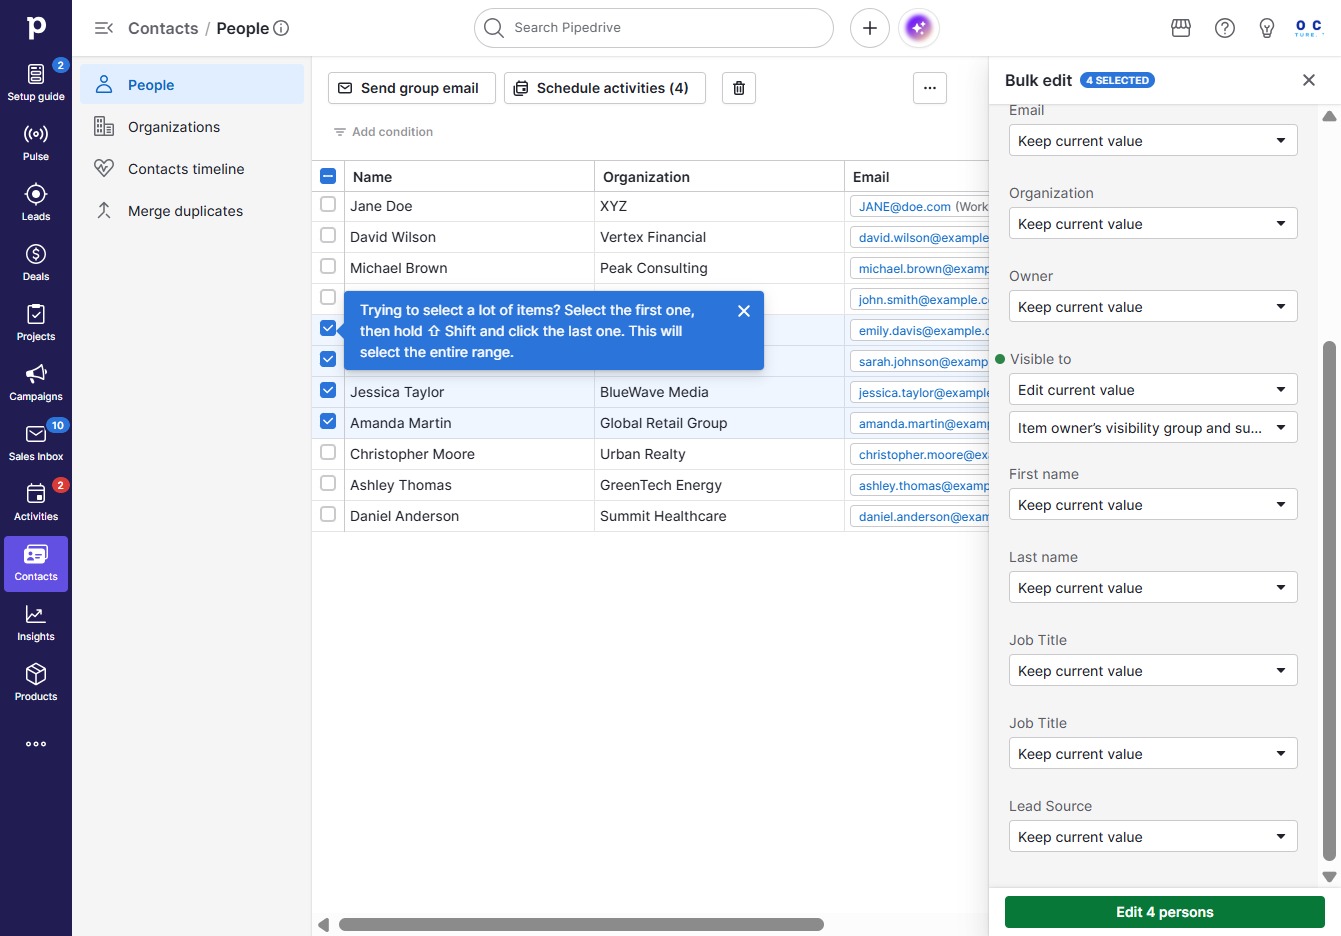
This action confirms the changes you've made to the visibility settings for the selected contacts. After clicking, the new values will be applied as listed in your confirmation dialog.

This action finalizes the changes made to the visibility settings for the selected persons. Once confirmed, these updates will take effect and cannot be undone.