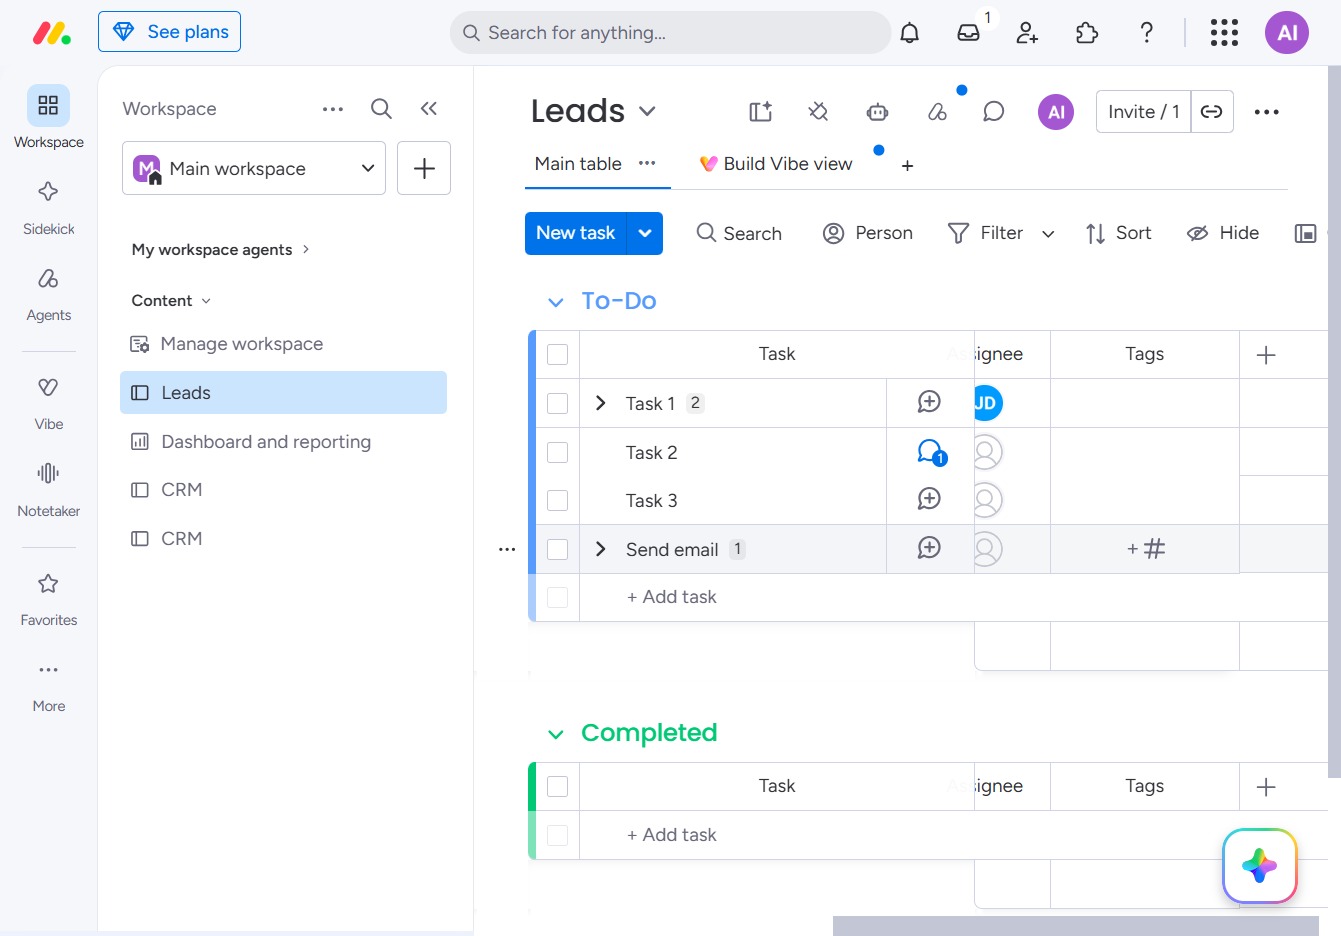
Click the BoardLeads section
This action selects the BoardLeads area, allowing you to manage and access your leads within the CRM environment.

Loading screenshot…
100%
This how-to guide demonstrates the step-by-step process of adding tags to items in the Leads section of your CRM, enabling you to better organize and manage tasks.
 viktoria
This how-to guide demonstrates the step-by-step process of adding tags to items in the Leads section of your CRM, enabling you to better organize and manage tasks. Learn how to navigate the interface, create new tags, and efficiently categorize your tasks for improved task management and retrieval.
This action selects the BoardLeads area, allowing you to manage and access your leads within the CRM environment.
This action opens a menu allowing you to add a new column to your Leads table, enabling you to customize the information displayed for each task.

Clicking this will open a dialog to customize and add a new column to your Leads table, allowing you to specify the type and properties of the column.

Input 'tags' in the Search box to filter and describe your columns within the Leads section. This will help you quickly locate relevant column types for better organization and task management.

Selecting the Tags option will allow you to filter or organize entries based on specific tags associated with your tasks in the Leads section.

Clicking this link will open the task creation interface where you can add details for new tasks related to your leads.
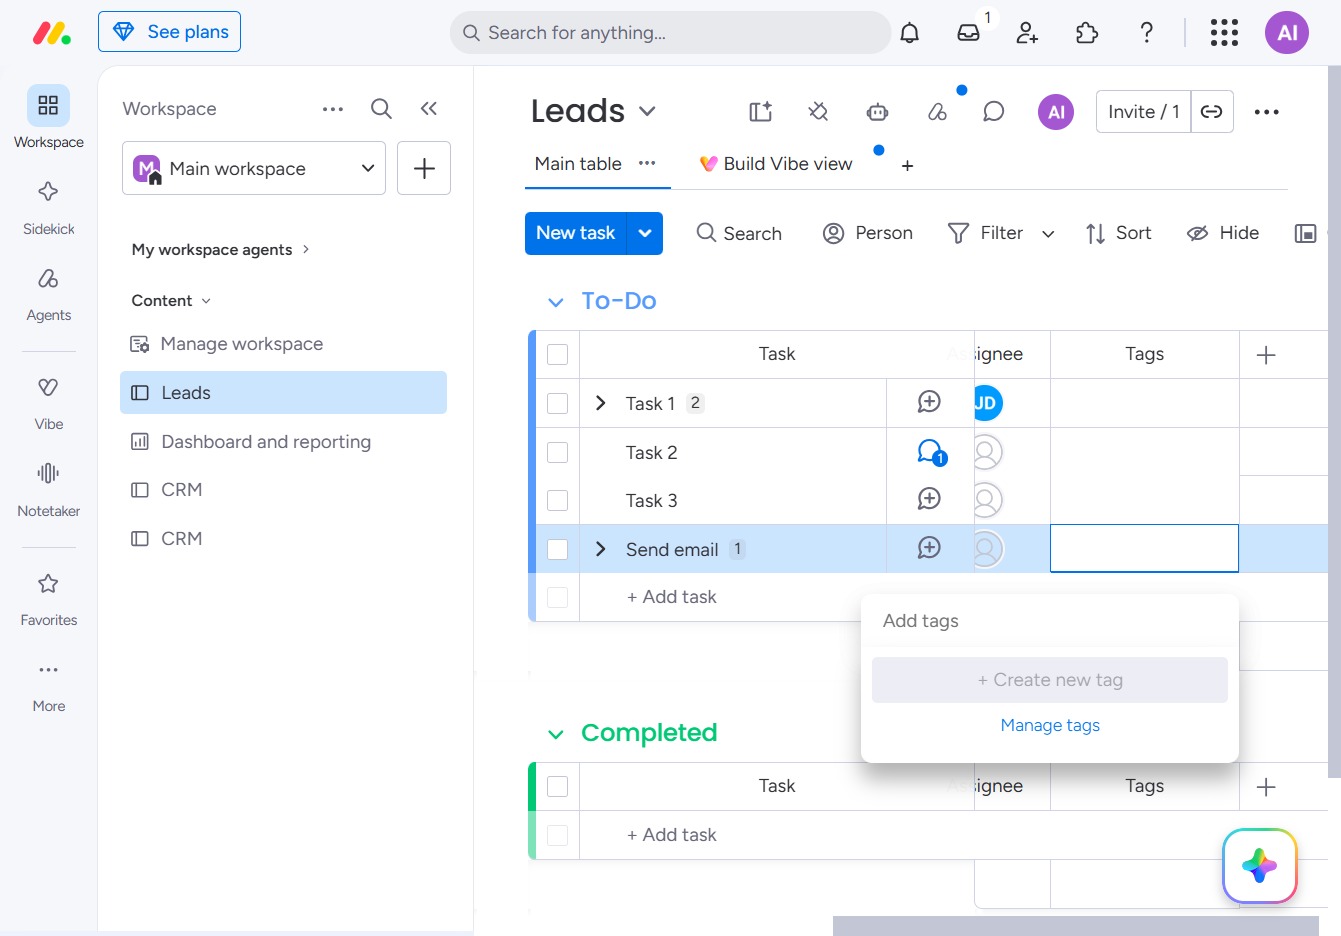
Clicking this option will allow you to create new tags or manage existing ones for your tasks in the Leads section.
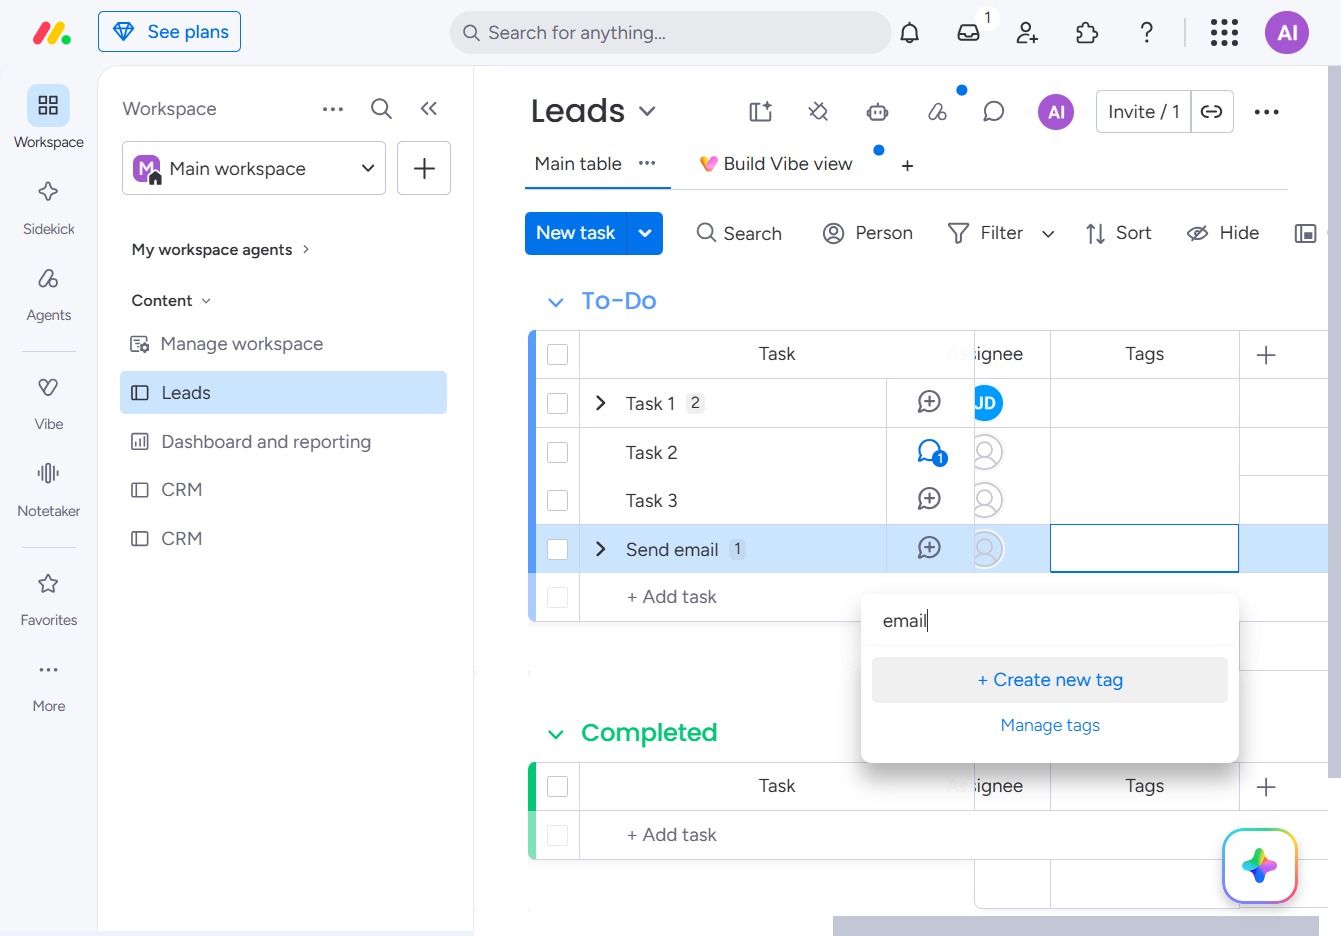
In the 'Add tags' field, type 'email' to categorize your task appropriately. This helps in organizing and retrieving tasks related to email communications effectively.

This action allows you to create a new tag for categorizing tasks in your Leads workspace. Enter the tag name in the input field that appears after clicking.