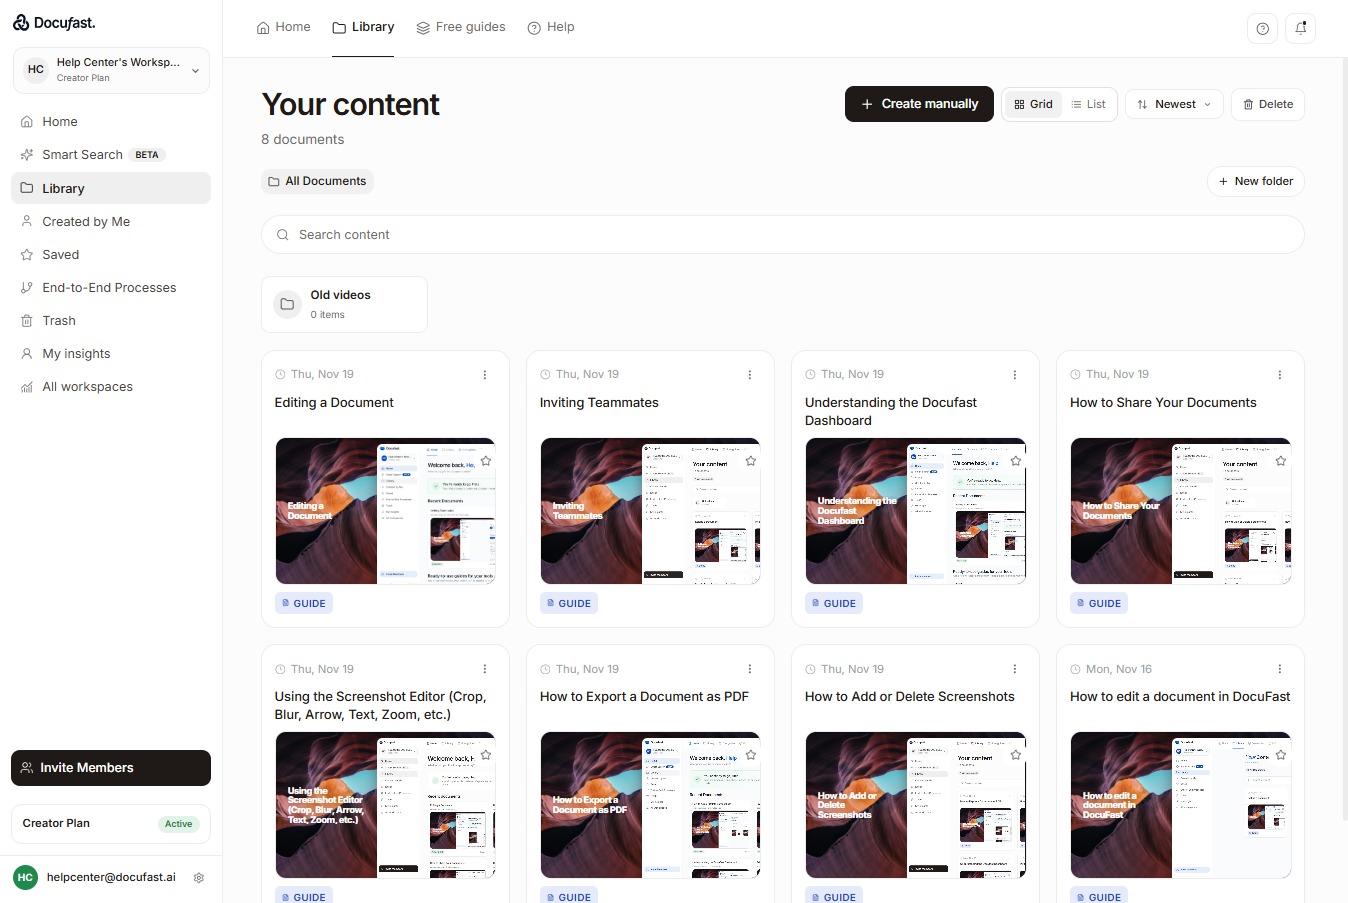
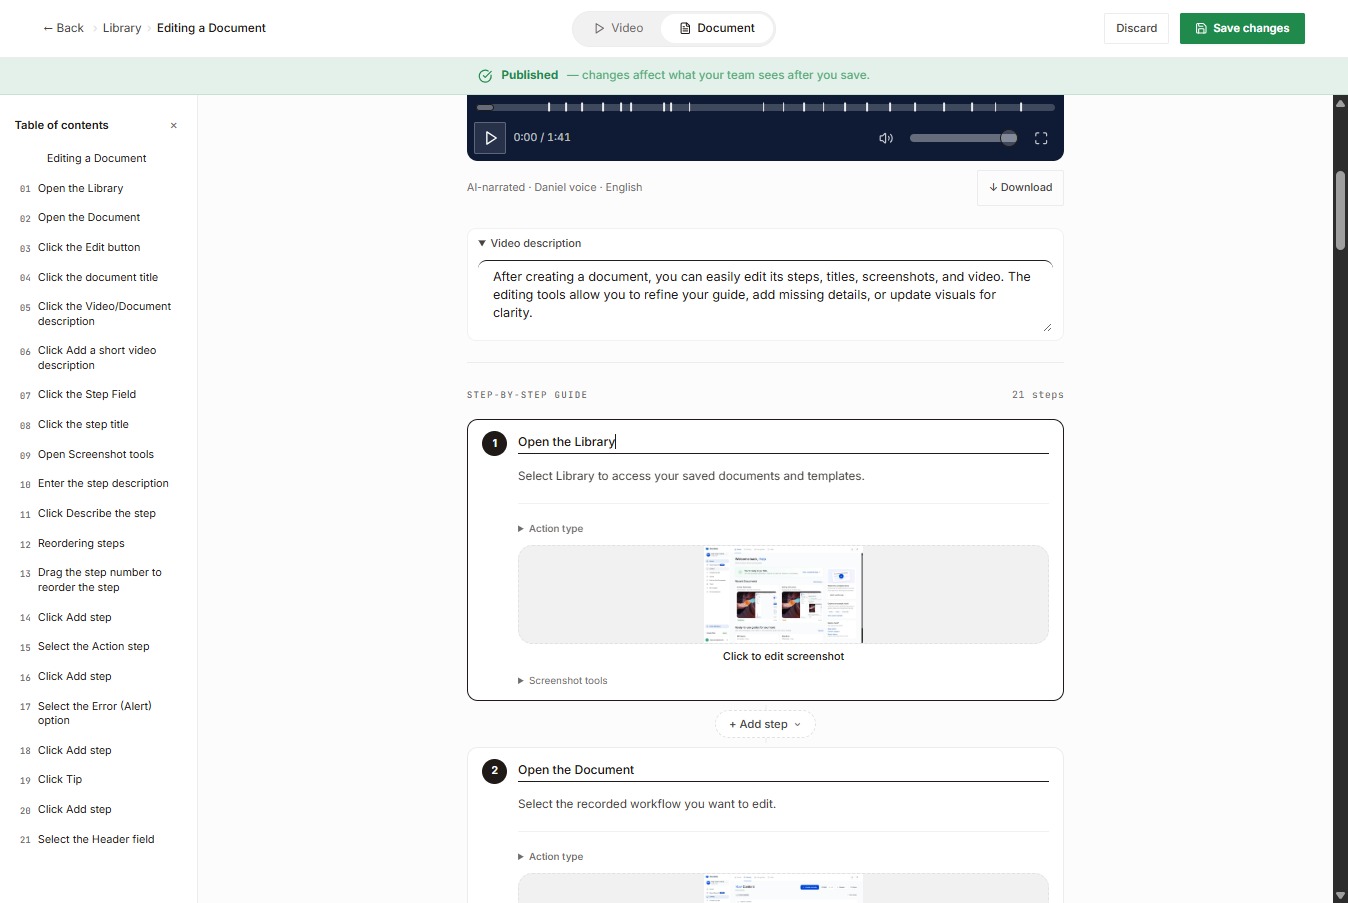
Open the Library
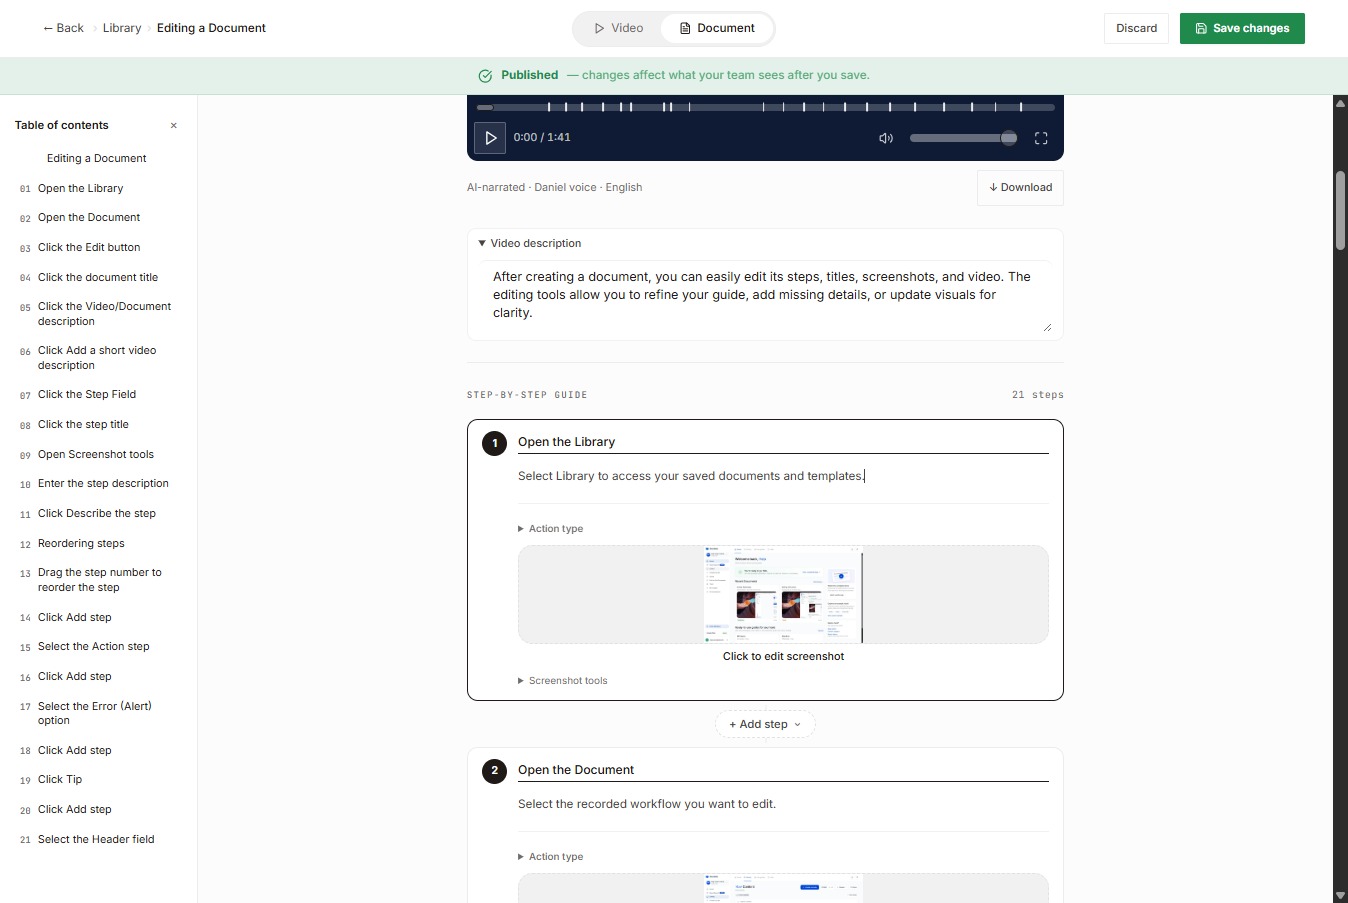
Select Library to access your saved documents and templates.
Loading screenshot…
100%
After creating a document, you can easily edit its steps, titles, screenshots, and video.
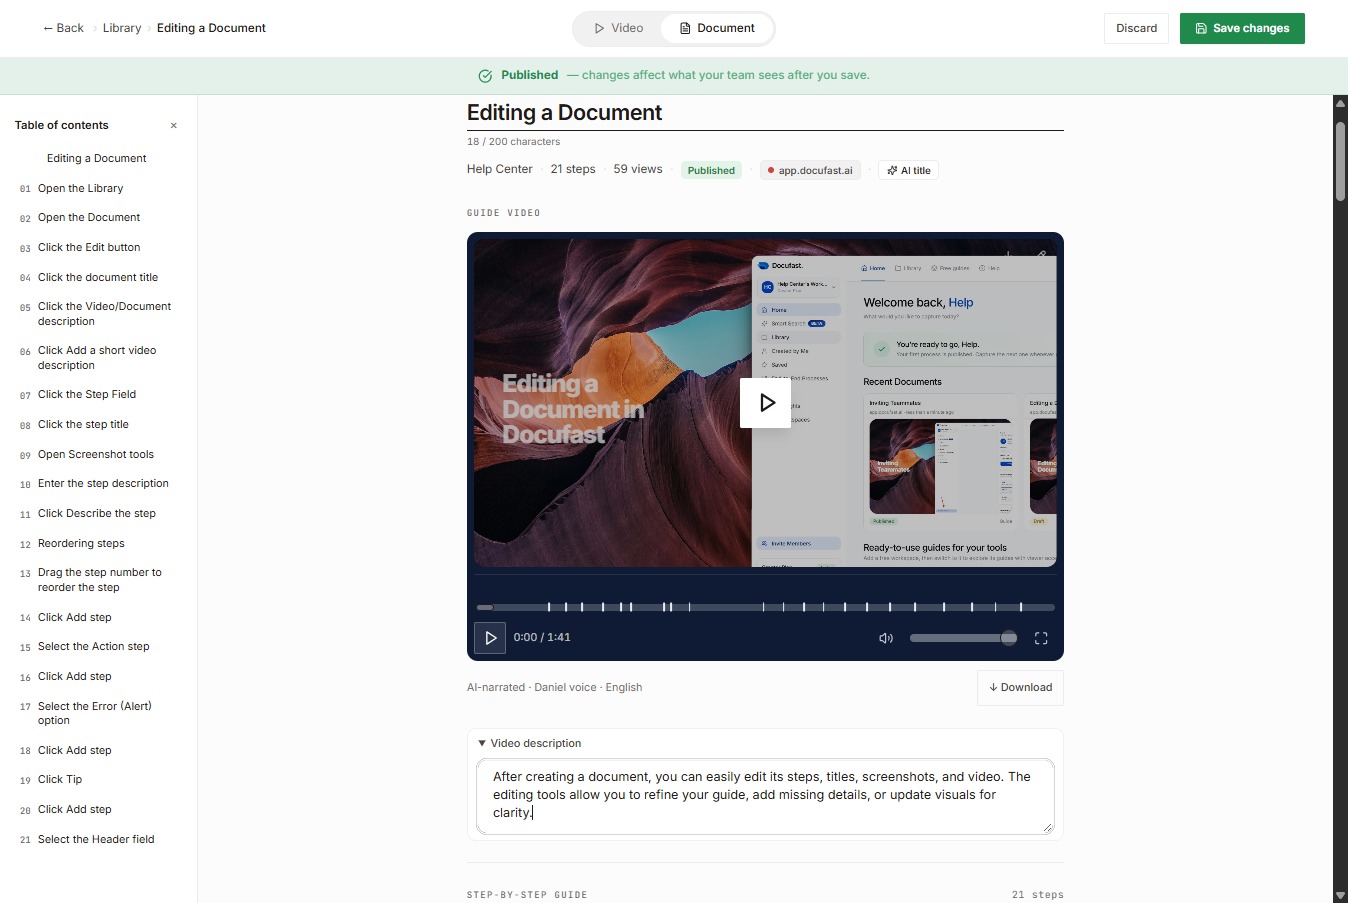
After creating a document, you can easily edit its steps, titles, screenshots, and video. The editing tools allow you to refine your guide, add missing details, or update visuals for clarity.
Select Library to access your saved documents and templates.
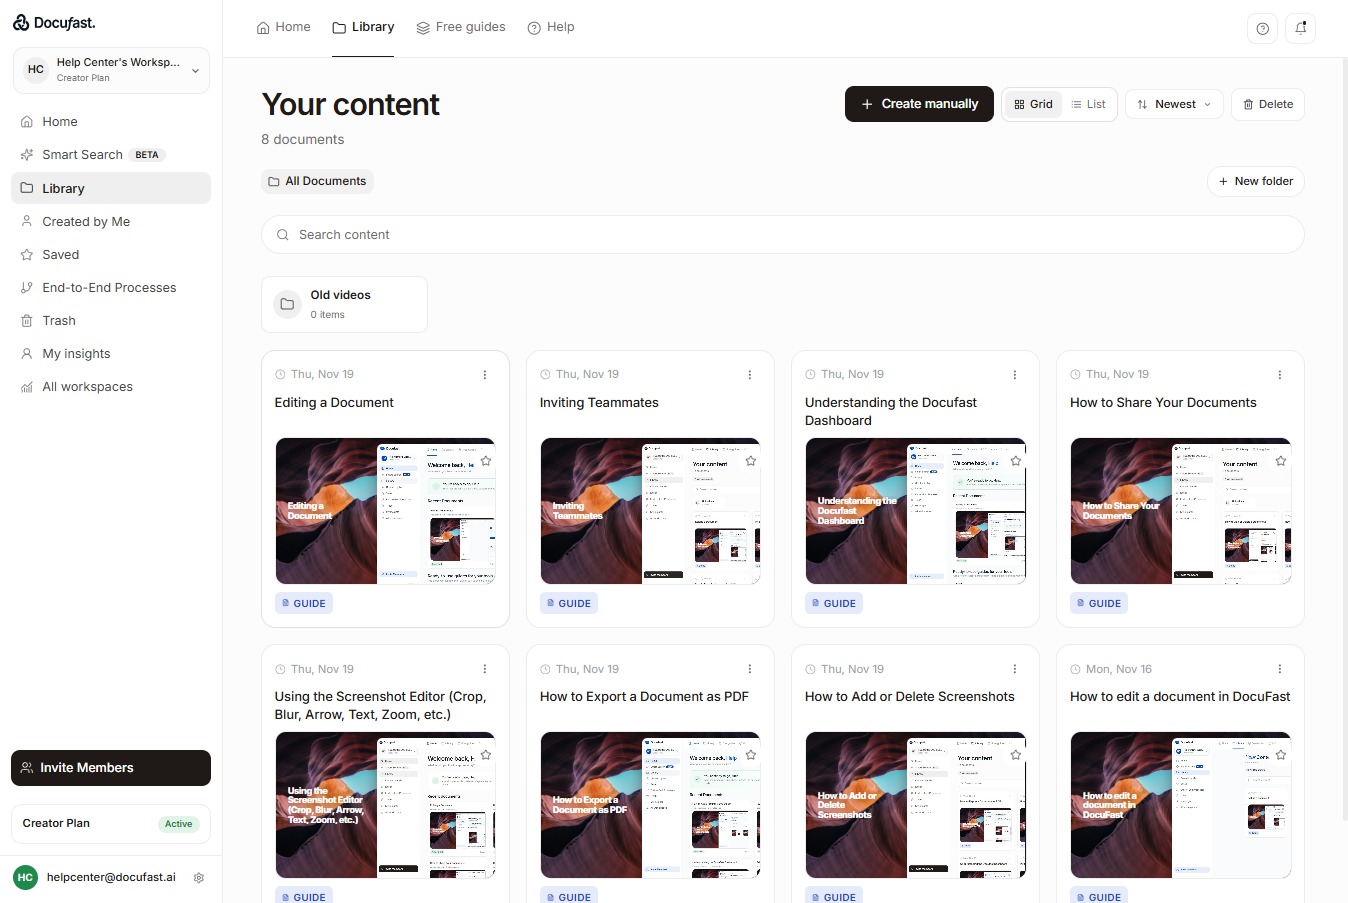
Select the recorded workflow you want to edit.
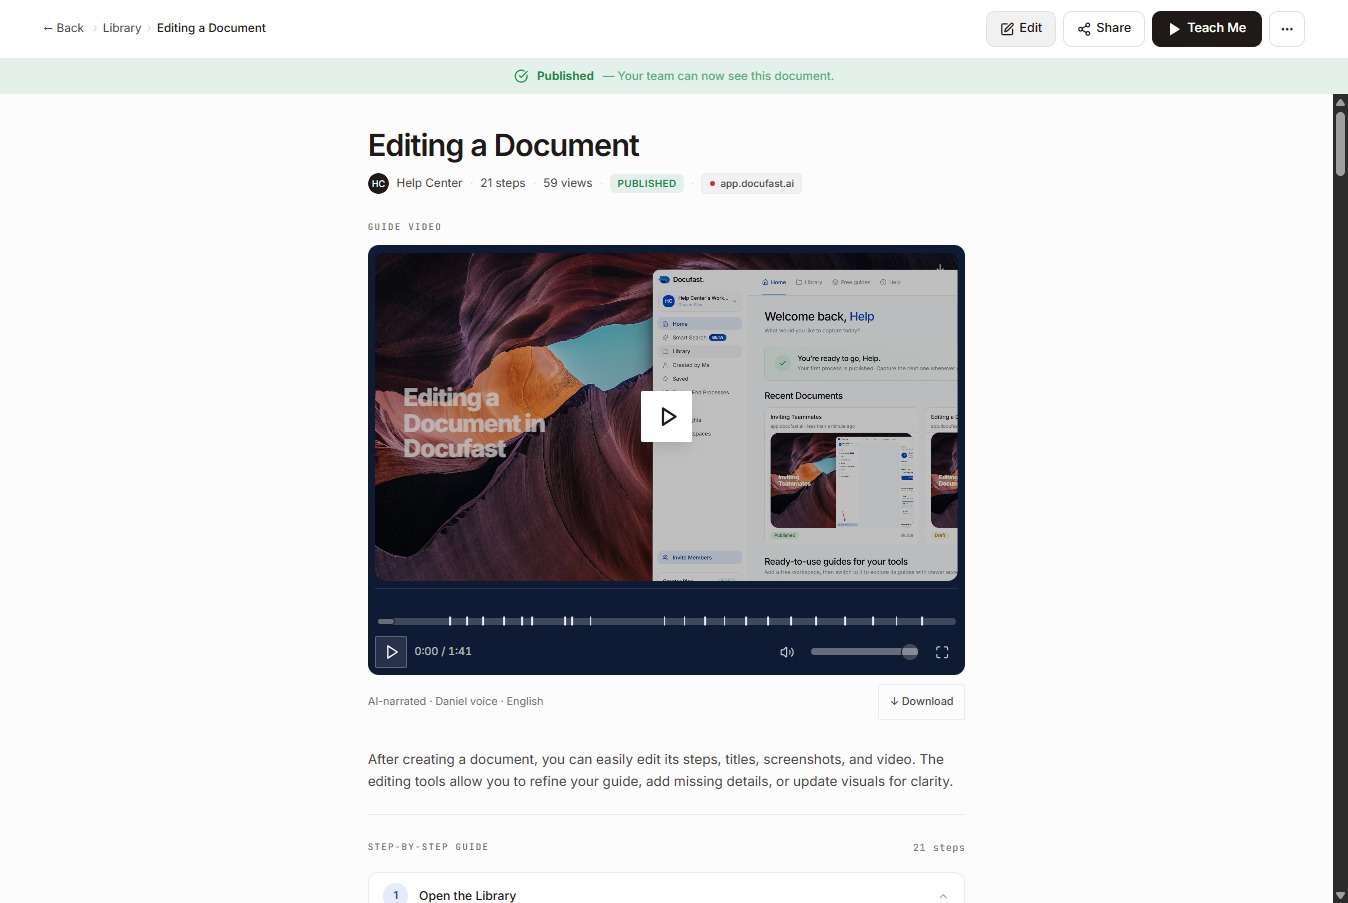
At the top of the document, select Edit to enter editing mode.
Type the new title for your document in the title field.
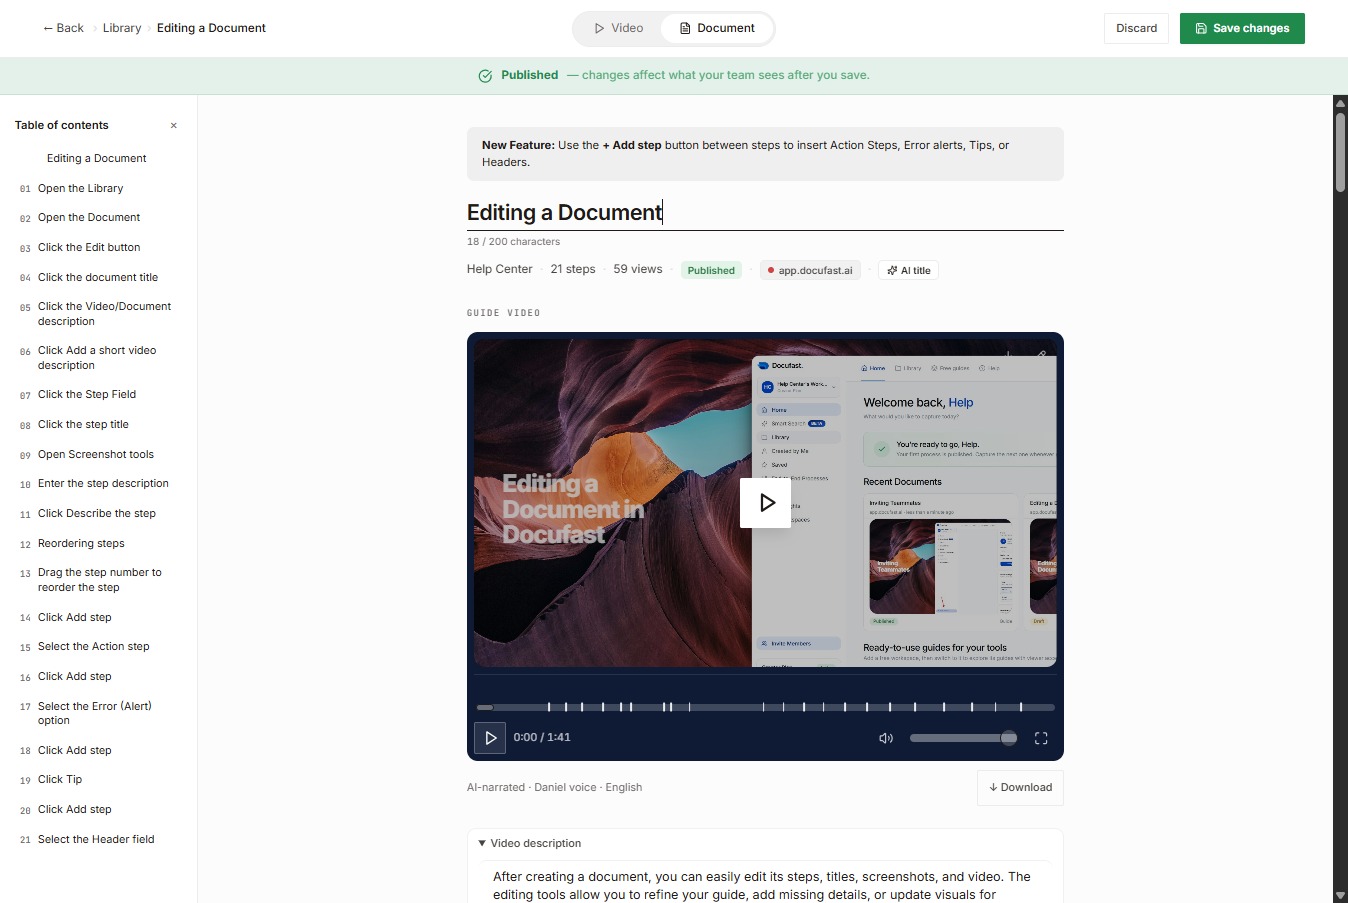
Type a brief description of the video/document in the text box to help users understand its content.
Type the title of this step in the step field provided.
Type the description of this step in the Step description field.
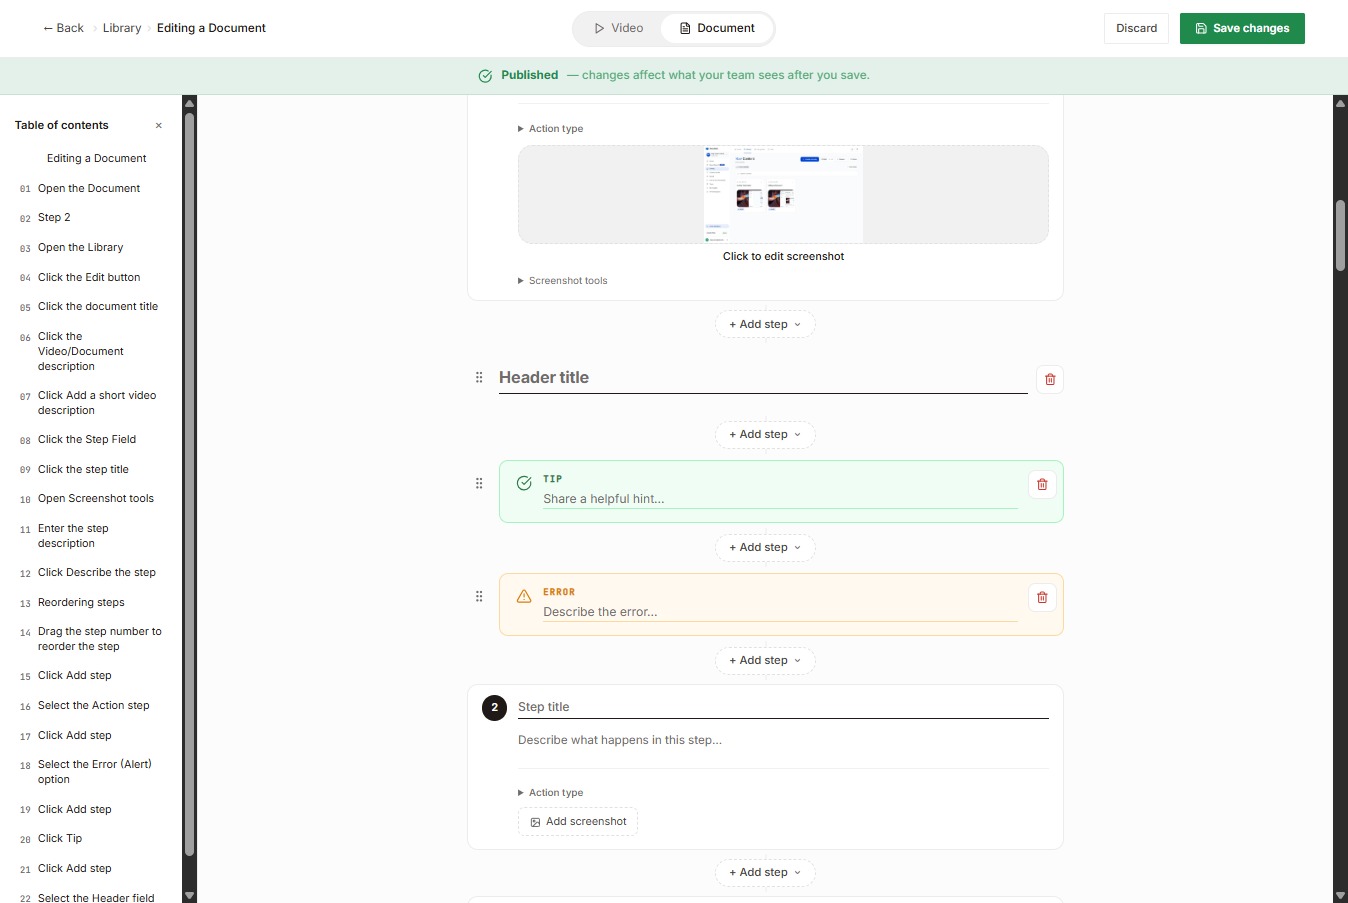
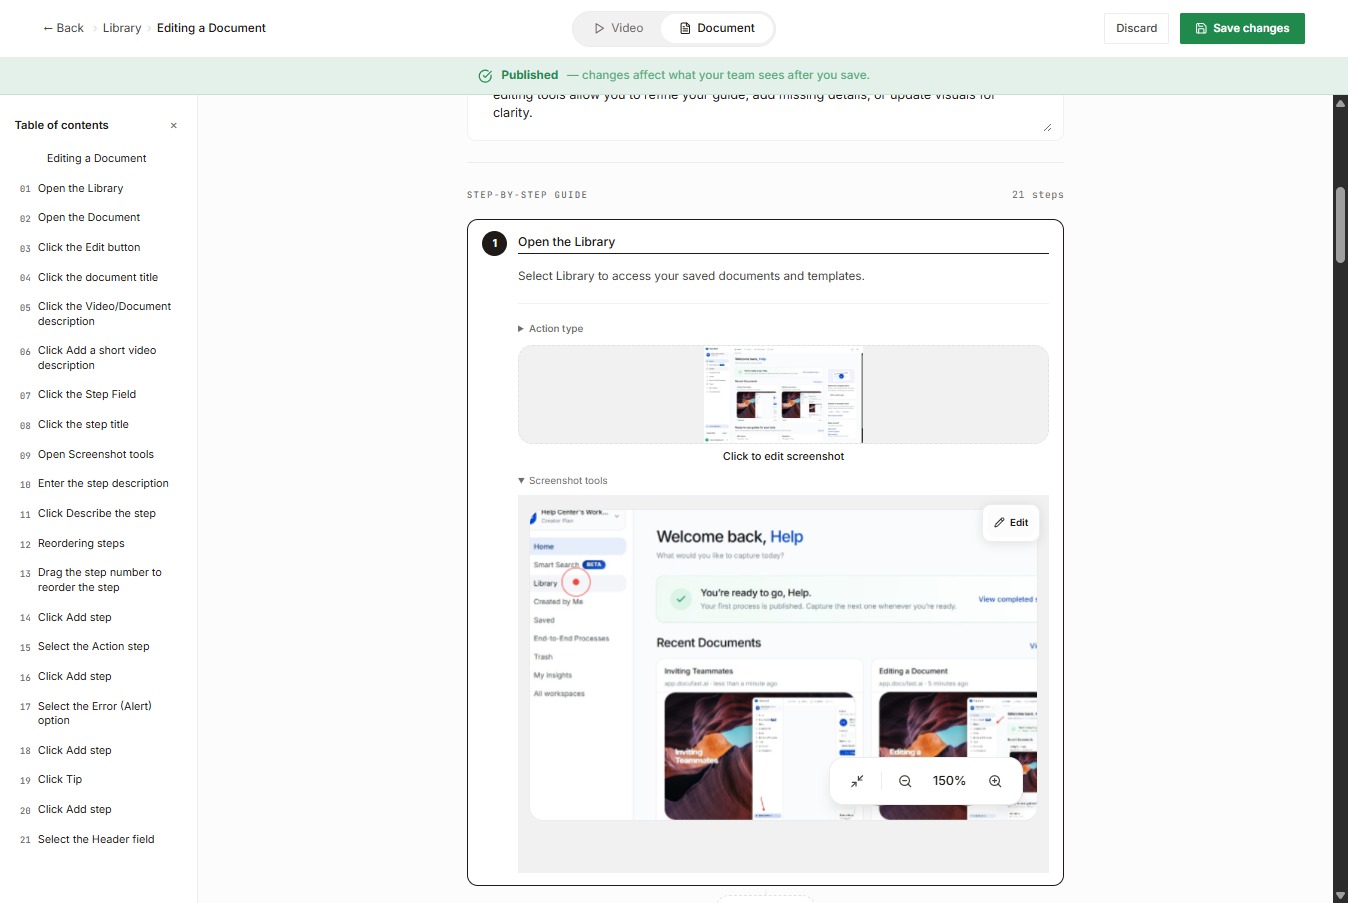
Select Screenshot tools to view more options for screenshots, such as updating or replacing the screenshot, deleting the image, cropping, adding annotations or notes, blurring sensitive information, and much more.
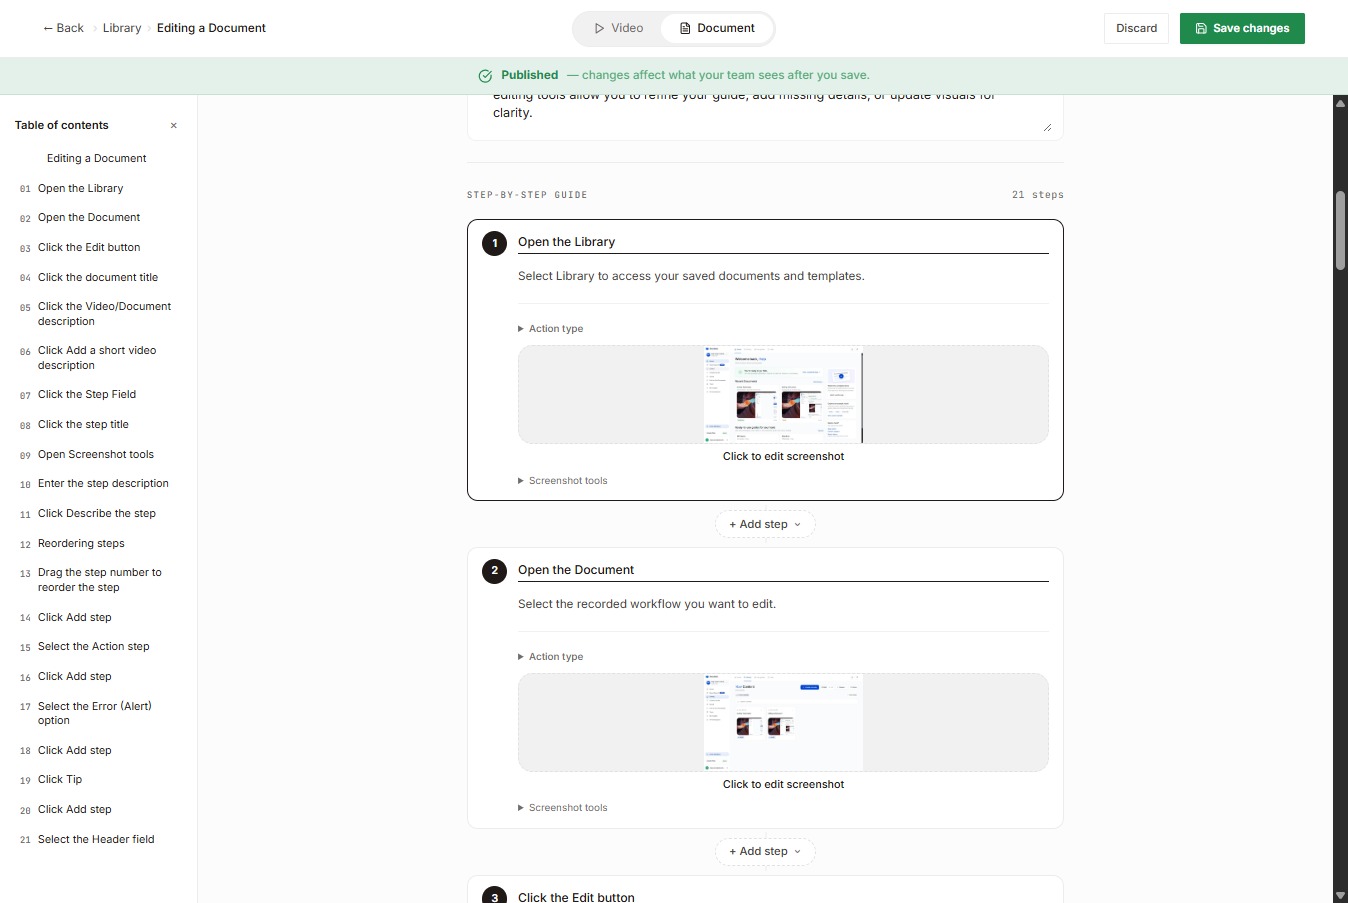
Click edit to see the options.
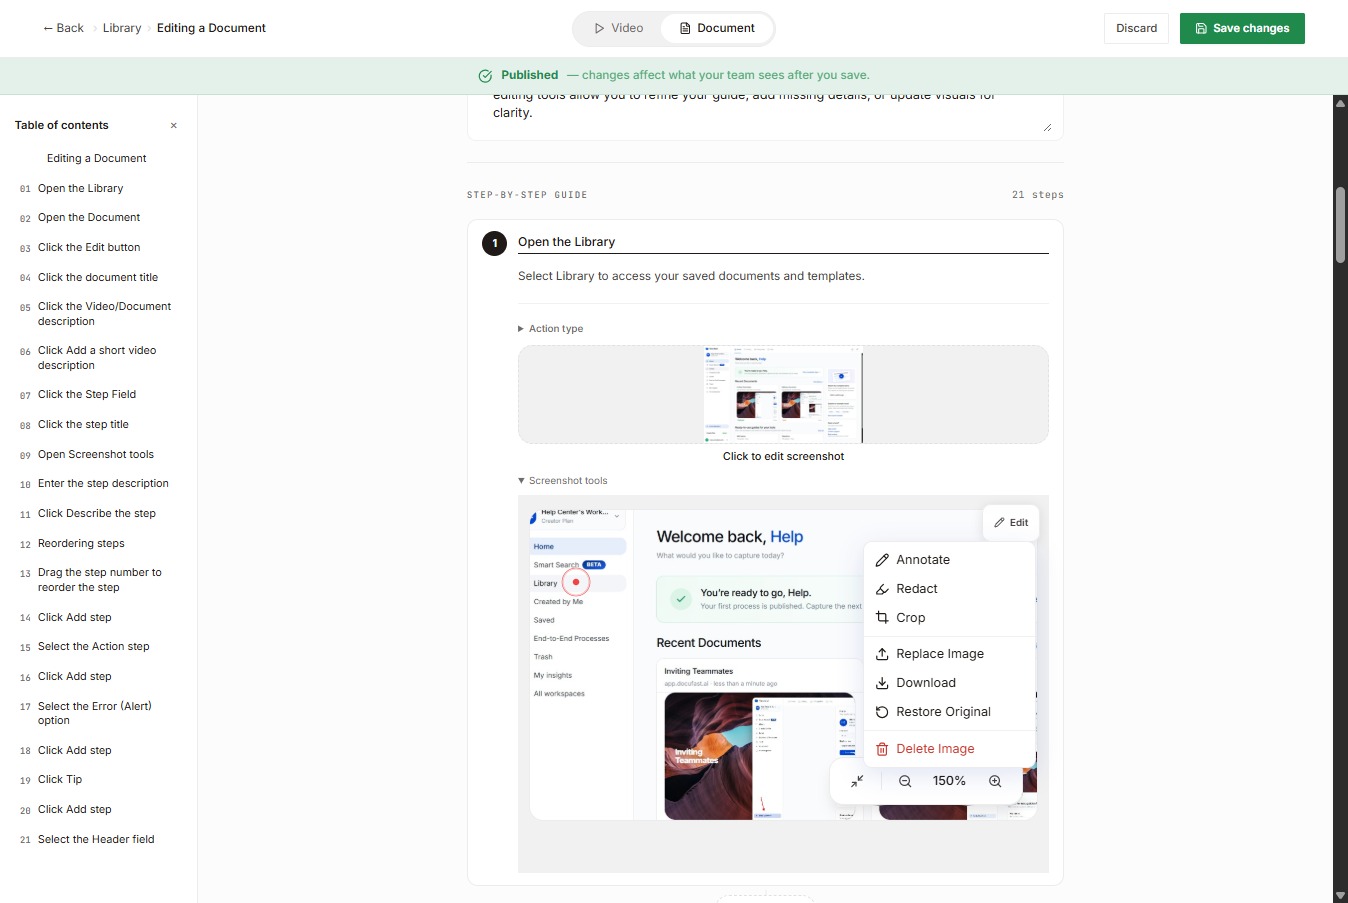
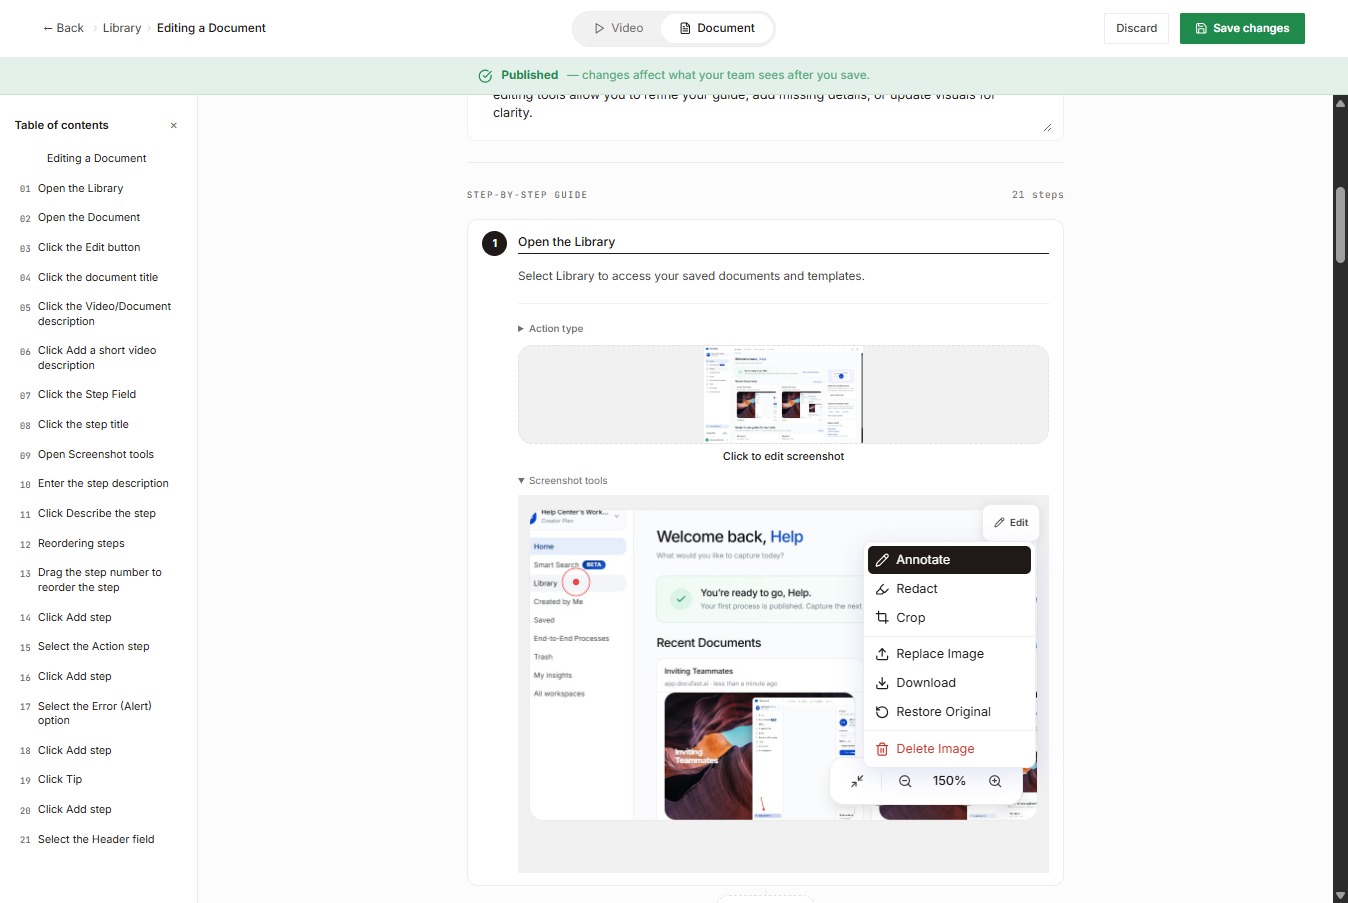
Choose how you want to edit the screenshot from the available tools: annotate, redact, crop, replace, download, restore original, or delete the image.
After changing the Descriptions and Editing Images. We'll reorder the steps.
Grab the step number and drag it to your preferred position in the list.
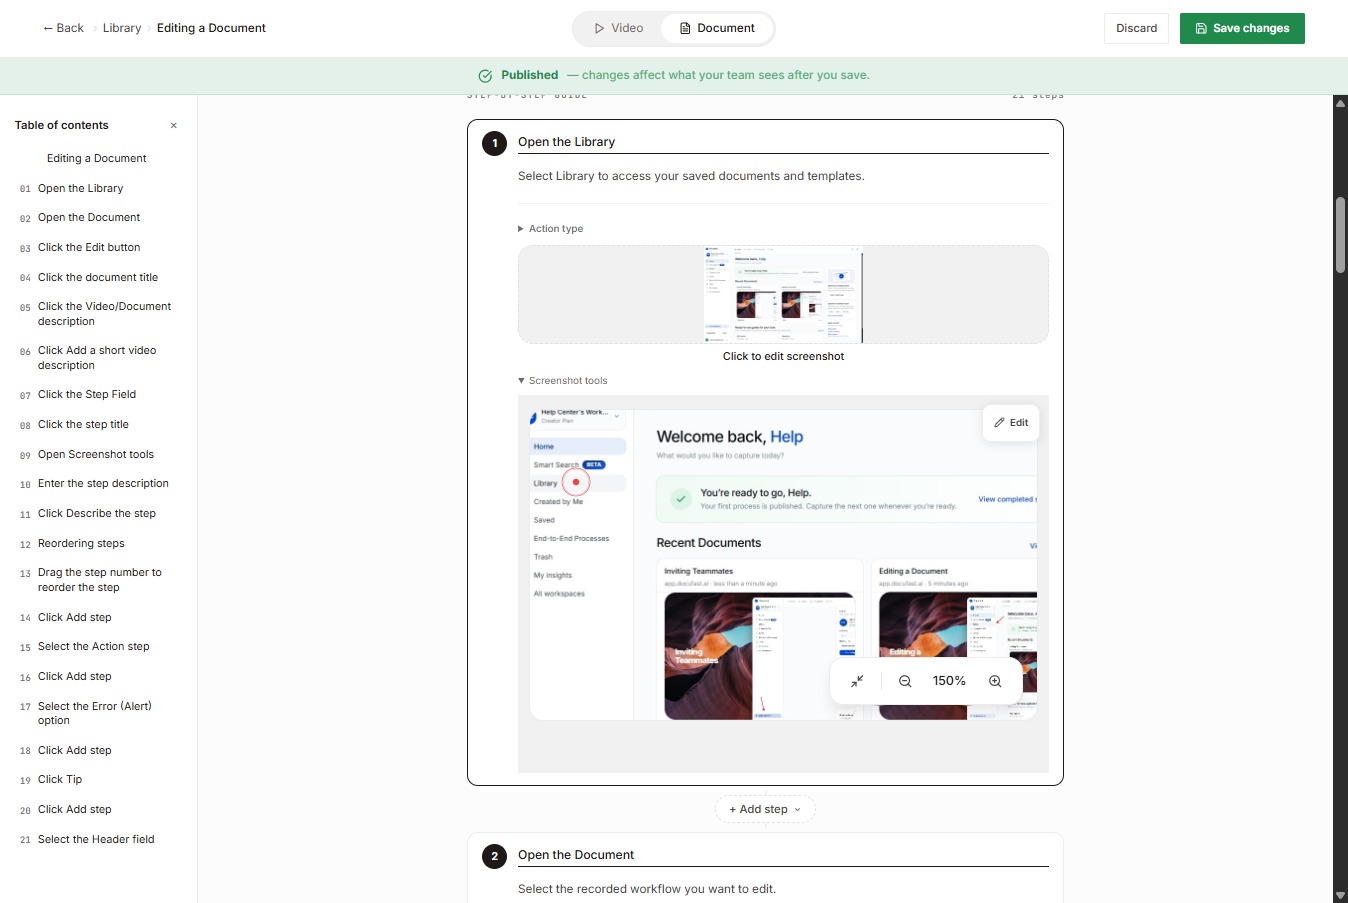
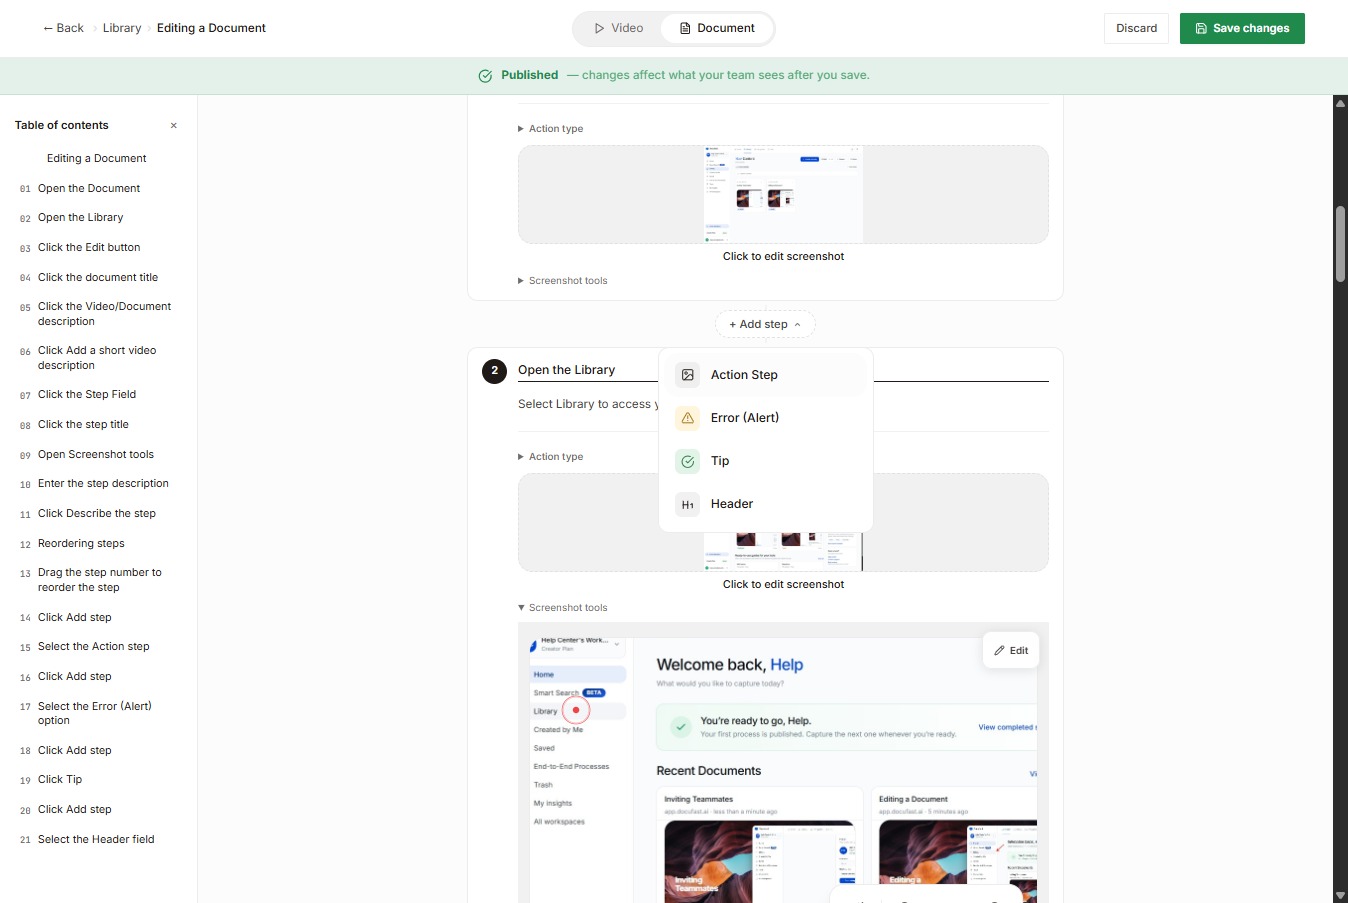
Now that you’ve reordered the steps, select the Add step button to include another action in the workflow.
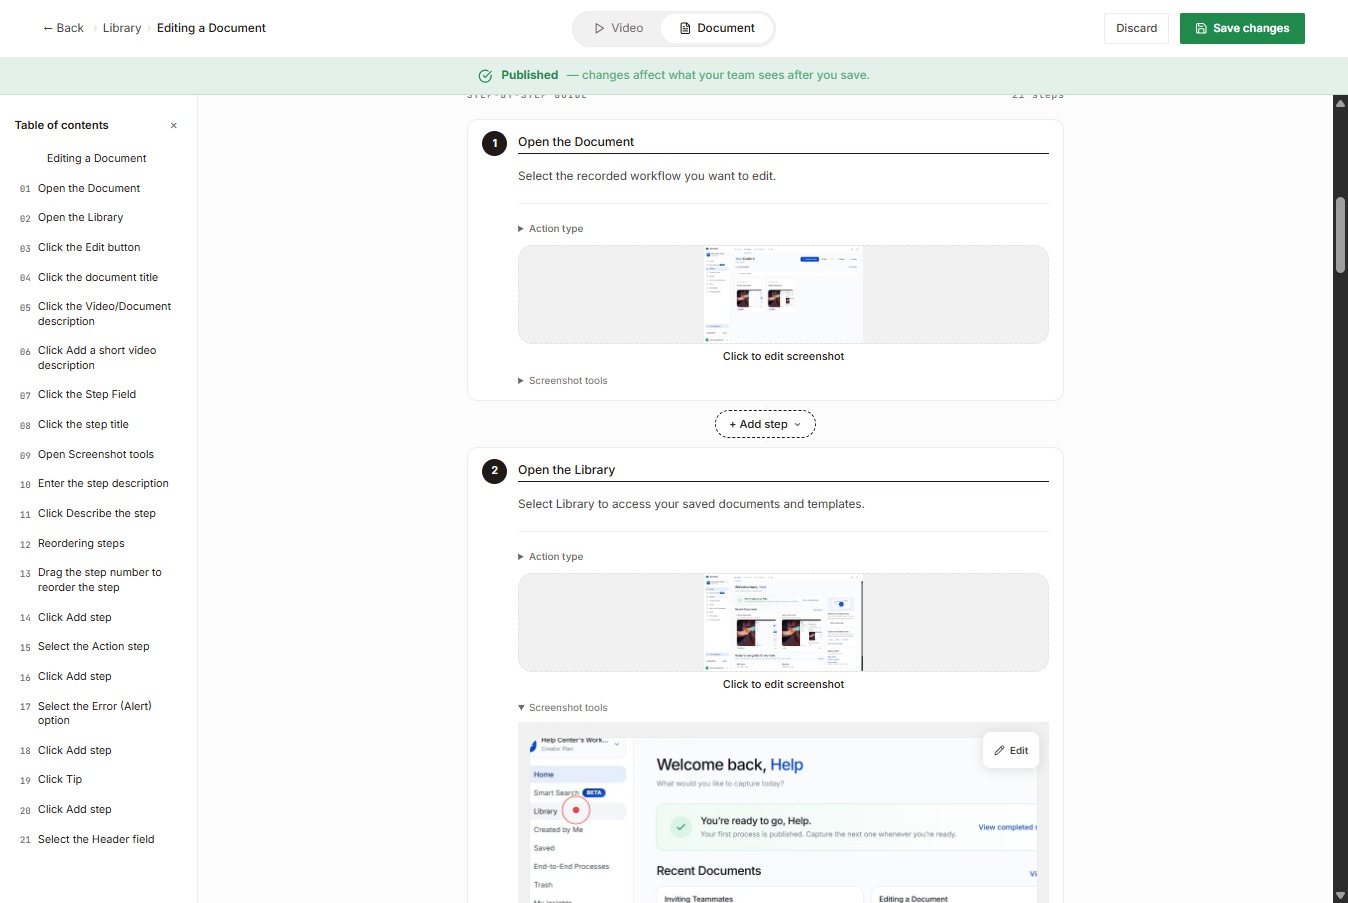
Choose Action Step.
This is the Actions step. Use it to add a standard instruction or action that users must complete.
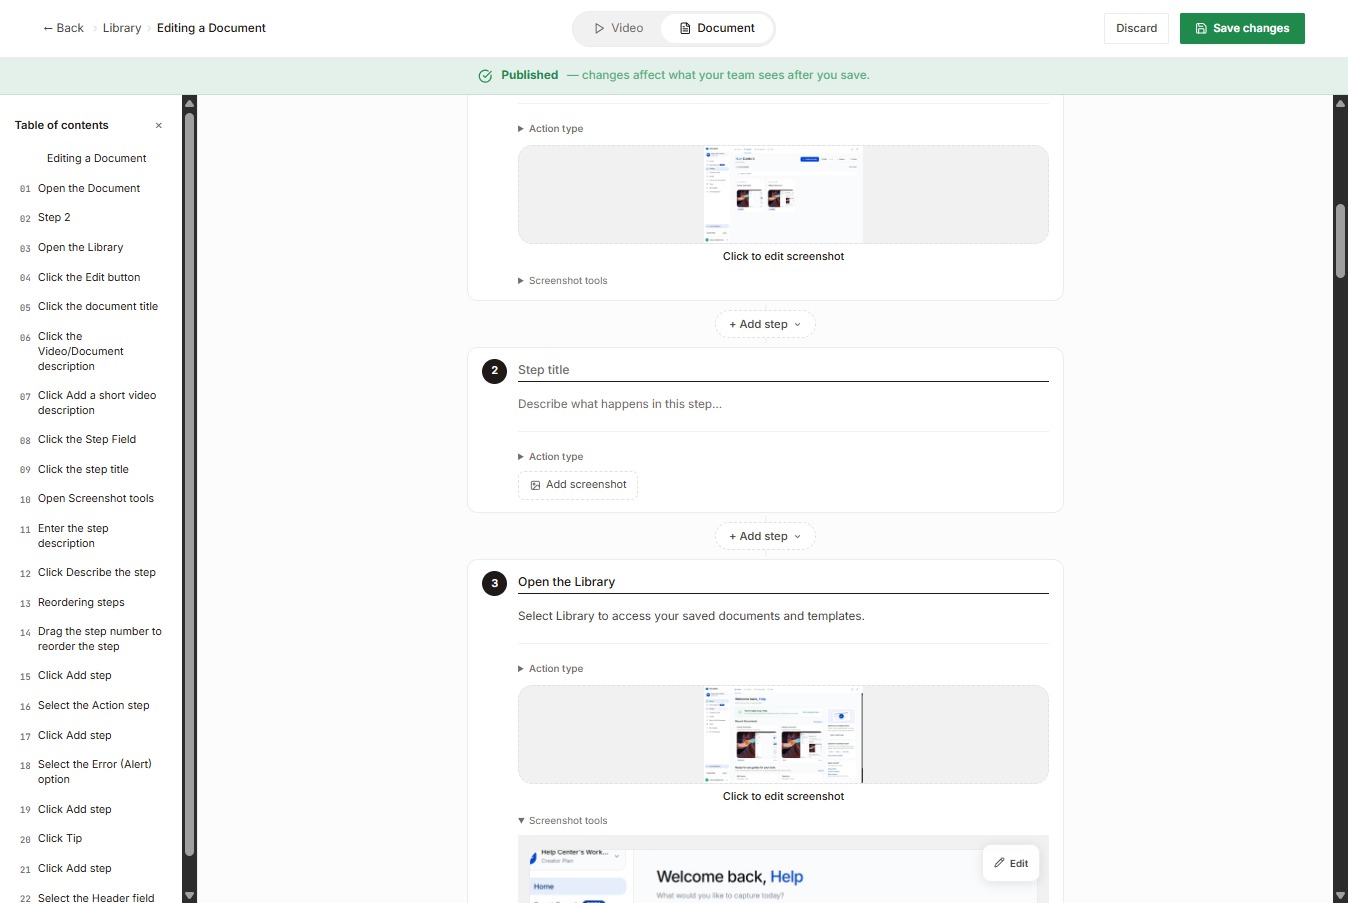
Select the Add step button again to include another action in the workflow.
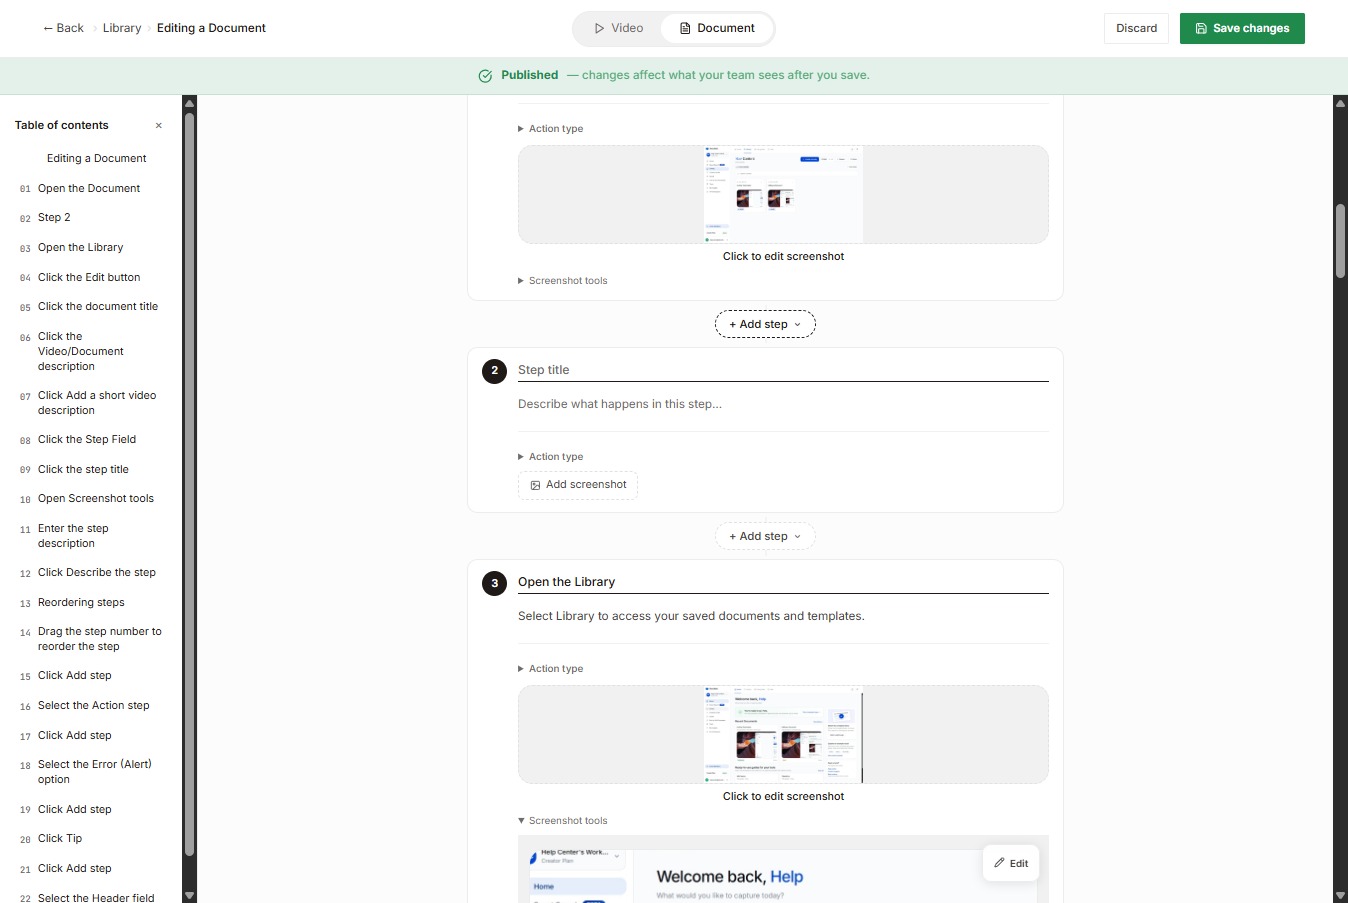
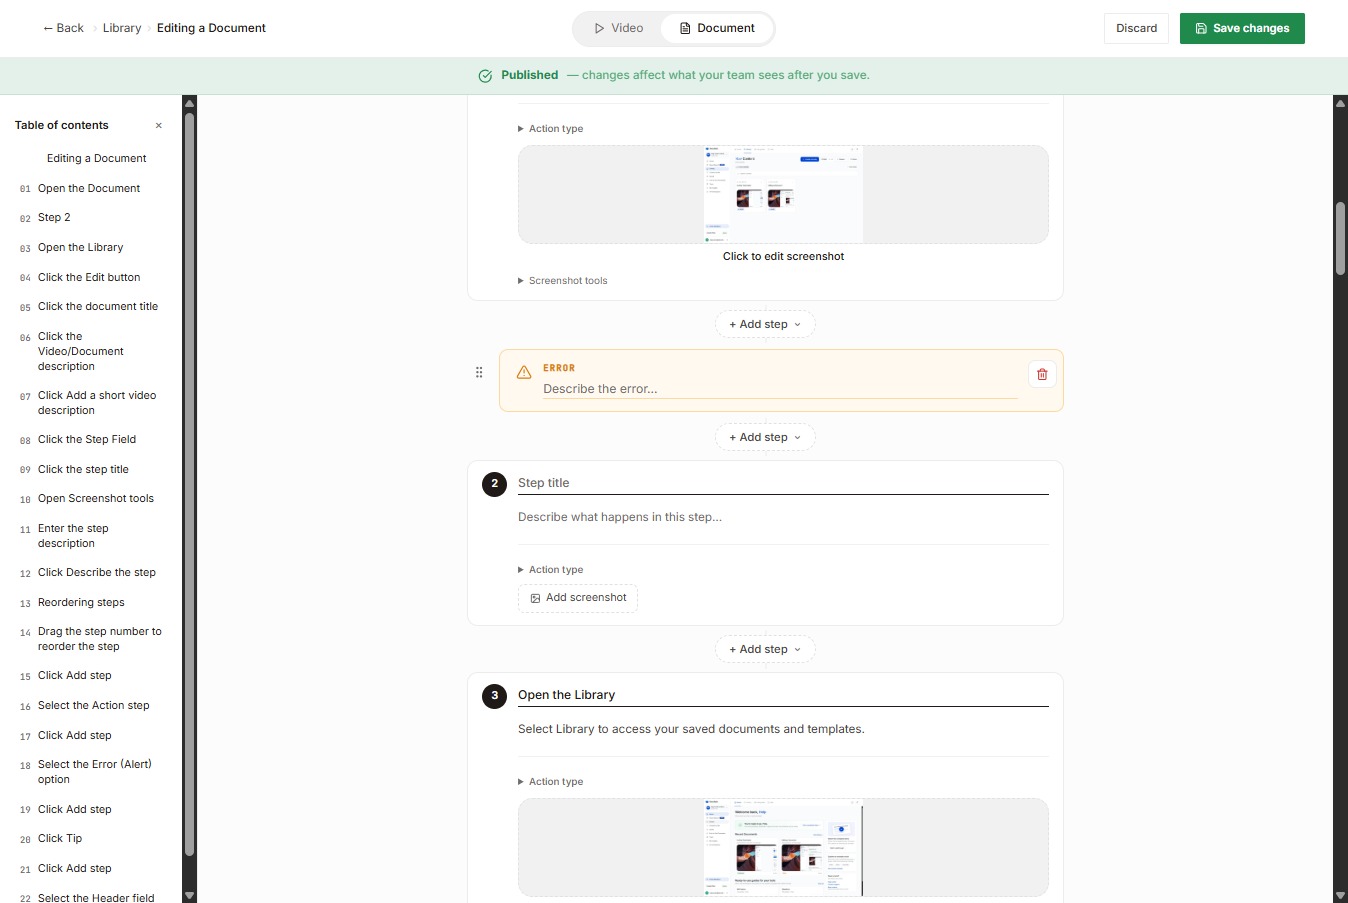
Choose Error (Alert)
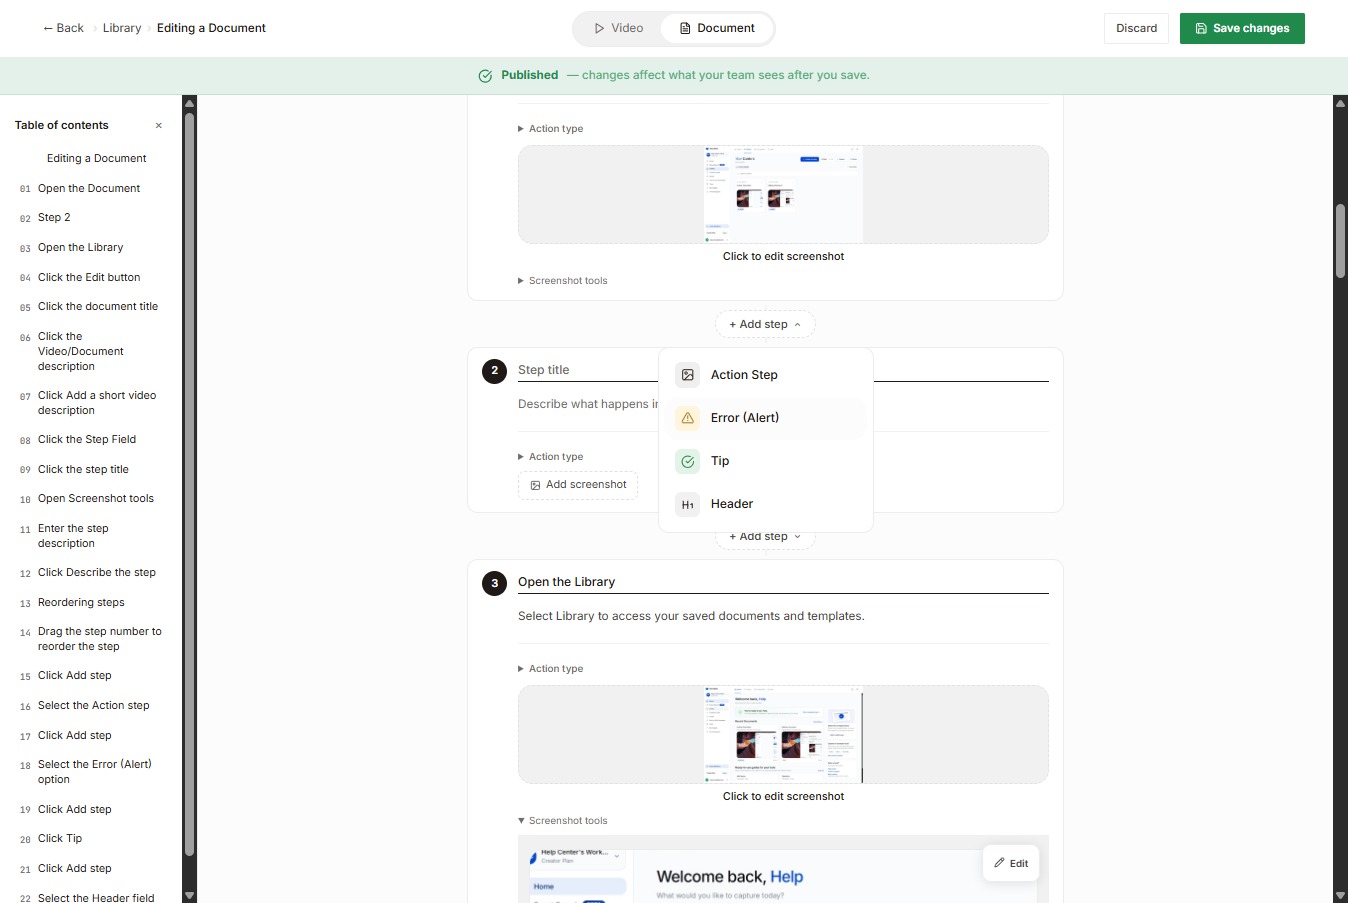
Use this to highlight a warning, issue, or potential mistake users should avoid.
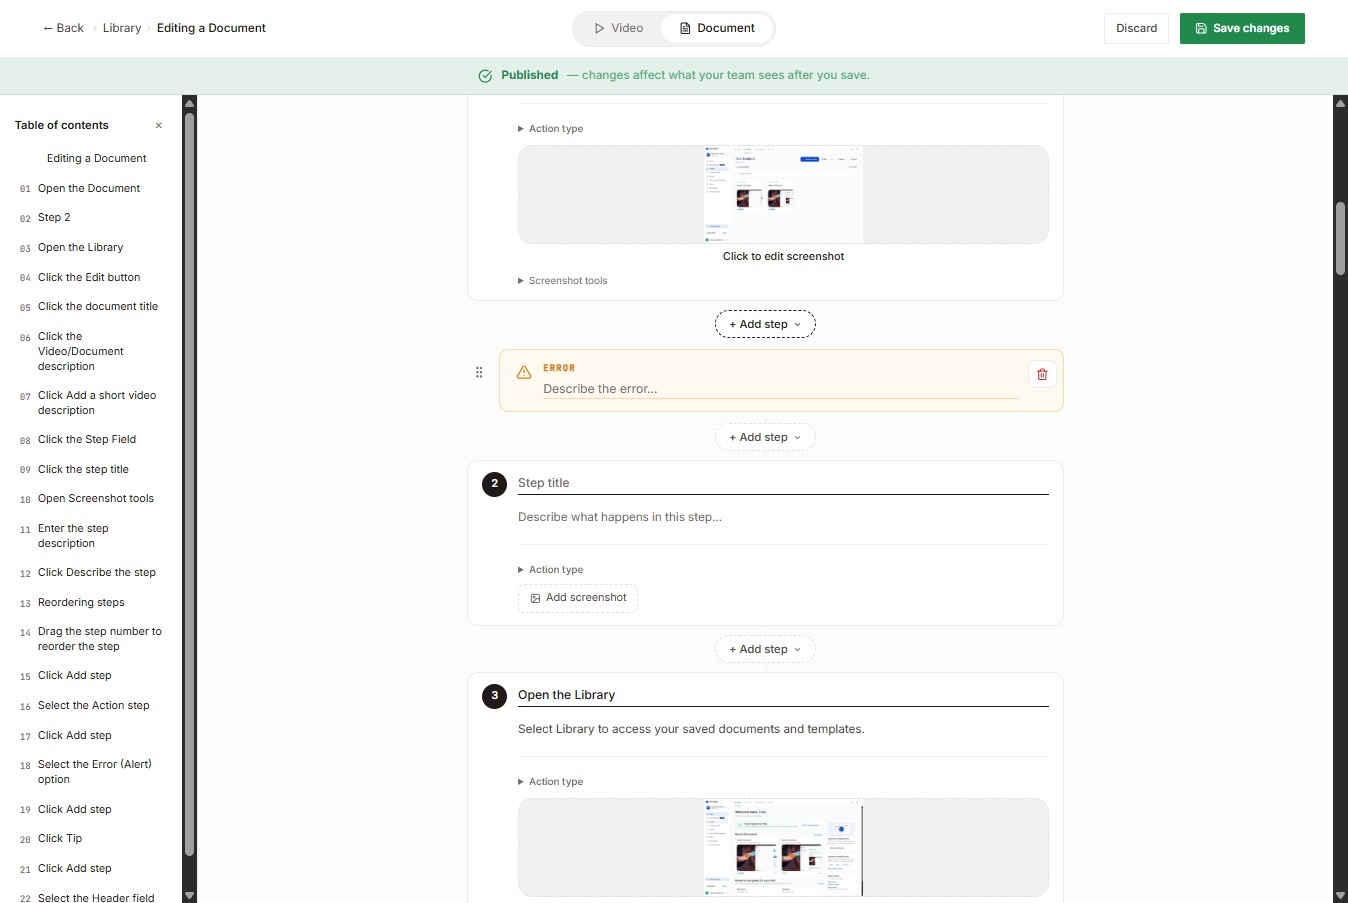
Select the Add step button again to include another action in the workflow.
Select the Tip button step
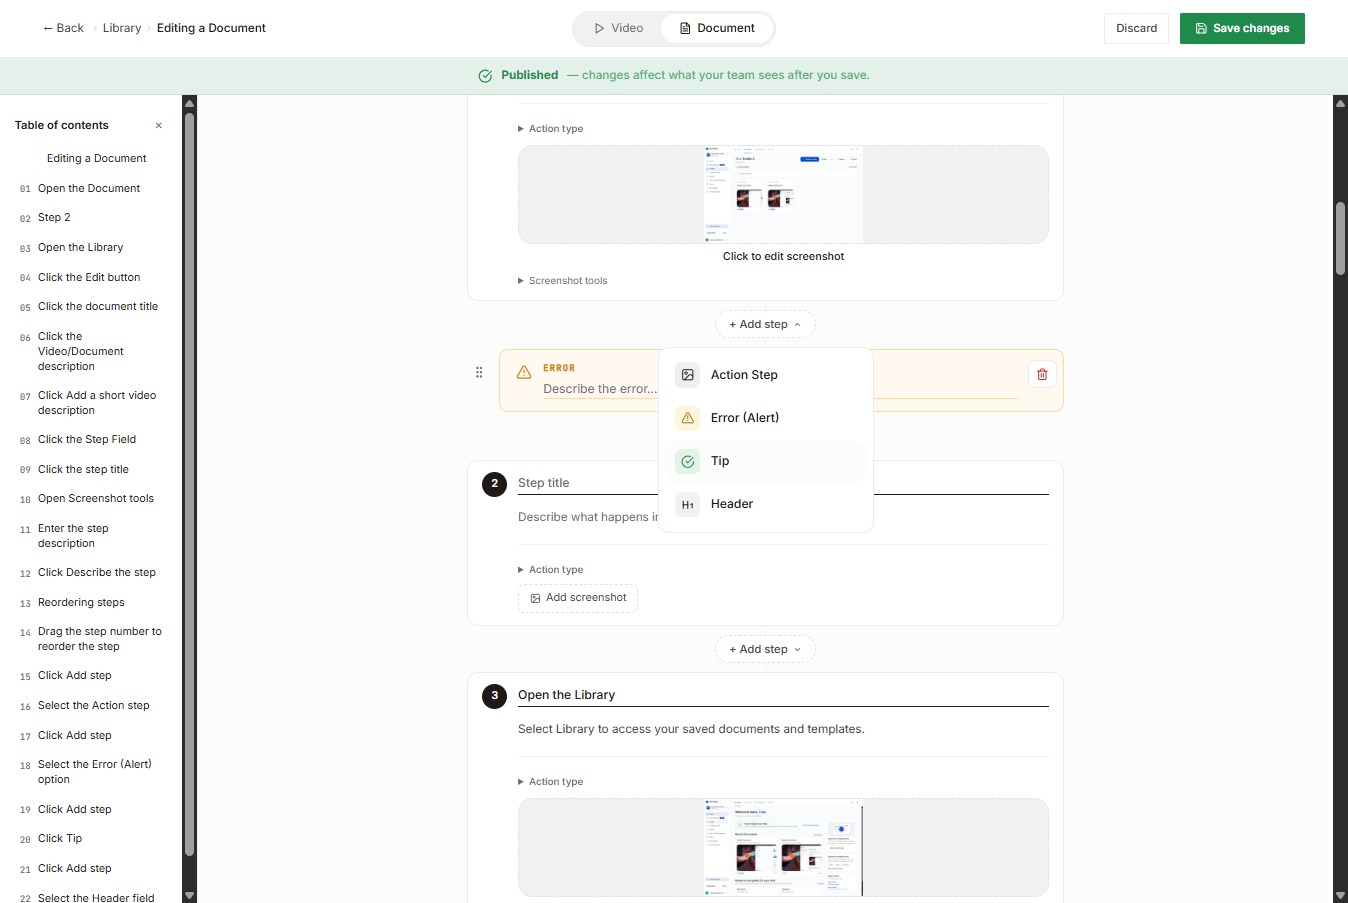
Use this to provide helpful guidance, best practices, or extra context.
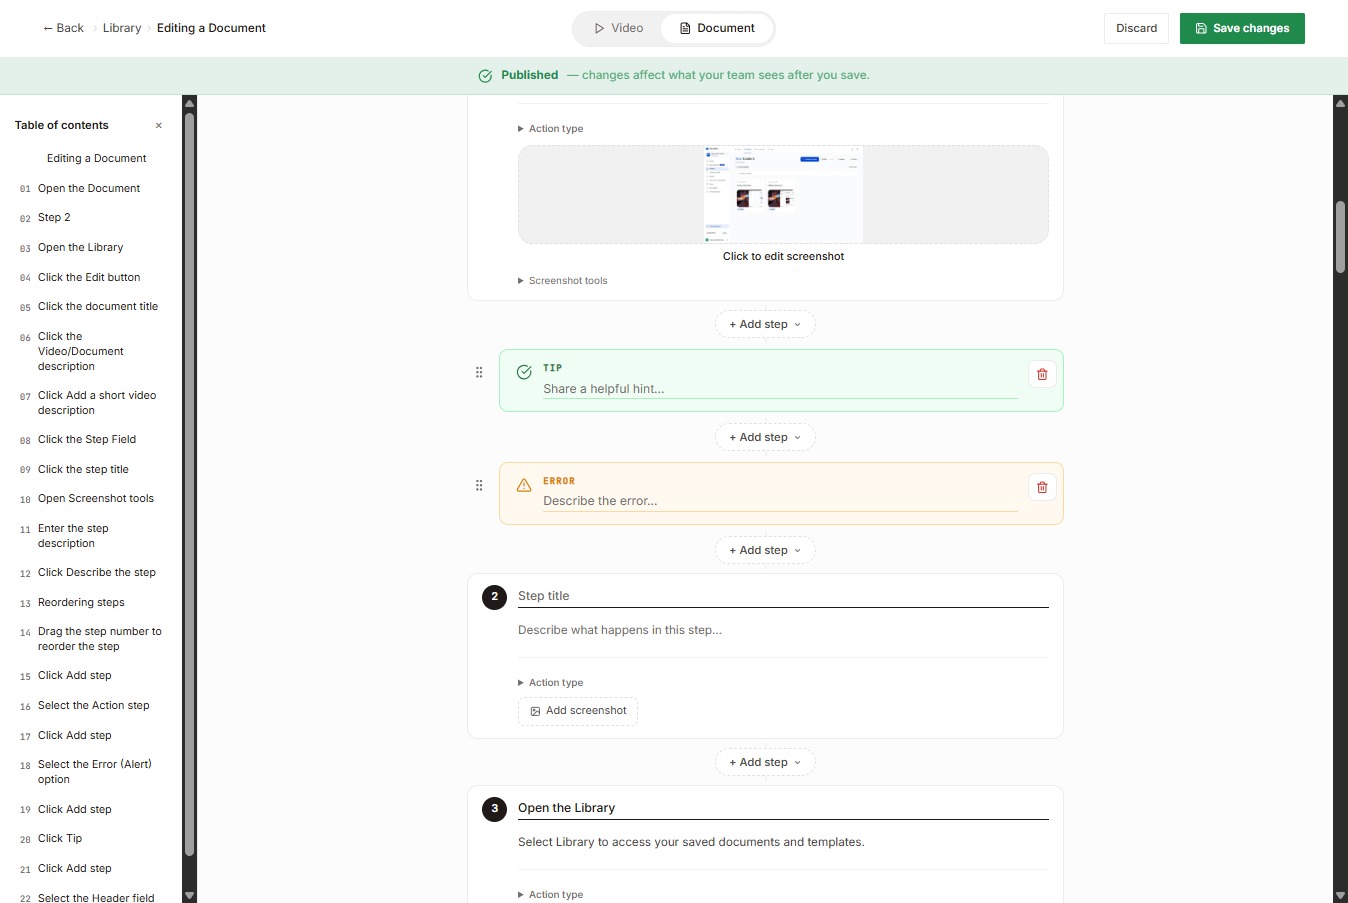
Again, select the Add step button to include another action in the workflow.
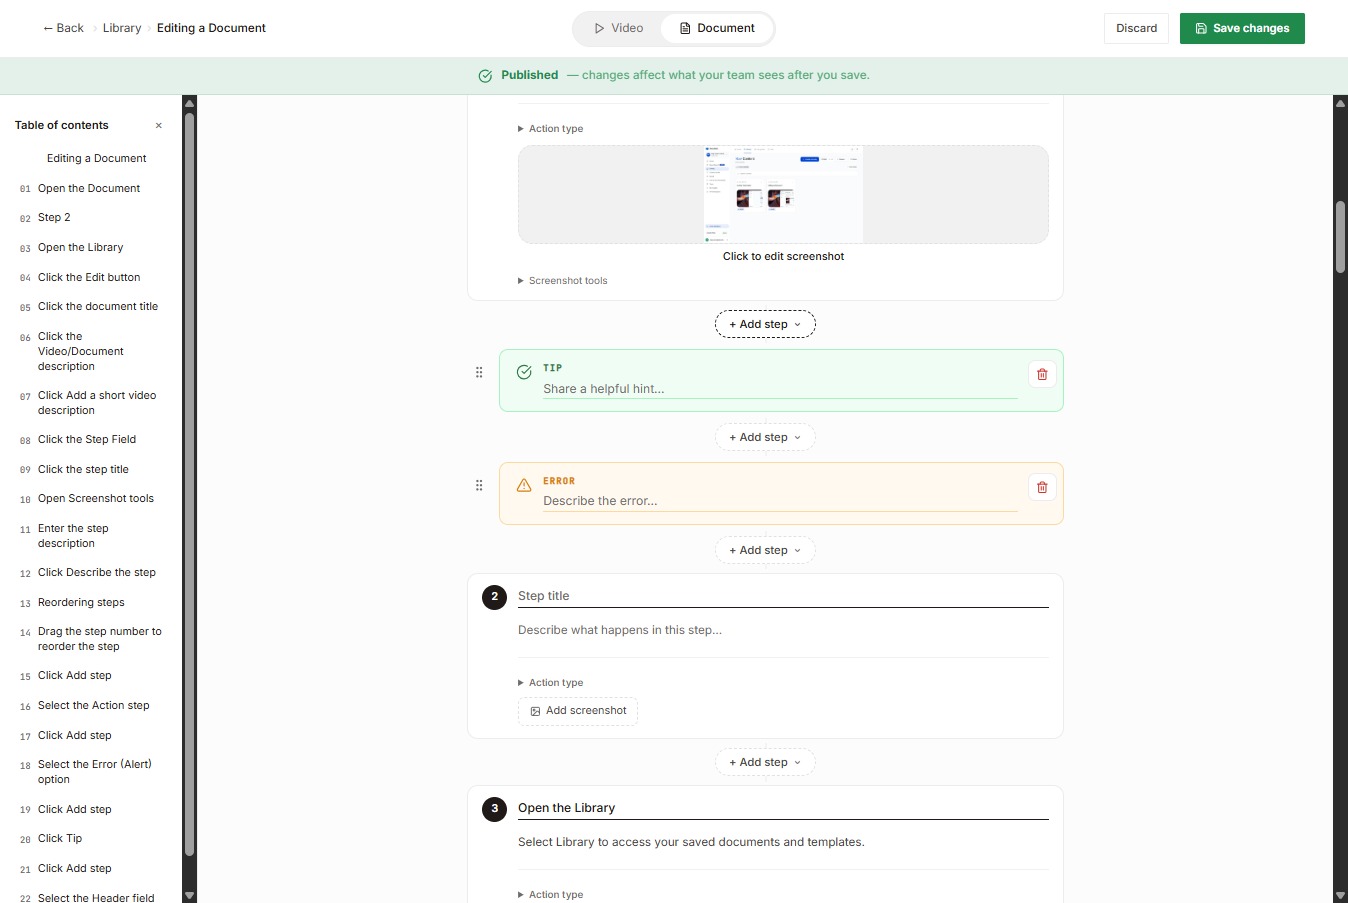
Select the Header field button
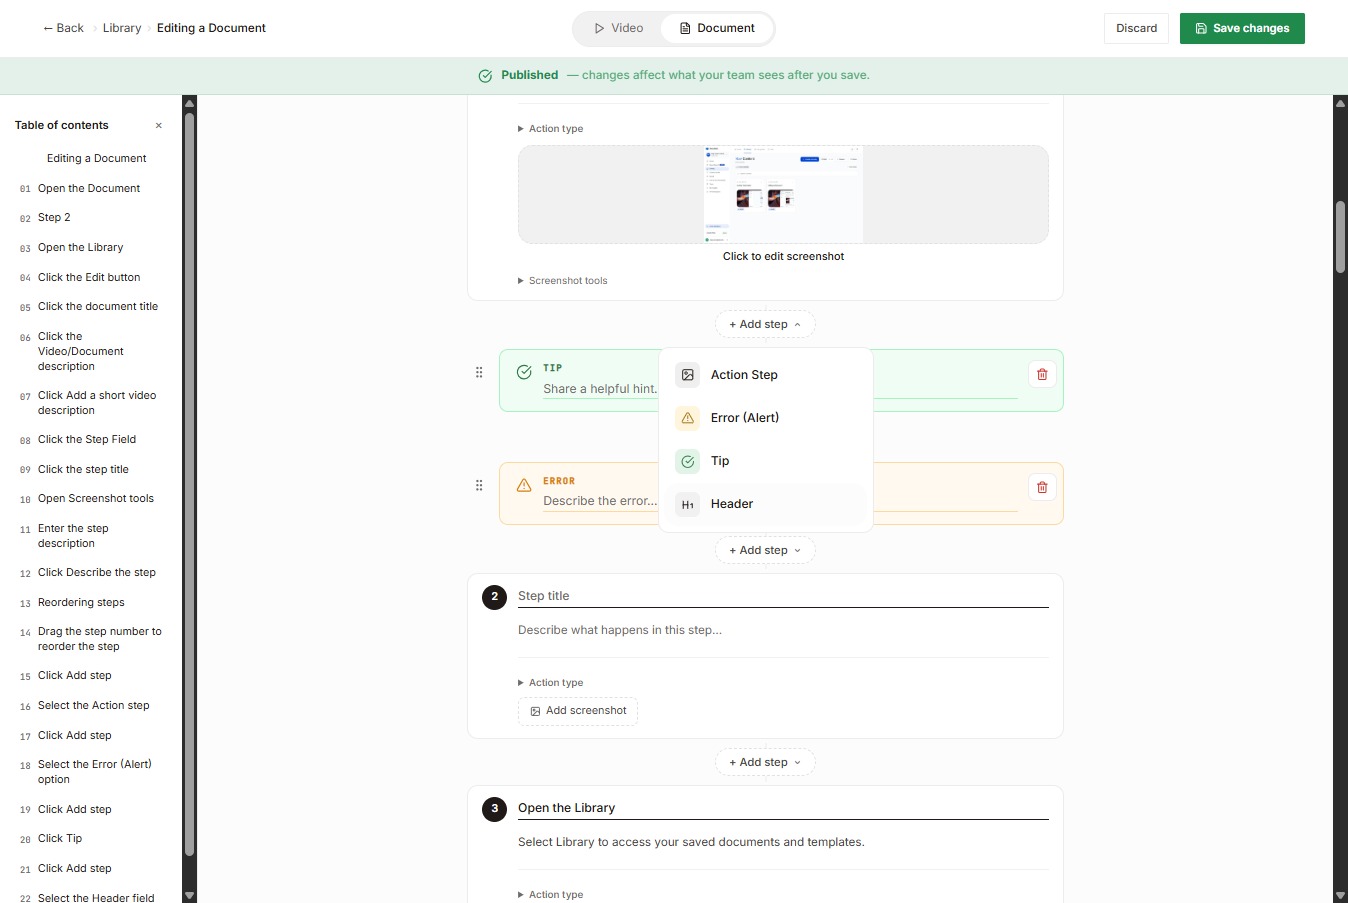
Use this to create section titles that help organize steps into clear sections.